> For the complete documentation index, see [llms.txt](https://docs.cherryai.com.cn/llms.txt). Markdown versions of documentation pages are available by appending `.md` to page URLs; this page is available as [Markdown](https://docs.cherryai.com.cn/docs/jp/pre-basic/providers/minimax-coding-plan.md).
# MiniMax Coding Plan
**コーディングプラン** は MiniMax が提供するコスパの高いコーディング定額サービス(Starter/Plus プランなど)です。Cherry Studio でこのプランを設定すると、非常に低い固定費(最安 ¥29/月)で利用できます `MiniMax-M2.1` モデルです。
{% hint style="success" %}
**主な利点**
* **対象者**:MiniMax Coding Plan(Starter / Plus / Max)を契約しているユーザー。
* **課金方式**:トークン課金ではなく、一定時間ごとに利用枠が更新されます(例:5時間ごとに40回のプロンプト)。使いすぎを心配する必要はありません。
{% endhint %}
### 1. 事前準備
始める前に、プランを購入し、キーを取得していることを確認してください:
1. ログイン [**MiniMaxオープンプラットフォーム**](https://platform.minimaxi.com/)。
2. 入る [**コーディングプラン** ページ](https://platform.minimaxi.com/subscribe/coding-plan?code=FYWiC6CtHy\&source=link)、プランが有効になっていることを確認してください。
3. 次の **コーディングプラン** から専用の `APIキー`( `sk-` で始まる)。
### 2. 設定手順
#### ステップ1:プロバイダーを探す
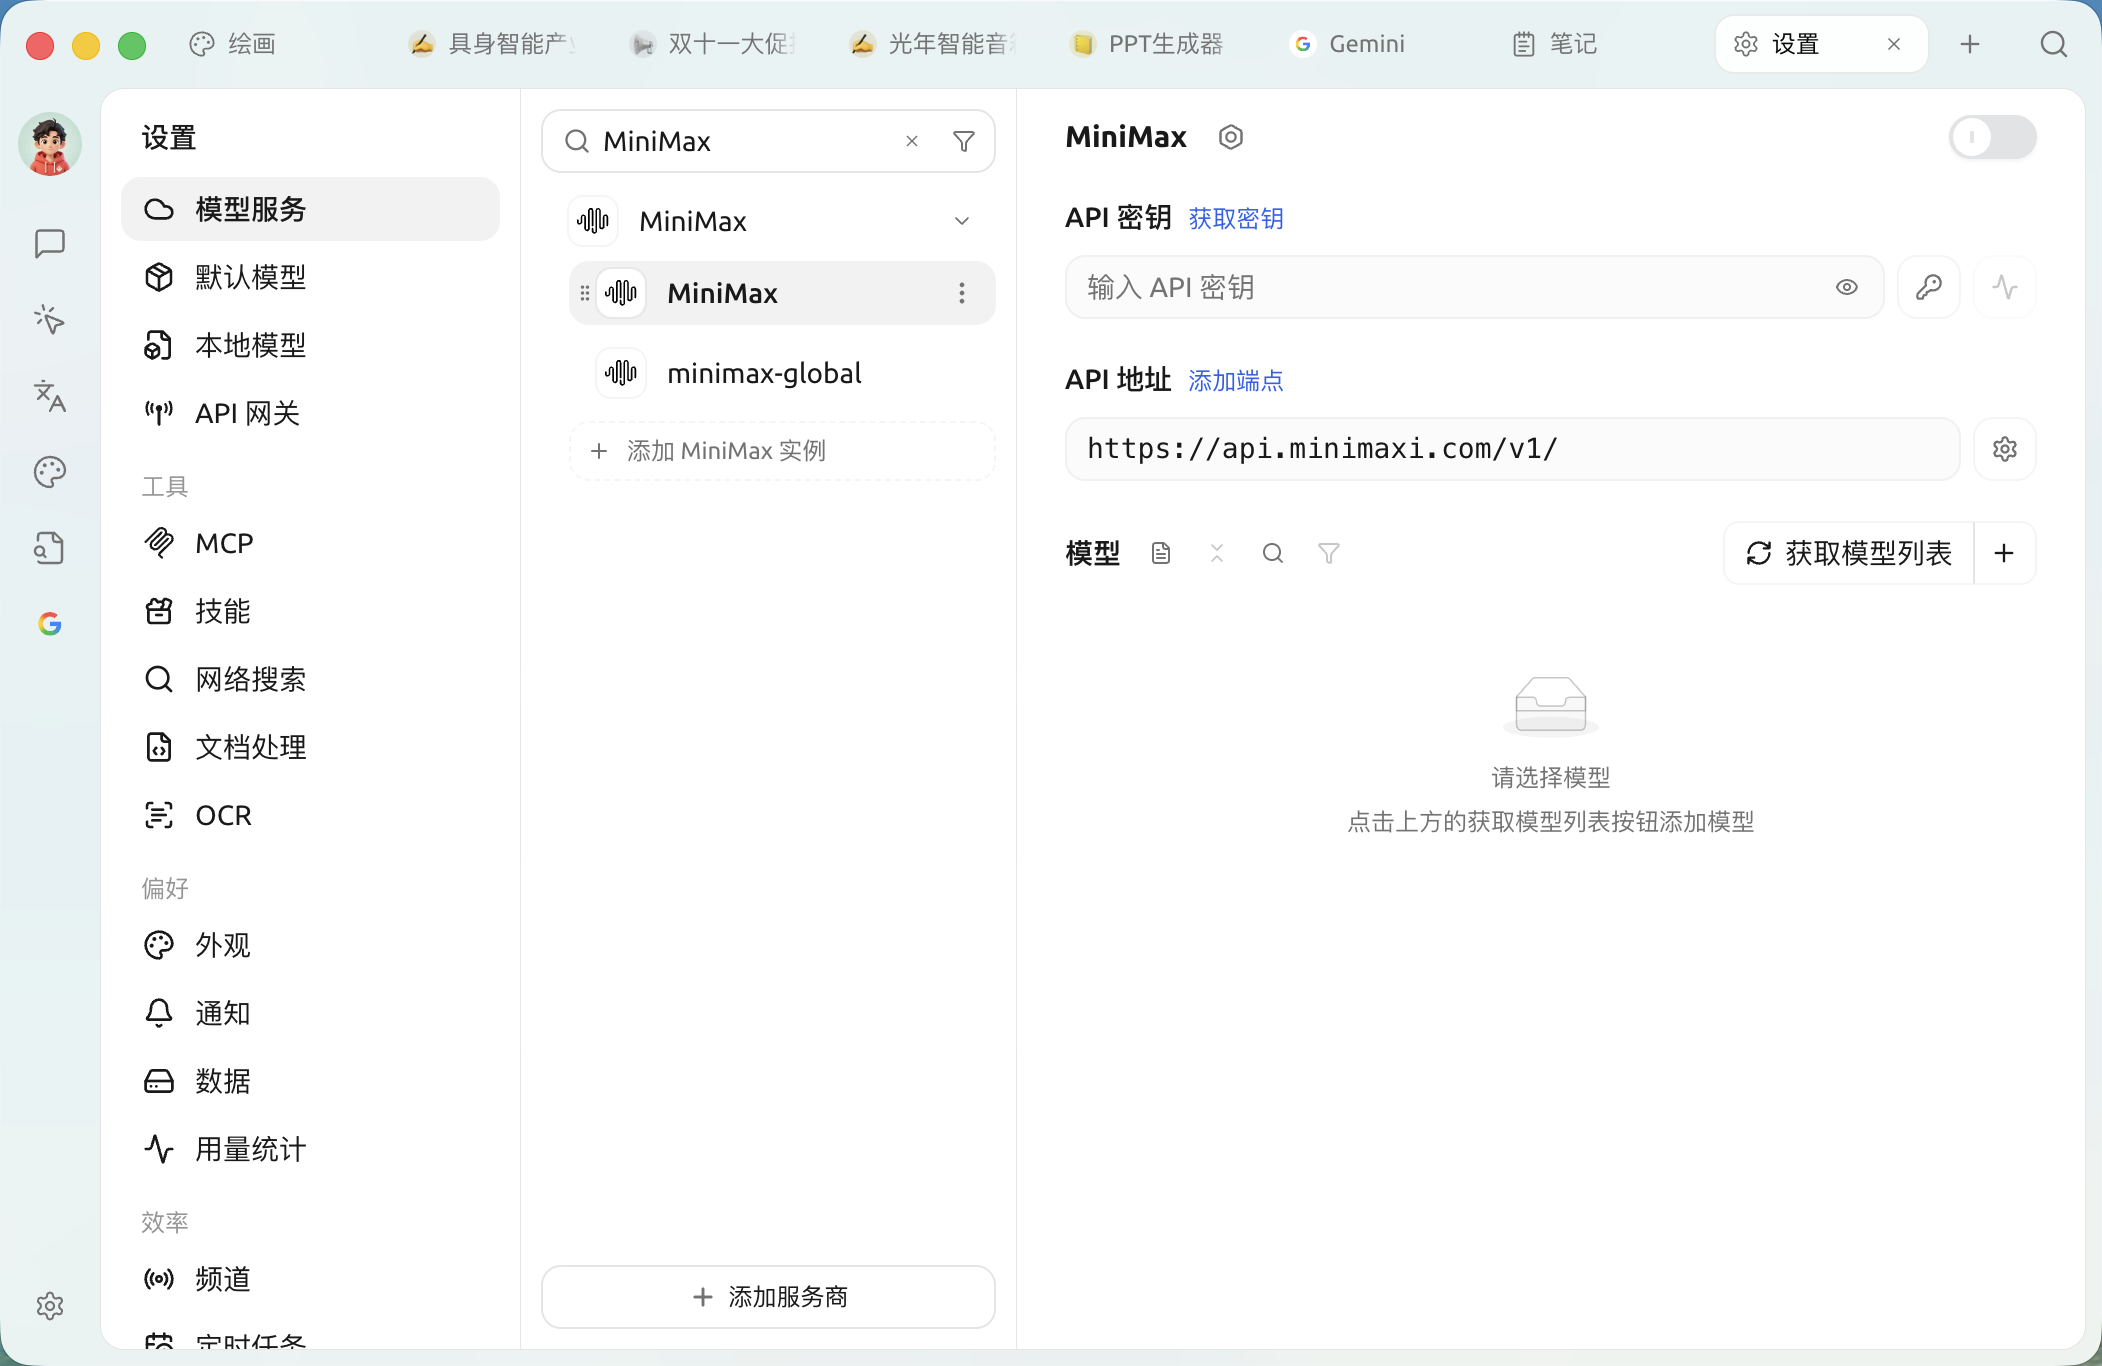
Cherry Studio に入り、サイドバーの **設定** > **モデルサービス**をクリックし、一覧から **MiniMax**。
{% hint style="info" %}
一覧が長い場合は、上部の検索欄に `mini` と入力するとすばやく見つけられます。
{% endhint %}
#### ステップ2:設定を入力
**不要です** 複雑な API アドレスを変更する必要はなく、デフォルト設定のままで大丈夫です。以下の説明に従って入力してください:
項目
入力説明
APIキー
Coding Plan 専用キーを貼り付ける (注意:プラン購入後に生成された Key を使用してください。余分なスペースを入れないでください)
API アドレス
デフォルトのまま https://api.minimaxi.com/v1
スイッチ
右上のスイッチをクリックし、 緑色(ON)になっていることを確認してください
#### ステップ3:指定モデルを追加(重要)
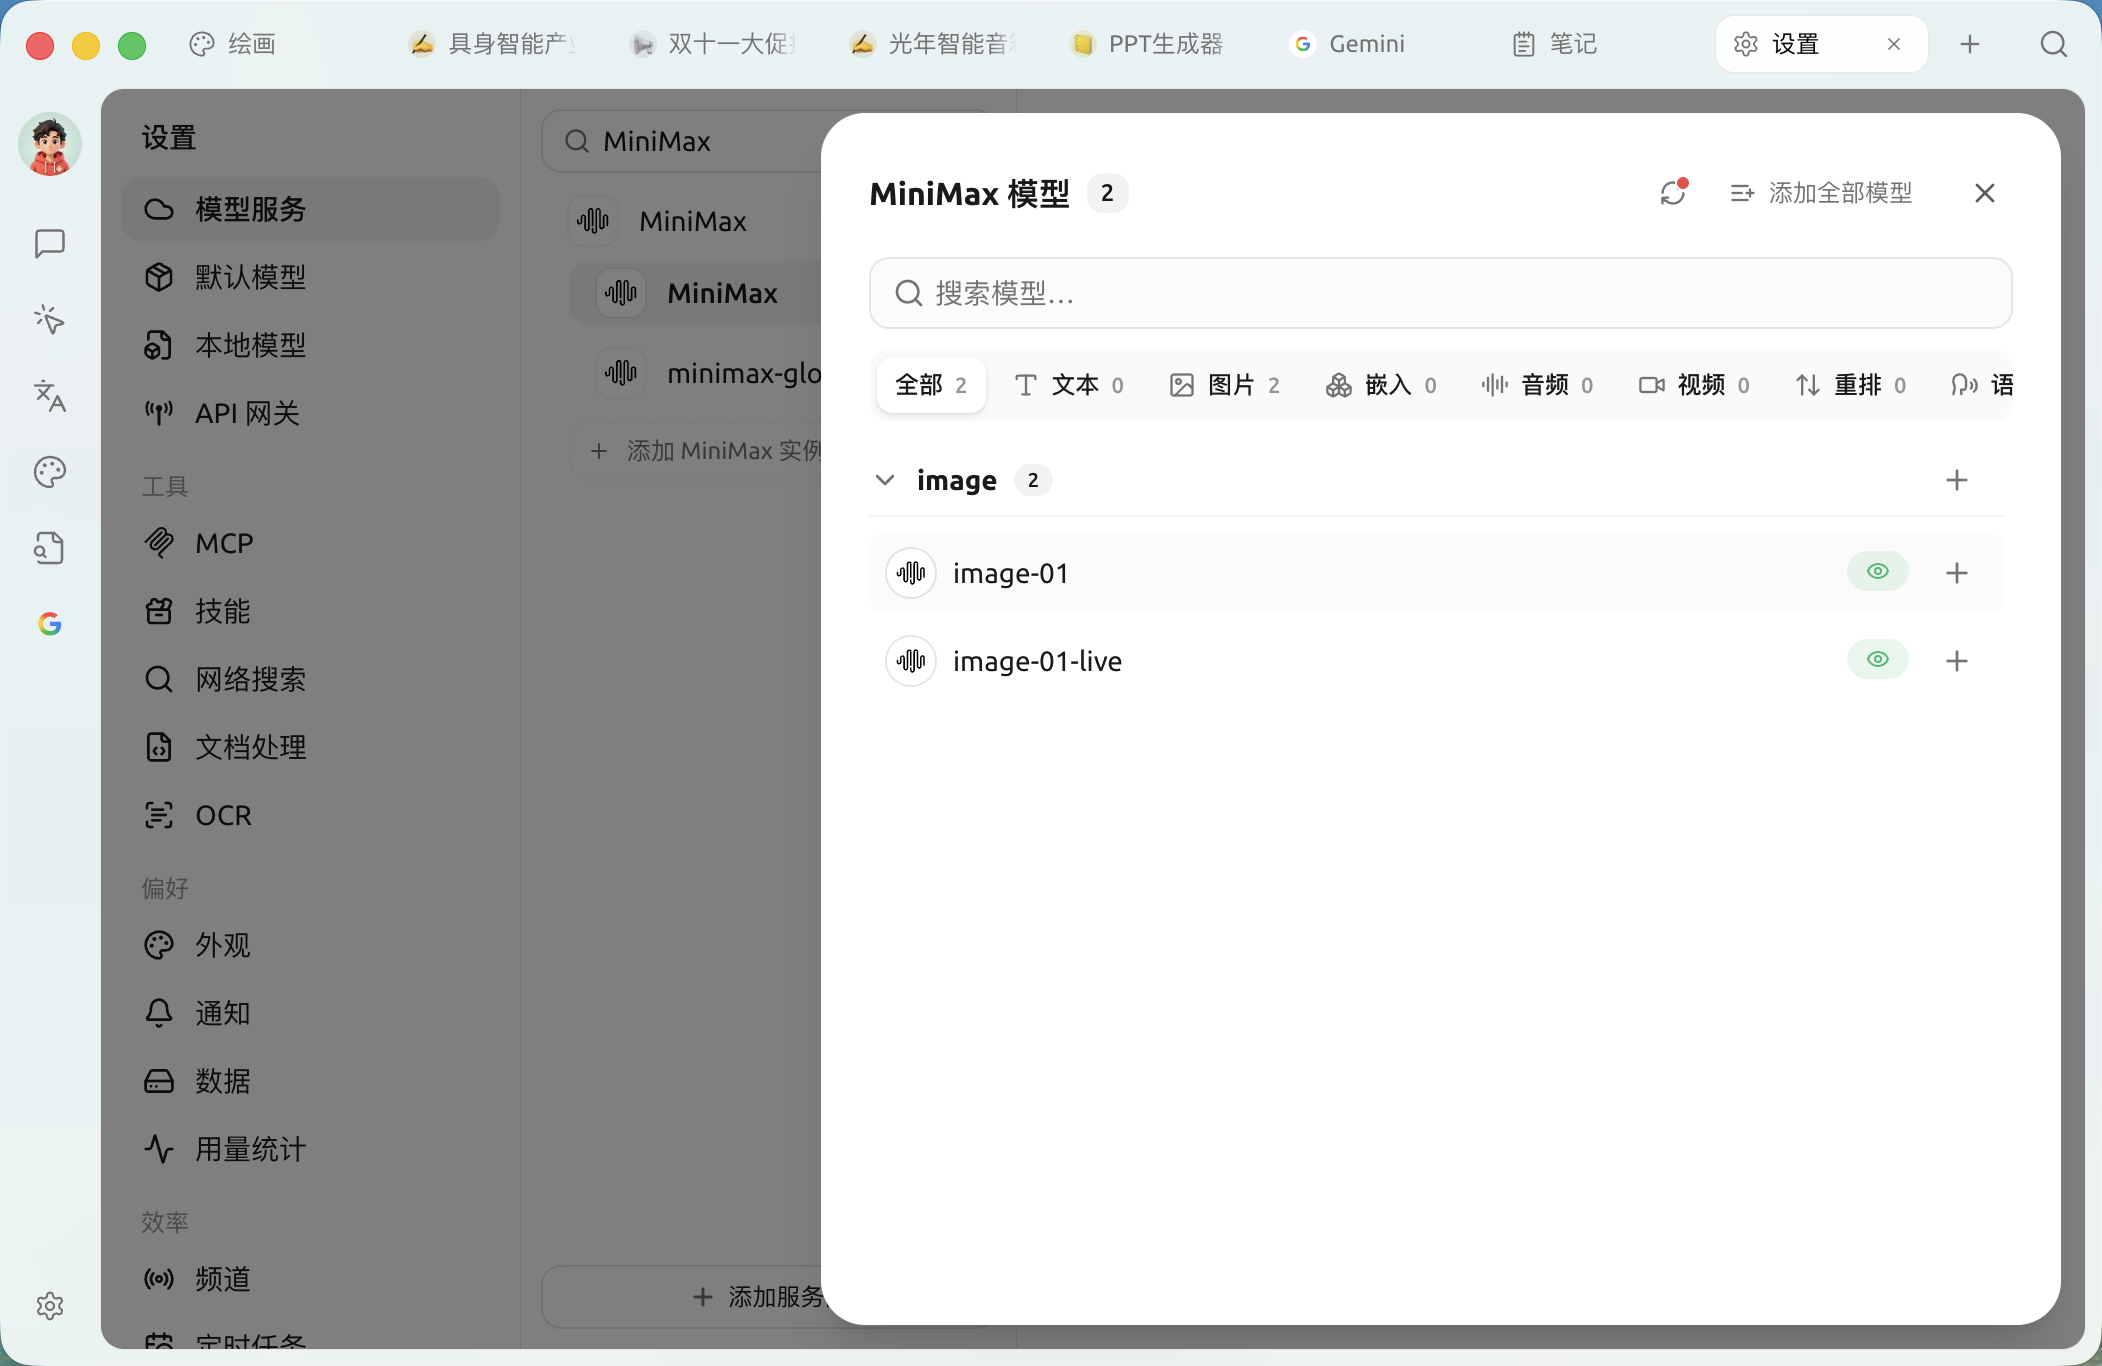
Coding Plan プランは特定のモデルのみ対応しています。モデルを間違えると利用できないか、追加費用が発生します。
1. 設定ページ下部の **管理(Manage)** ボタン。
2. 一覧から見つけて追加する **`MiniMax M2.1`**。
{% hint style="warning" %}
**必ず正しいモデルを選択してください!**
* ✅ **おすすめ**:`MiniMax M2.1` (Coding Plan の指定メインモデルです)。
{% endhint %}
#### ステップ4:保存して確認
1. API キー入力欄の横にある **チェック(Check)** ボタン。
2. 緑色で表示されれば **Success**、Coding Plan プランの接続は成功です!
### 3. 利用量と制限の説明
Coding Plan と通常の API では課金方式がまったく異なります。以下の仕組みを必ず理解してください:
{% hint style="info" %}
**利用枠の更新仕組み** Coding Plan の利用枠は **定期的に更新されます** 。たとえば Starter プラン:**5時間ごとに** 提供される **40回の** 会話枠です。
* **返答がなくなったら**:現在の5時間分の利用枠を使い切ったことを意味します。
* **対処法**:数時間待って利用枠が自動回復するのを待てばよく、追加料金は不要です。
{% endhint %}
### 4. よくある問題の確認
{% hint style="danger" %}
**遭遇した `429 Too Many Requests` エラー?**
これはソフトウェアの故障ではなく、 **Coding Plan のレート制限**。
* これは、現在の時間帯での「送信回数」を使い切ったことを意味します。
* 次の5時間サイクルで更新されるまで、しばらくお待ちください。
{% endhint %}
{% hint style="warning" %}
**遭遇した `401 Unauthorized` エラー?**
* APIキーに余分なスペースがないか確認してください。
* MiniMax 公式サイトにログインして、Coding Plan のサブスクリプションが期限切れでないか確認してください。
{% endhint %}
***
### ヘルプの取得とフィードバックの送信
設定または使用中に不明点、バグ、機能改善の提案がある場合は、 [フィードバックと提案](/docs/jp/question-contact/suggestions.md) に記載の公式チャネルをご参照ください。
---
# Agent Instructions
This documentation is published with GitBook. GitBook is the documentation platform designed so that both humans and AI agents can read, navigate, and reason over technical content effectively. Learn more at gitbook.com.
## Querying This Documentation
If you need additional information that is not directly available in this page, you can query the documentation dynamically by asking a question.
Perform an HTTP GET request on the current page URL with the `ask` query parameter, and the optional `goal` query parameter:
```
GET https://docs.cherryai.com.cn/docs/jp/pre-basic/providers/minimax-coding-plan.md?ask=&goal=
```
`ask` is the immediate question: it should be specific, self-contained, and written in natural language.
`goal` is optional and describes the broader end goal you are ultimately trying to accomplish on behalf of the user. GitBook uses it to tailor the answer towards what is most useful for that goal.
The response will contain a direct answer to the question and relevant excerpts and sources from the documentation.
Use this mechanism when the answer is not explicitly present in the current page, you need clarification or additional context, or you want to retrieve related documentation sections.