> For the complete documentation index, see [llms.txt](https://docs.cherryai.com.cn/llms.txt). Markdown versions of documentation pages are available by appending `.md` to page URLs; this page is available as [Markdown](https://docs.cherryai.com.cn/docs/en-us/pre-basic/settings/websearch/searxng.md).
# Local Deployment and Configuration of SearXNG
CherryStudio supports web searches through SearXNG. SearXNG is an open-source project that can be deployed locally or on a server, so it is slightly different from other configuration methods that require an API provider.
**SearXNG project link**:[SearXNG](https://github.com/searxng/searxng)
## Advantages of SearXNG
* Open source and free, no API required
* Relatively high privacy
* Highly customizable
## Local deployment
### 1. Direct Docker deployment
Because SearXNG does not require complex environment configuration, you do not need docker compose; you only need to provide an available port to deploy it. So the quickest way is to use Docker directly to pull the image and deploy it.
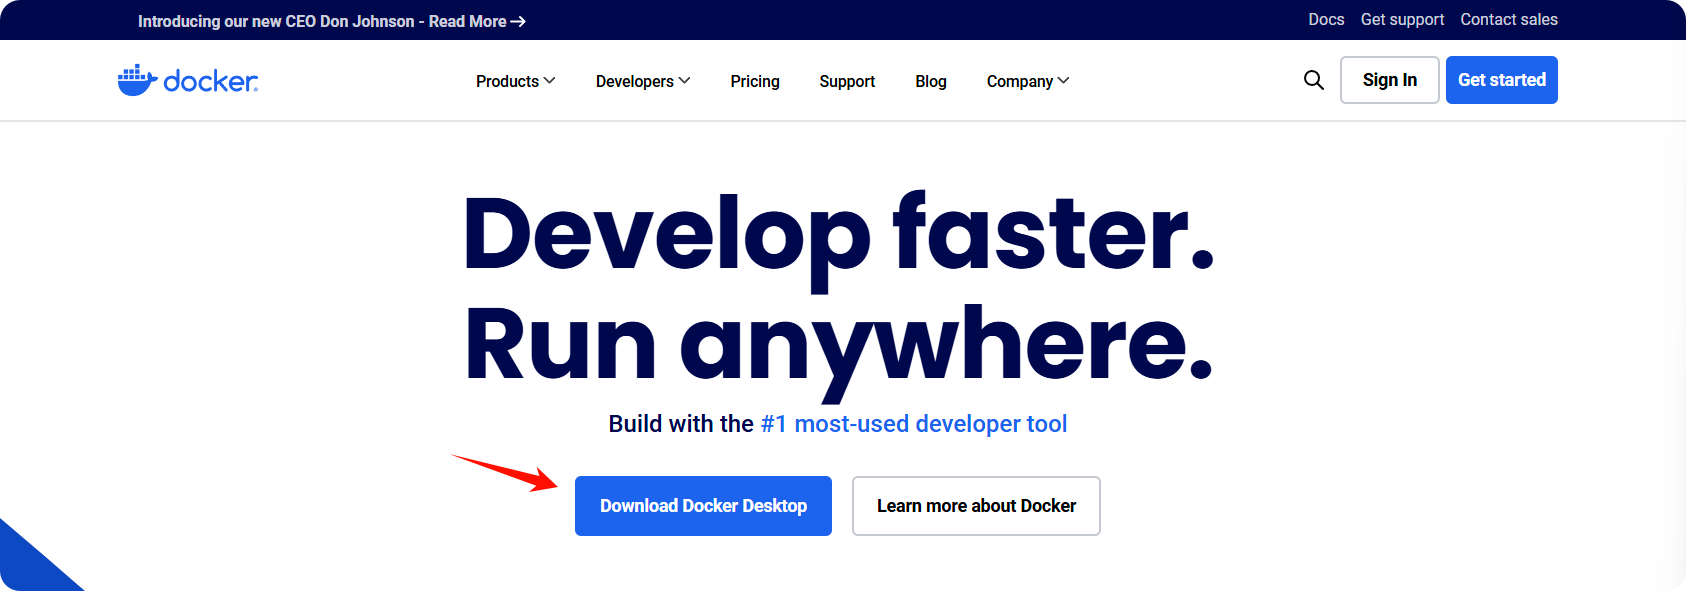
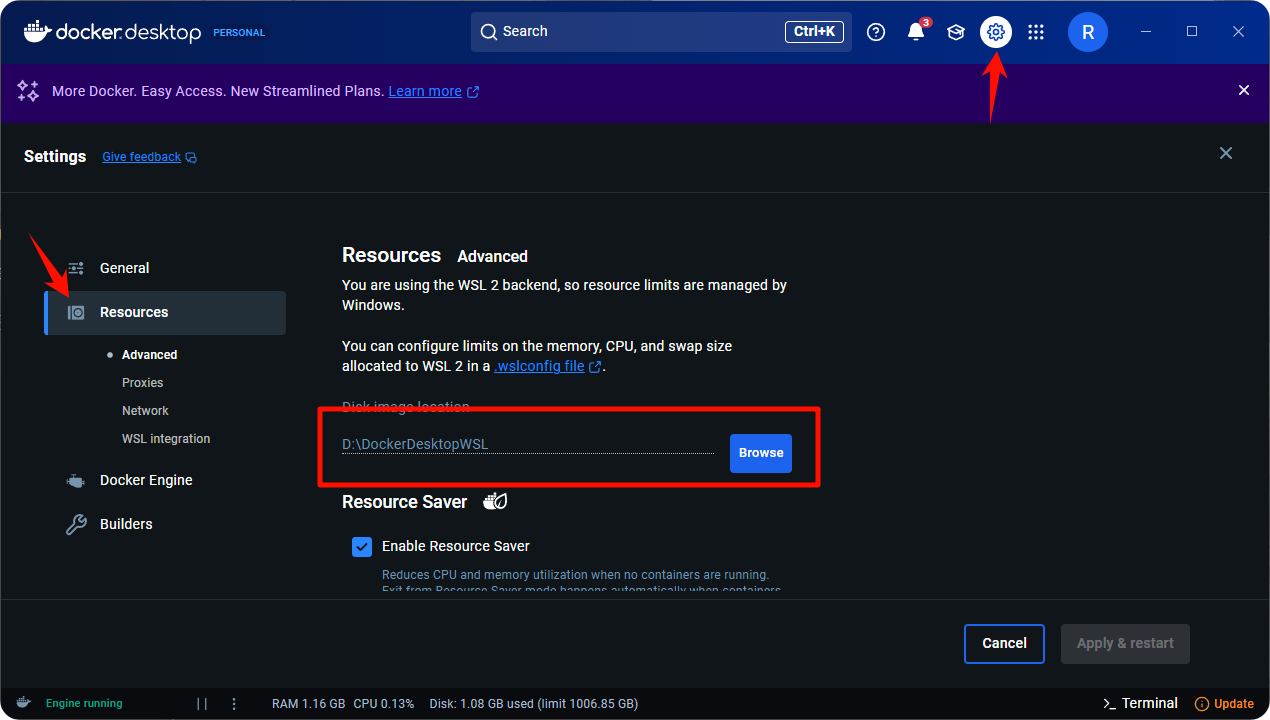
#### 1. Download, install, and configure [docker](https://www.docker.com/)
After installation, choose an image storage path:
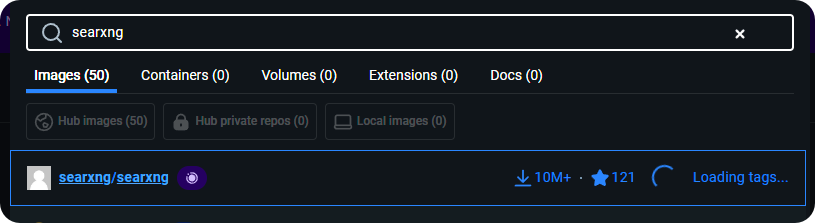
#### 2. Search for and pull the SearXNG image
Enter in the search bar **searxng** :
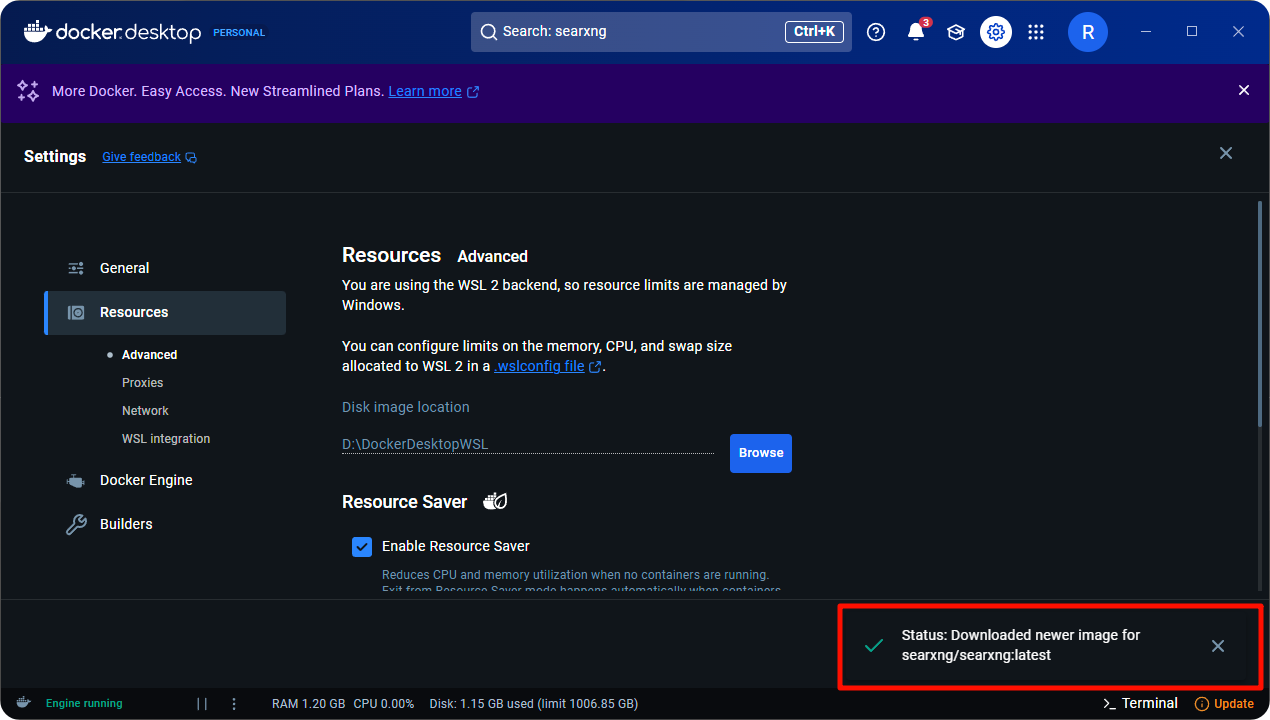
Pull the image:
#### 3. Run the image
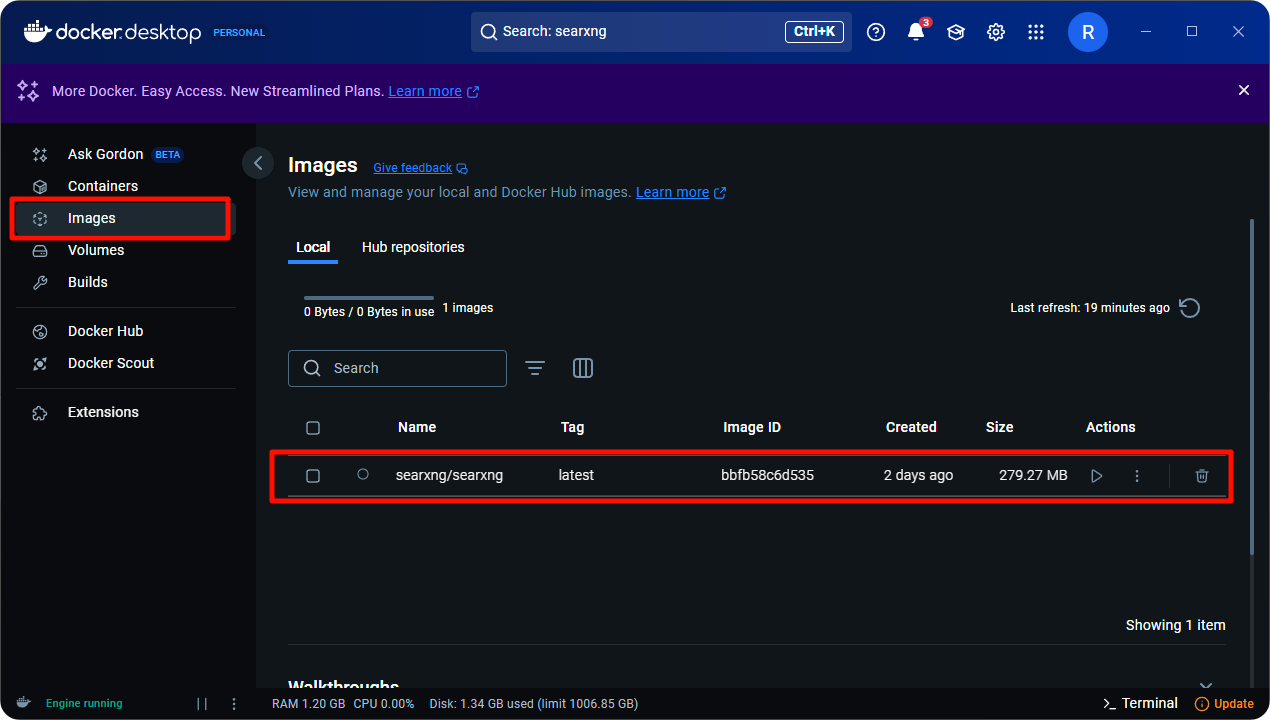
After the pull succeeds, go to **images** page:
Select the pulled image and click Run:
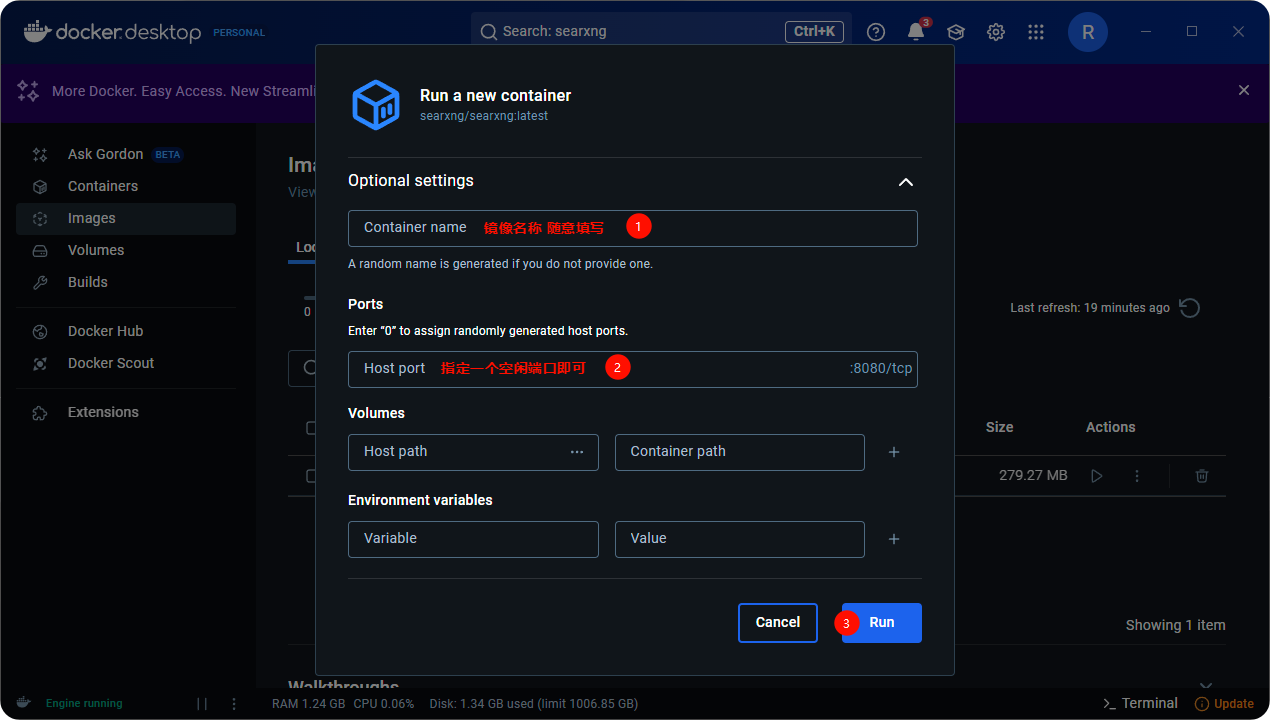
Open the settings item to configure:
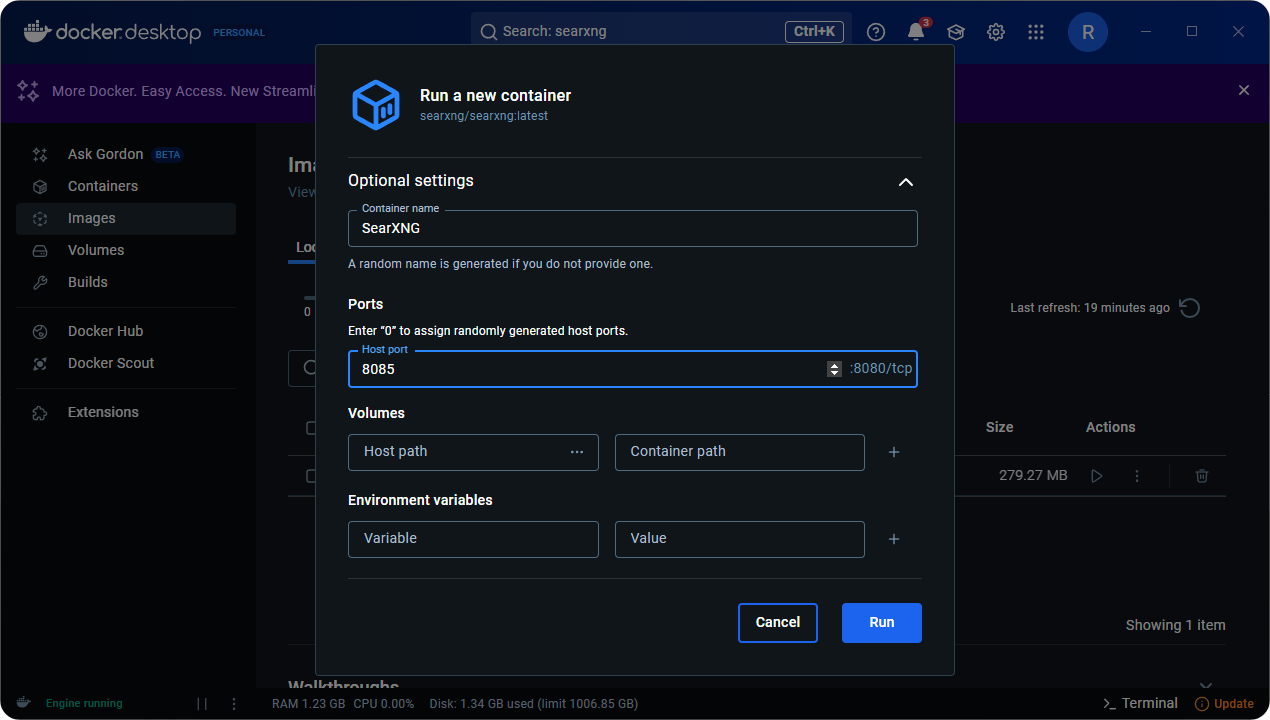
Use `8085` port as an example:
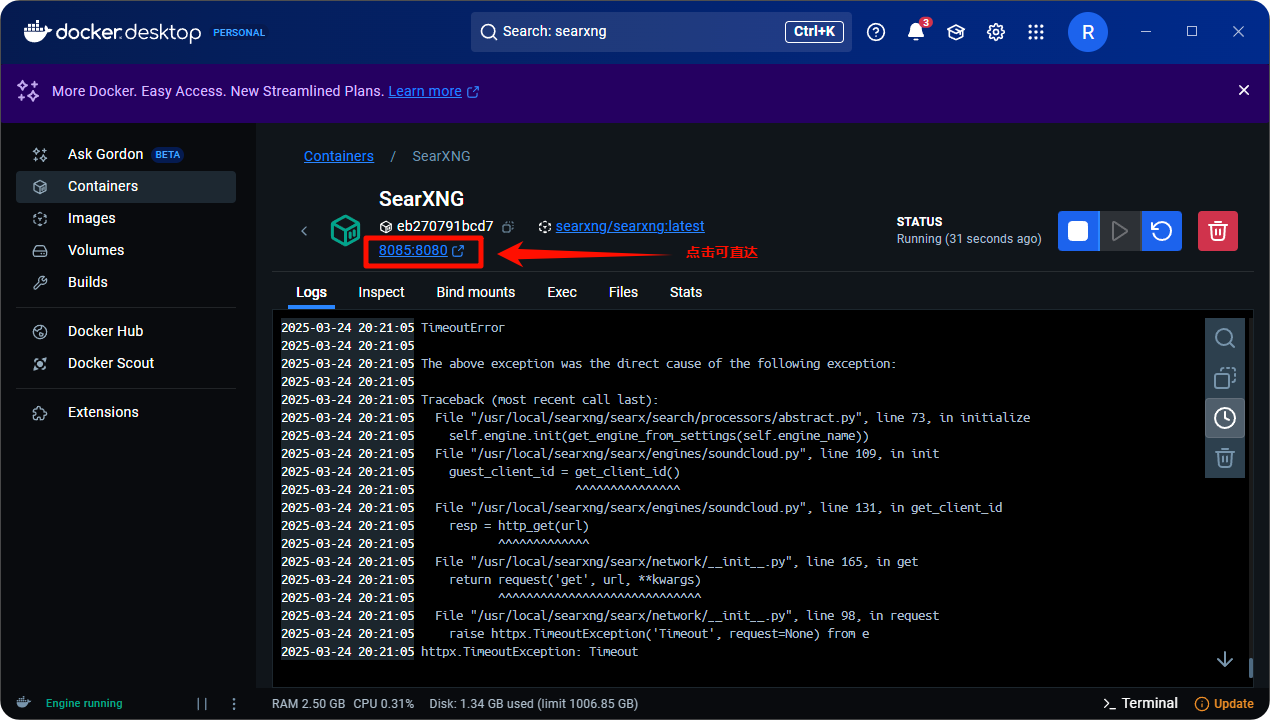
After the run succeeds, click the link to open SearXNG's frontend interface:
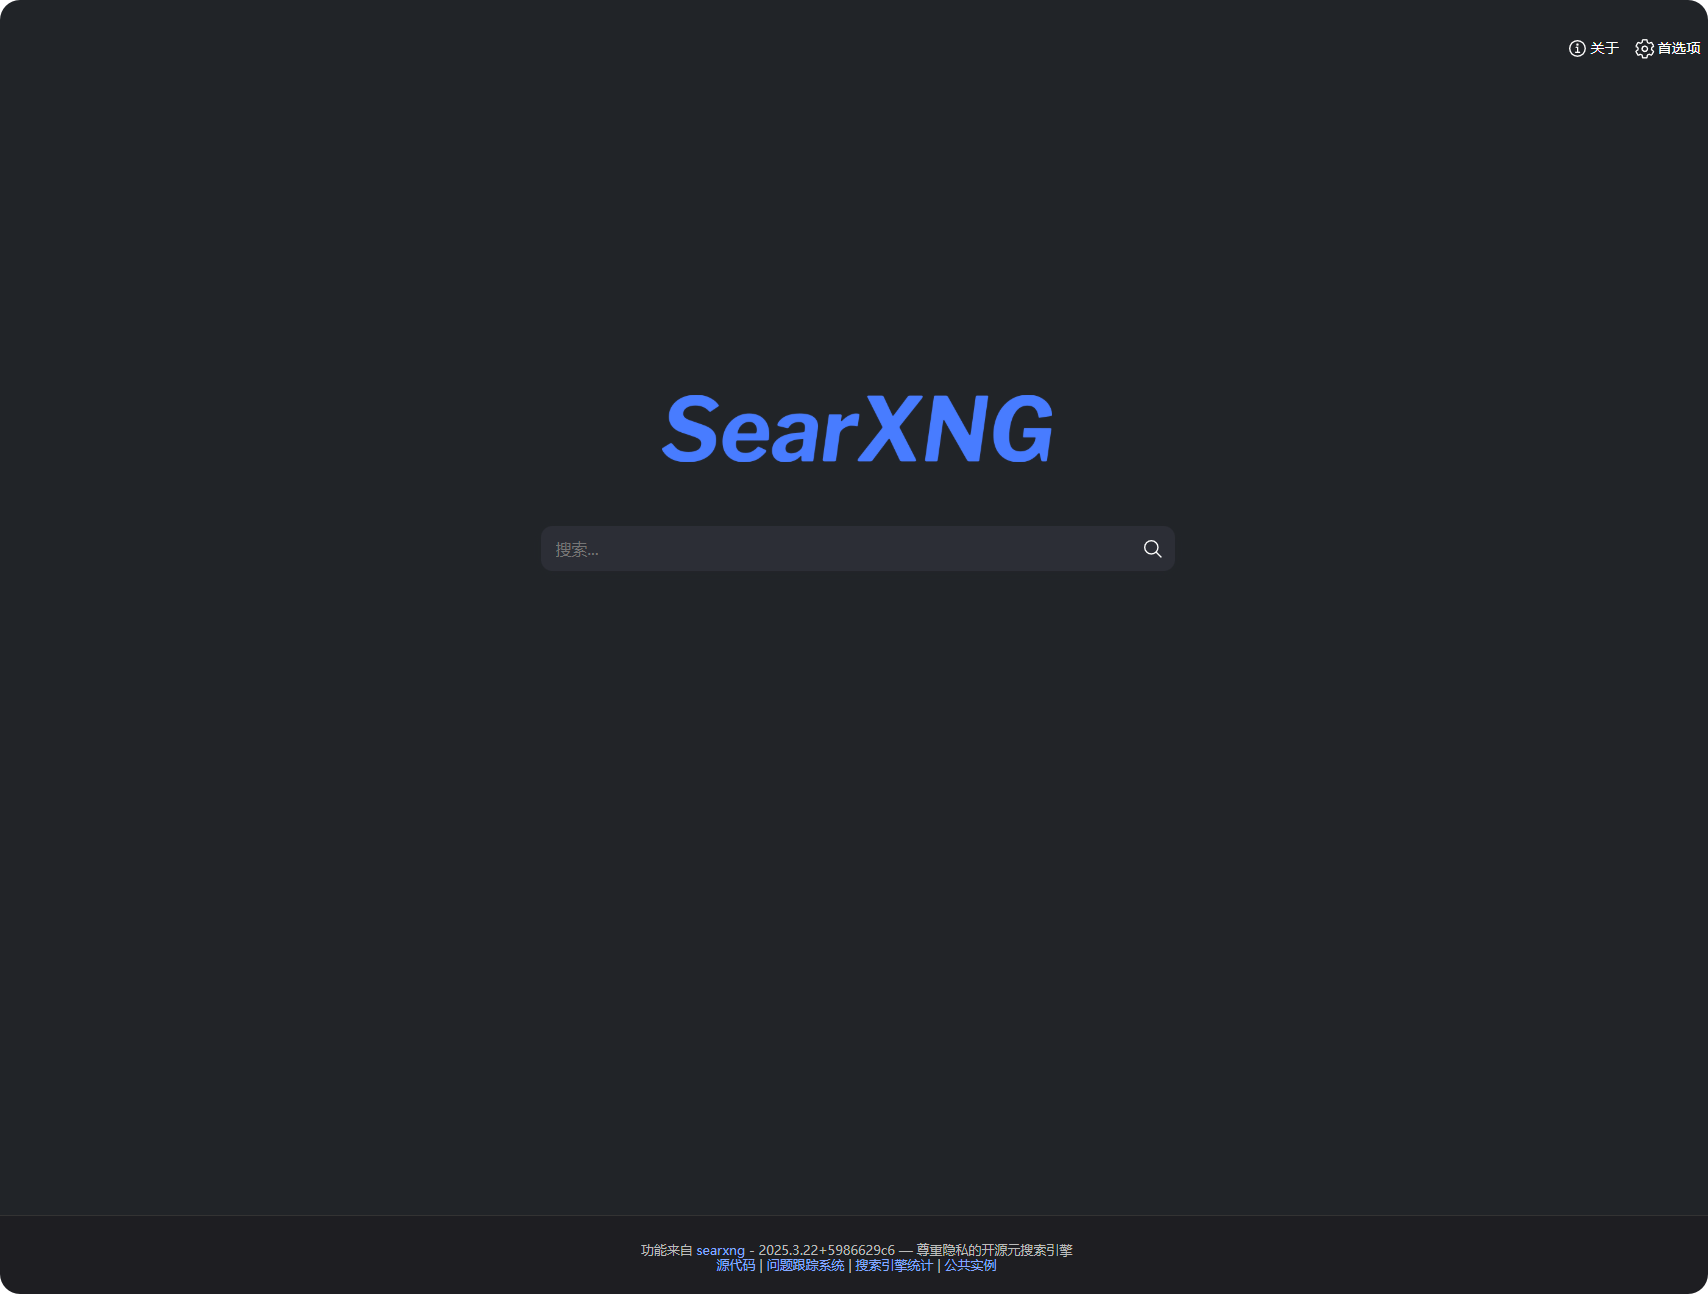
If this page appears, deployment succeeded:
## Server deployment
Given that installing Docker on Windows is rather troublesome, users can deploy SearXNG on a server and also share it with others. However, unfortunately, SearXNG itself does not currently support authentication, which allows others to scan for and abuse your deployed instance through technical means.
For this reason, Cherry Studio now supports configuring [HTTP Basic Authentication (RFC7617)](https://developer.mozilla.org/zh-CN/docs/Web/HTTP/Guides/Authentication)If you want to expose your self-hosted SearXNG to the public internet, please **be sure** configure HTTP Basic Authentication through reverse proxy software such as Nginx. Below is a brief tutorial; you need basic Linux operations knowledge.
### Deploy SearXNG
Similarly, still use Docker for deployment. Assume you have already followed the [official tutorial](https://docs.docker.com/engine/install) to install the latest Docker CE on the server. The following provides an all-in-one command, suitable for a fresh installation on Debian systems:
```bash
sudo apt update
sudo apt install git -y
# Fetch the official repository
cd /opt
git clone https://github.com/searxng/searxng-docker.git
cd /opt/searxng-docker
# If your server has very limited bandwidth, you can set it to false
export IMAGE_PROXY=true
# Modify the configuration file
cat < /opt/searxng-docker/searxng/settings.yml
# see https://docs.searxng.org/admin/settings/settings.html#settings-use-default-settings
use_default_settings: true
server:
# base_url is defined in the SEARXNG_BASE_URL environment variable, see .env and docker-compose.yml
secret_key: $(openssl rand -hex 32)
limiter: false # can be disabled for a private instance
image_proxy: $IMAGE_PROXY
ui:
static_use_hash: true
redis:
url: redis://redis:6379/0
search:
formats:
- html
- json
EOF
```
If you need to change the local listening port or reuse an existing local nginx, you can edit `docker-compose.yaml` file, refer to the following:
```yaml
version: "3.7"
services:
# If you don't need Caddy and are reusing an existing local Nginx, remove the following. By default, we don't need Caddy.
caddy:
container_name: caddy
image: docker.io/library/caddy:2-alpine
network_mode: host
restart: unless-stopped
volumes:
- ./Caddyfile:/etc/caddy/Caddyfile:ro
- caddy-data:/data:rw
- caddy-config:/config:rw
environment:
- SEARXNG_HOSTNAME=${SEARXNG_HOSTNAME:-http://localhost}
- SEARXNG_TLS=${LETSENCRYPT_EMAIL:-internal}
cap_drop:
- ALL
cap_add:
- NET_BIND_SERVICE
logging:
driver: "json-file"
options:
max-size: "1m"
max-file: "1"
# If you don't need Caddy and are reusing an existing local Nginx, remove the above. By default, we don't need Caddy.
redis:
container_name: redis
image: docker.io/valkey/valkey:8-alpine
command: valkey-server --save 30 1 --loglevel warning
restart: unless-stopped
networks:
- searxng
volumes:
- valkey-data2:/data
cap_drop:
- ALL
cap_add:
- SETGID
- SETUID
- DAC_OVERRIDE
logging:
driver: "json-file"
options:
max-size: "1m"
max-file: "1"
searxng:
container_name: searxng
image: docker.io/searxng/searxng:latest
restart: unless-stopped
networks:
- searxng
# By default it maps to port 8080 on the host. If you want to listen on 8000, change it to "127.0.0.1:8000:8080"
ports:
- "127.0.0.1:8080:8080"
volumes:
- ./searxng:/etc/searxng:rw
environment:
- SEARXNG_BASE_URL=https://${SEARXNG_HOSTNAME:-localhost}/
- UWSGI_WORKERS=${SEARXNG_UWSGI_WORKERS:-4}
- UWSGI_THREADS=${SEARXNG_UWSGI_THREADS:-4}
cap_drop:
- ALL
cap_add:
- CHOWN
- SETGID
- SETUID
logging:
driver: "json-file"
options:
max-size: "1m"
max-file: "1"
networks:
searxng:
volumes:
# If you don't need Caddy and are reusing an existing local Nginx, remove the following
caddy-data:
caddy-config:
# If you don't need Caddy and are reusing an existing local Nginx, remove the above
valkey-data2:
```
Run `docker compose up -d` to start. Run `docker compose logs -f searxng` to view the logs.
### Deploy Nginx reverse proxy and HTTP Basic Authentication
If you are using a server panel program such as BaoTa Panel or 1Panel, please refer to its documentation to add a website and configure the Nginx reverse proxy, then find where to modify the Nginx configuration file,\
modify it according to the example below:
```conf
server
{
listen 443 ssl;
# This line is your hostname
server_name search.example.com;
# index index.html;
# root /data/www/default;
# If SSL is configured, there should be these two lines
ssl_certificate /path/to/your/cert/fullchain.pem;
ssl_certificate_key /path/to/your/cert/privkey.pem;
# HSTS
# add_header Strict-Transport-Security "max-age=31536000; includeSubDomains; preload";
# By default, when configuring reverse proxy through the panel, the default location block looks like this
location / {
# Just add the following two lines to the location block; keep the rest as is.
# This example assumes your configuration file is saved under the /etc/nginx/conf.d/ directory.
# If it's BaoTa, it may be saved in a /www or similar directory; note that.
auth_basic "Please enter your username and password";
auth_basic_user_file /etc/nginx/conf.d/search.htpasswd;
proxy_http_version 1.1;
proxy_set_header Connection "";
proxy_redirect off;
proxy_set_header Host $host;
proxy_set_header X-Forwarded-For $proxy_protocol_addr;
proxy_pass http://127.0.0.1:8000;
client_max_body_size 0;
}
# access_log ...;
# error_log ...;
}
```
Assuming the Nginx configuration file is saved in `/etc/nginx/conf.d` under that directory, we will save the password file in the same directory.
Execute the command (replace `example_name`,`example_password` with the username and password you plan to set):
```bash
echo "example_name:$(openssl passwd -5 'example_password')" > /etc/nginx/conf.d/search.htpasswd
```
Restart Nginx (reloading the configuration is also fine).
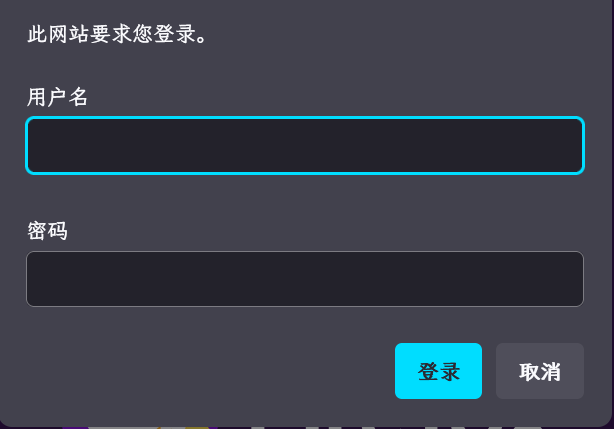
At this point, you can open the web page and it will already prompt you for a username and password. Enter the username and password you set earlier to see whether you can successfully enter the SearXNG search page, thereby checking whether the configuration is correct.
## Cherry Studio related configuration
After SearXNG has been successfully deployed locally or on a server, next comes the CherryStudio configuration.
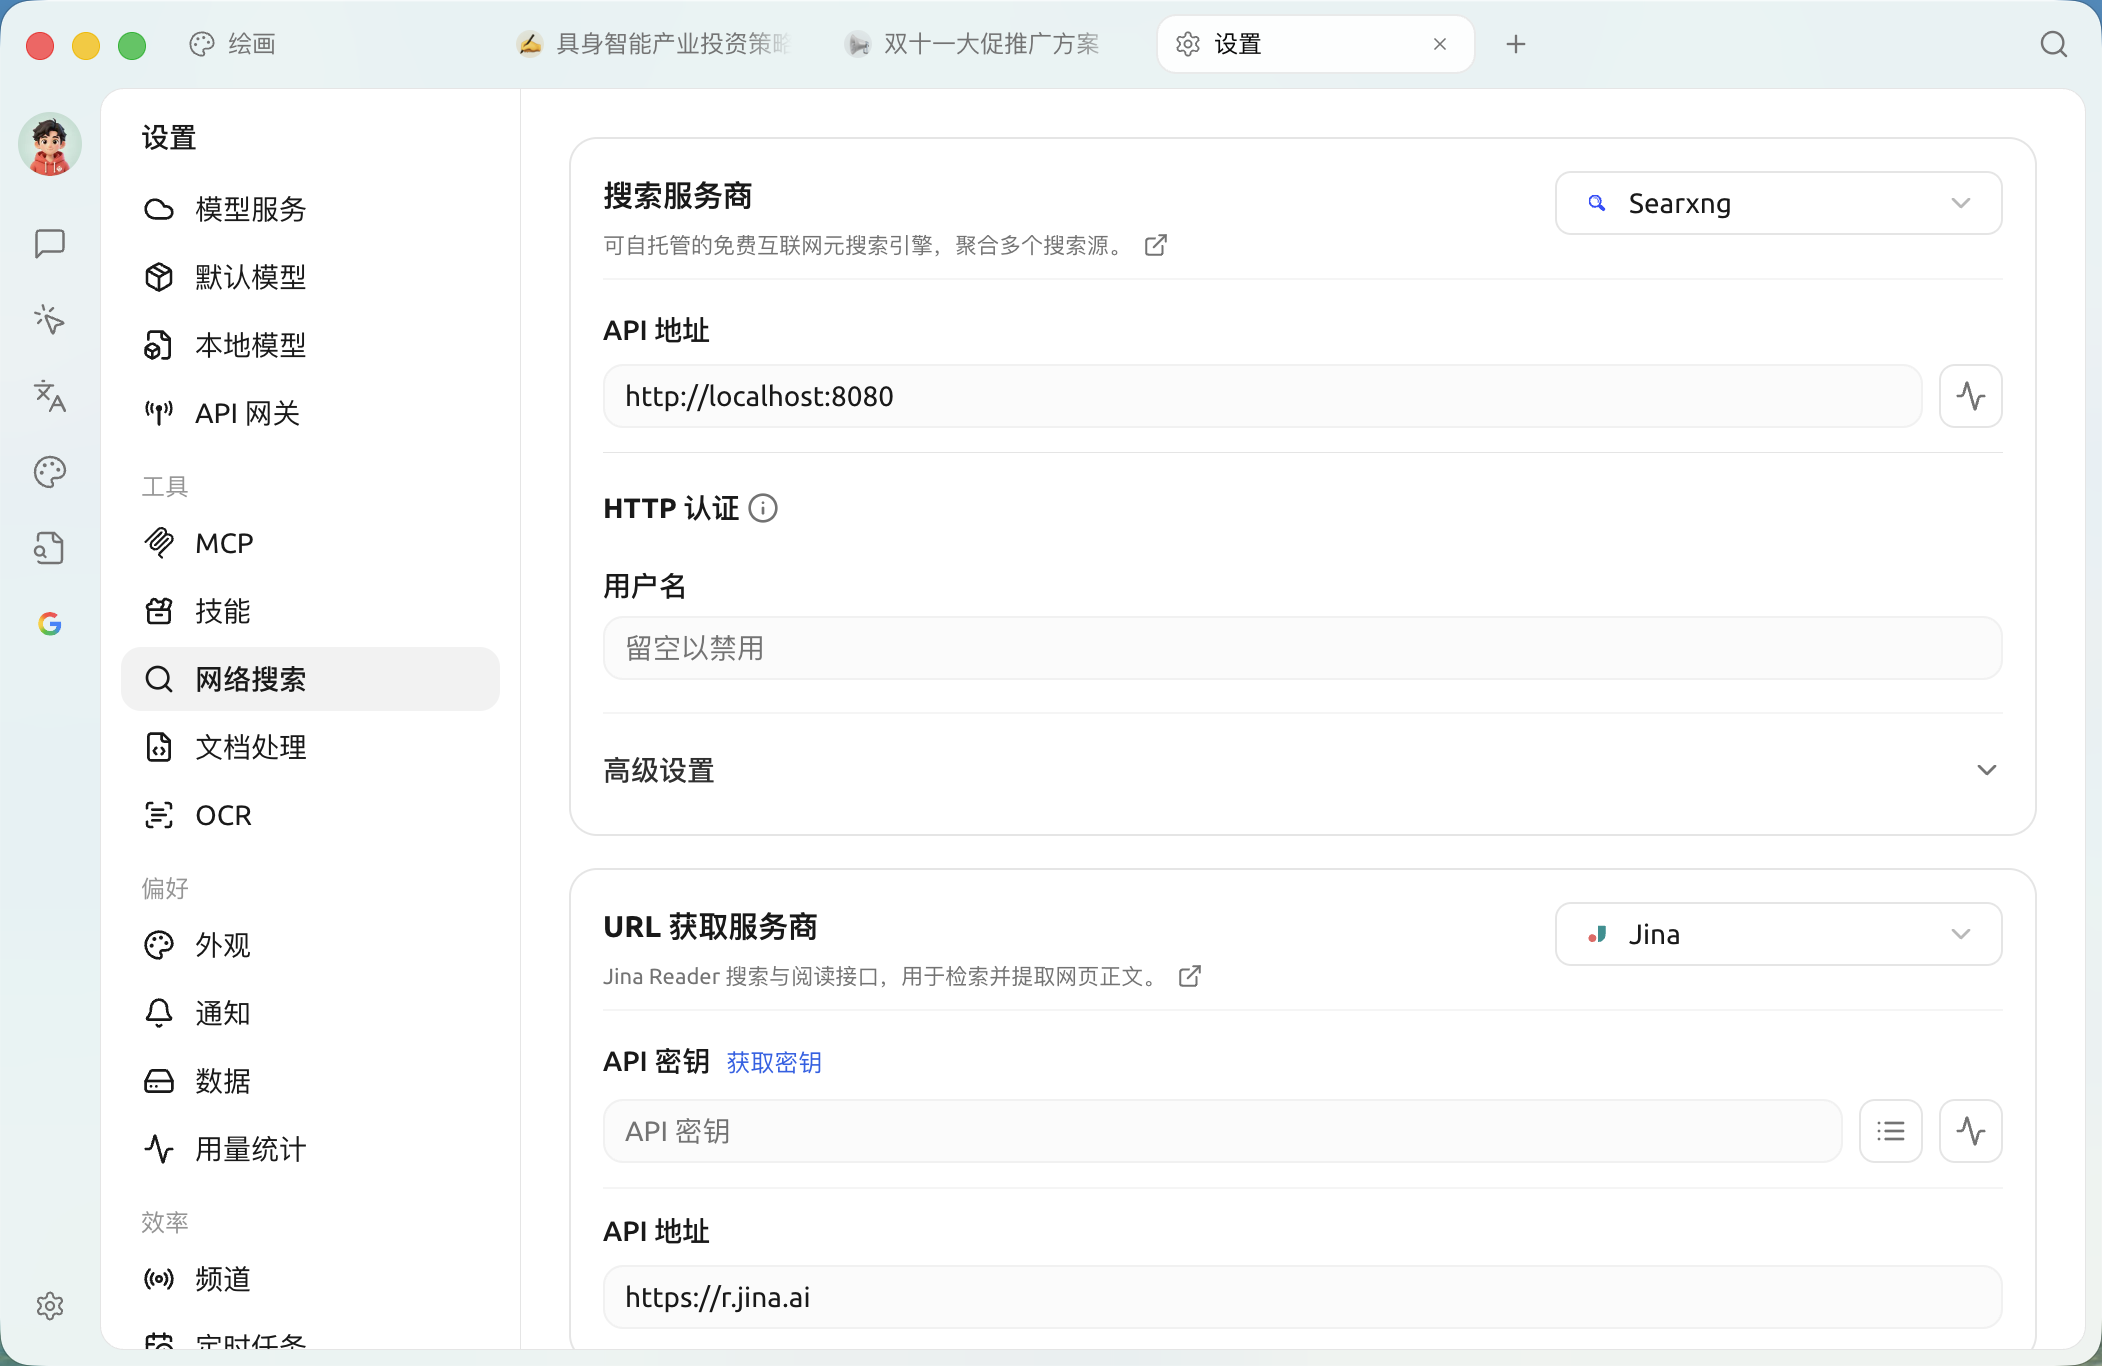
Go to the web search settings page and select Searxng:
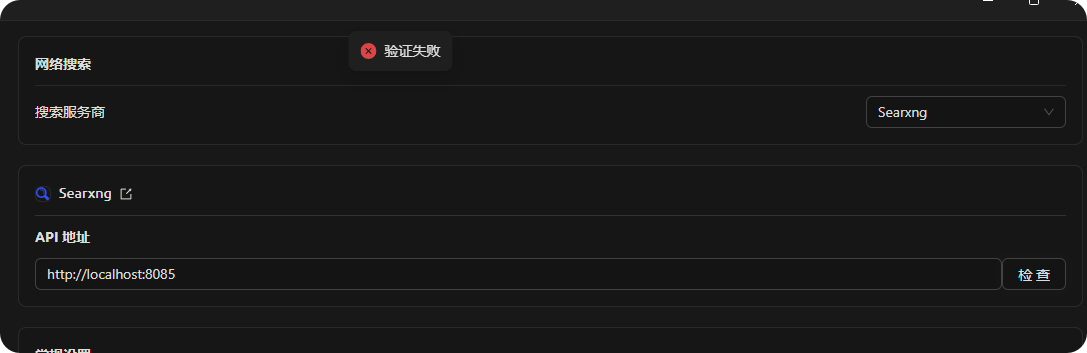
Directly entering the locally deployed link shows verification failed; don't worry at this point:
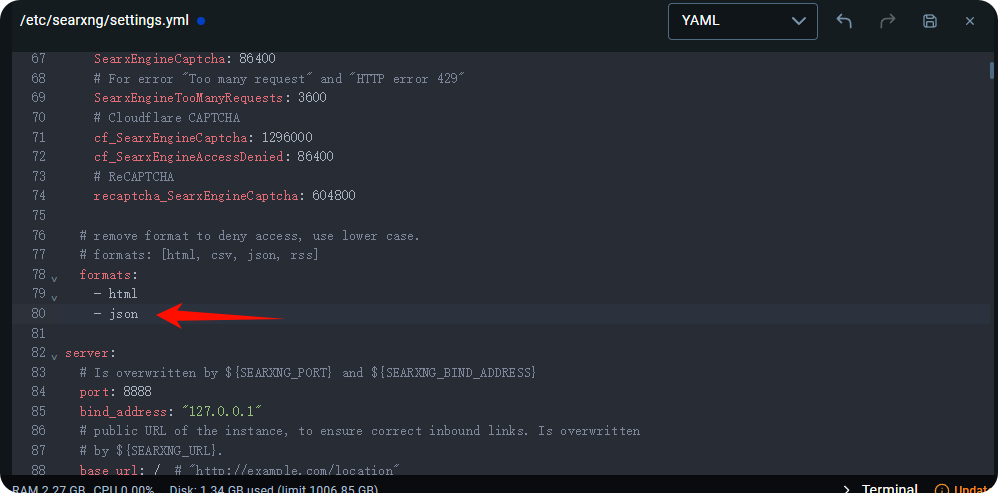
Because after direct deployment, json return type is not configured by default, data cannot be fetched, so the configuration file needs to be modified.
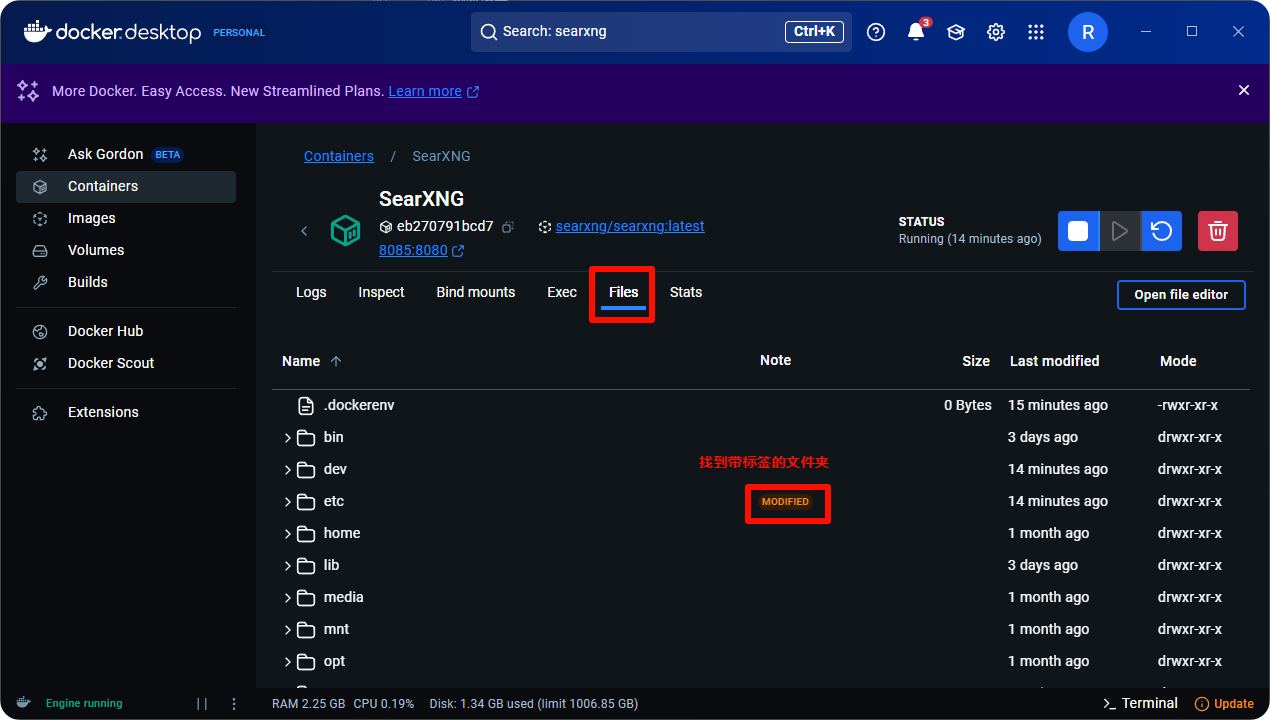
Go back to Docker, go to the Files tab and find the tagged folder in the image:
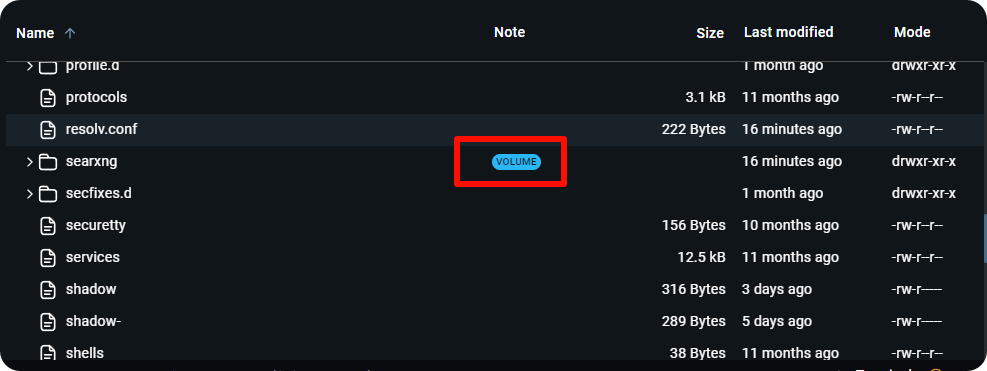
Expand it and scroll further down, and you will find another tagged folder:
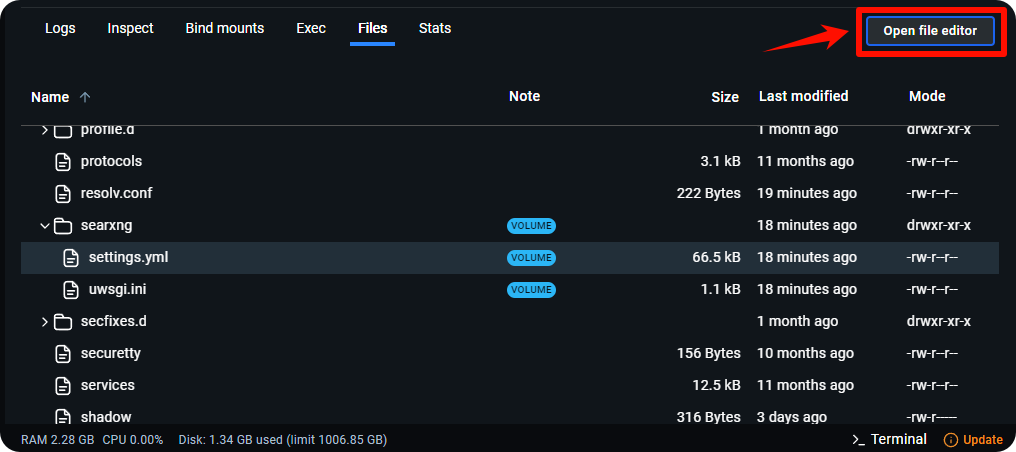
Continue expanding and find **settings.yml** configuration file:
Click to open the file editor:
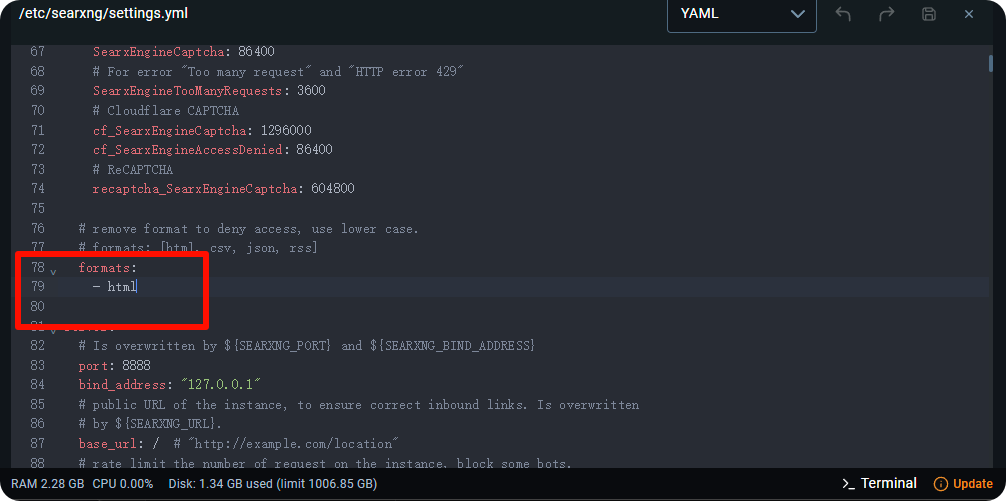
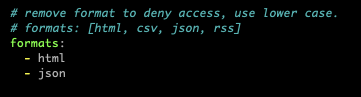
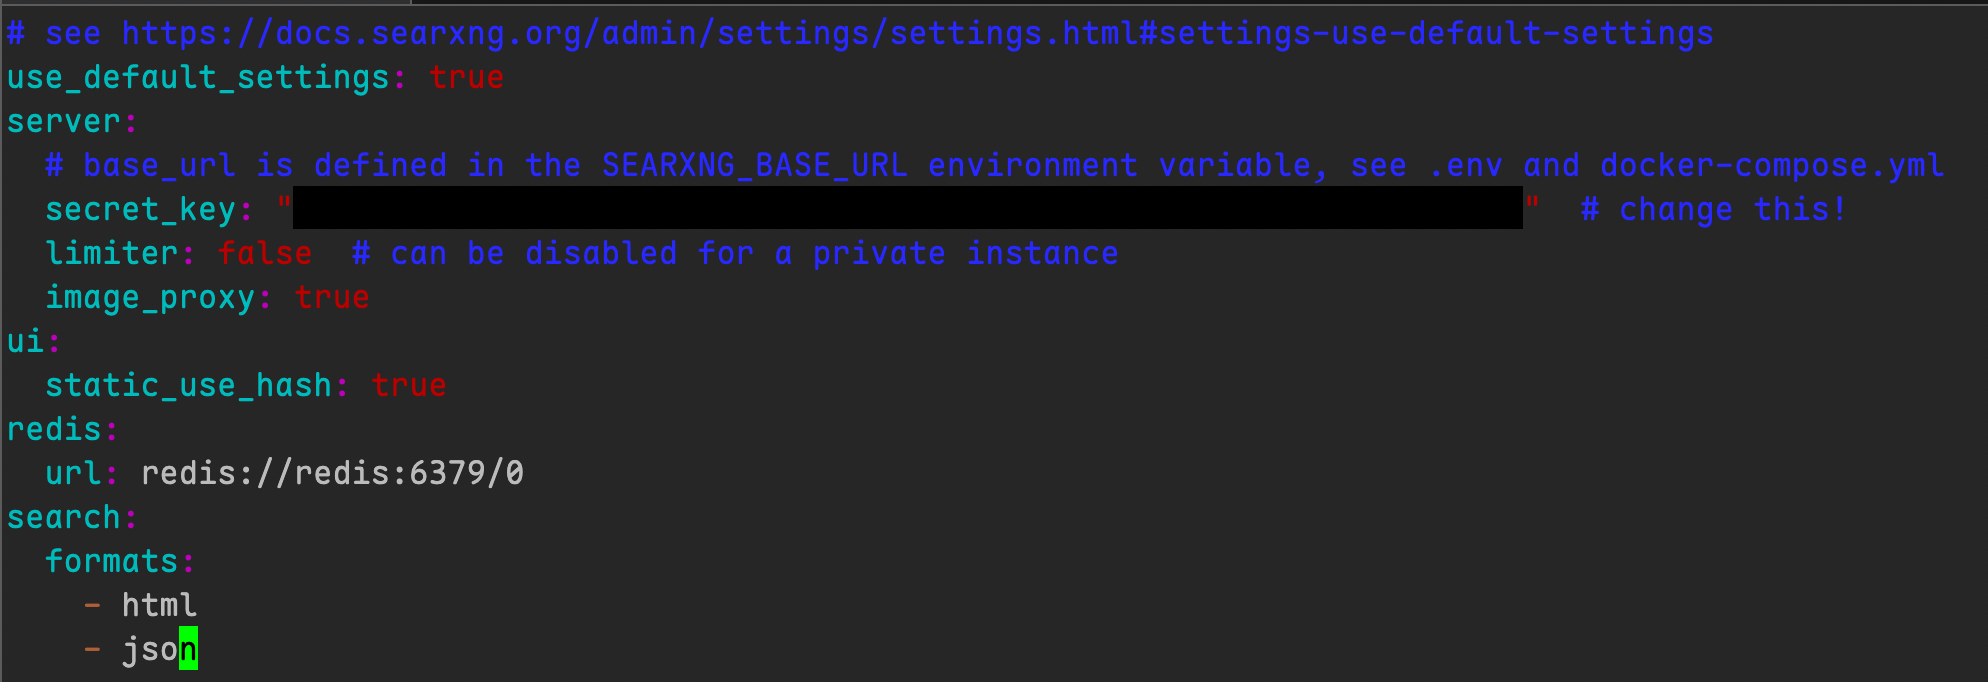
Find line 78, and you can see that the only type is html
After adding the json type and saving, rerun the image
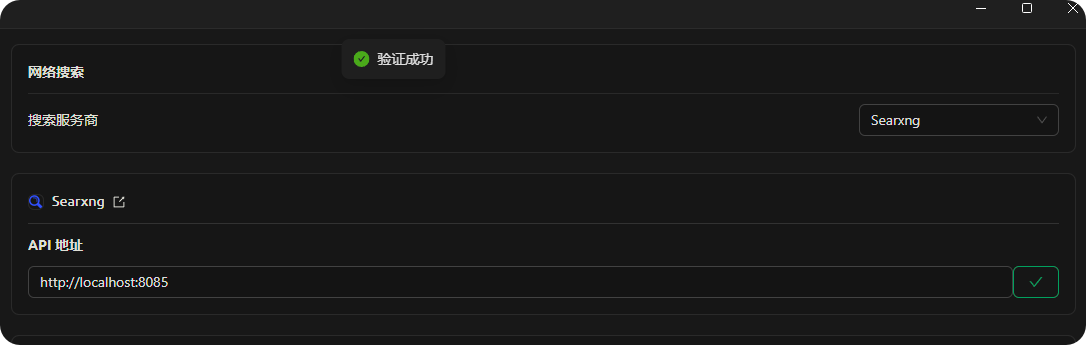
Go back to Cherry Studio to verify again, verification successful:
The address can be entered as local: : port number\
You can also enter the Docker address: : port number
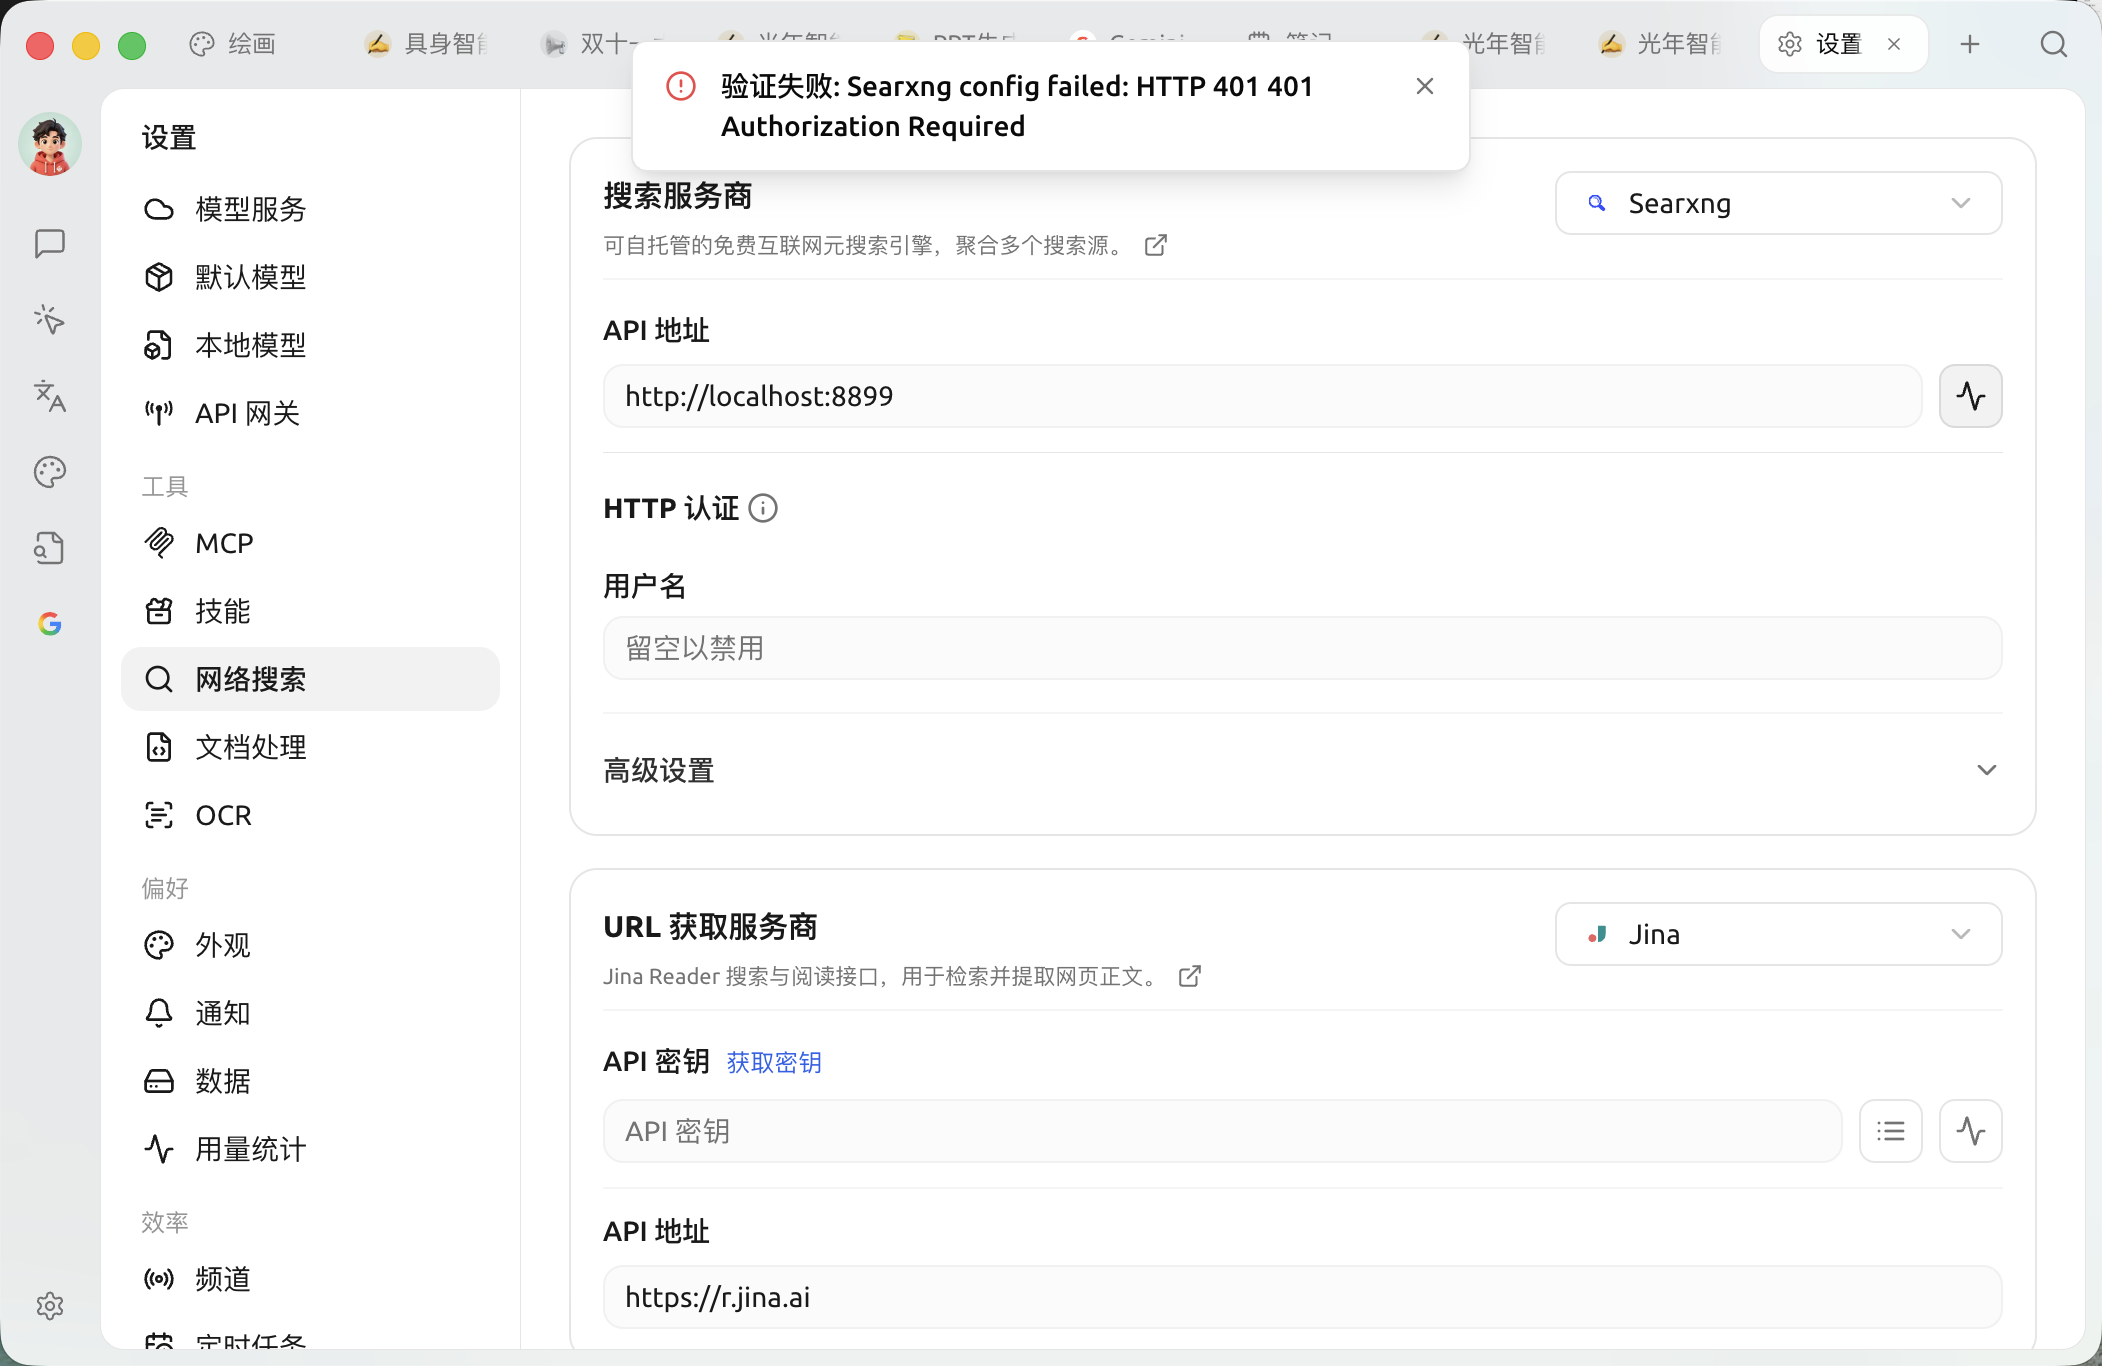
If the user followed the previous example to deploy on a server and configured the reverse proxy correctly, json return type has already been enabled. After entering the address for verification, because HTTP Basic Authentication has been configured for the reverse proxy, the verification should return 401 error code:
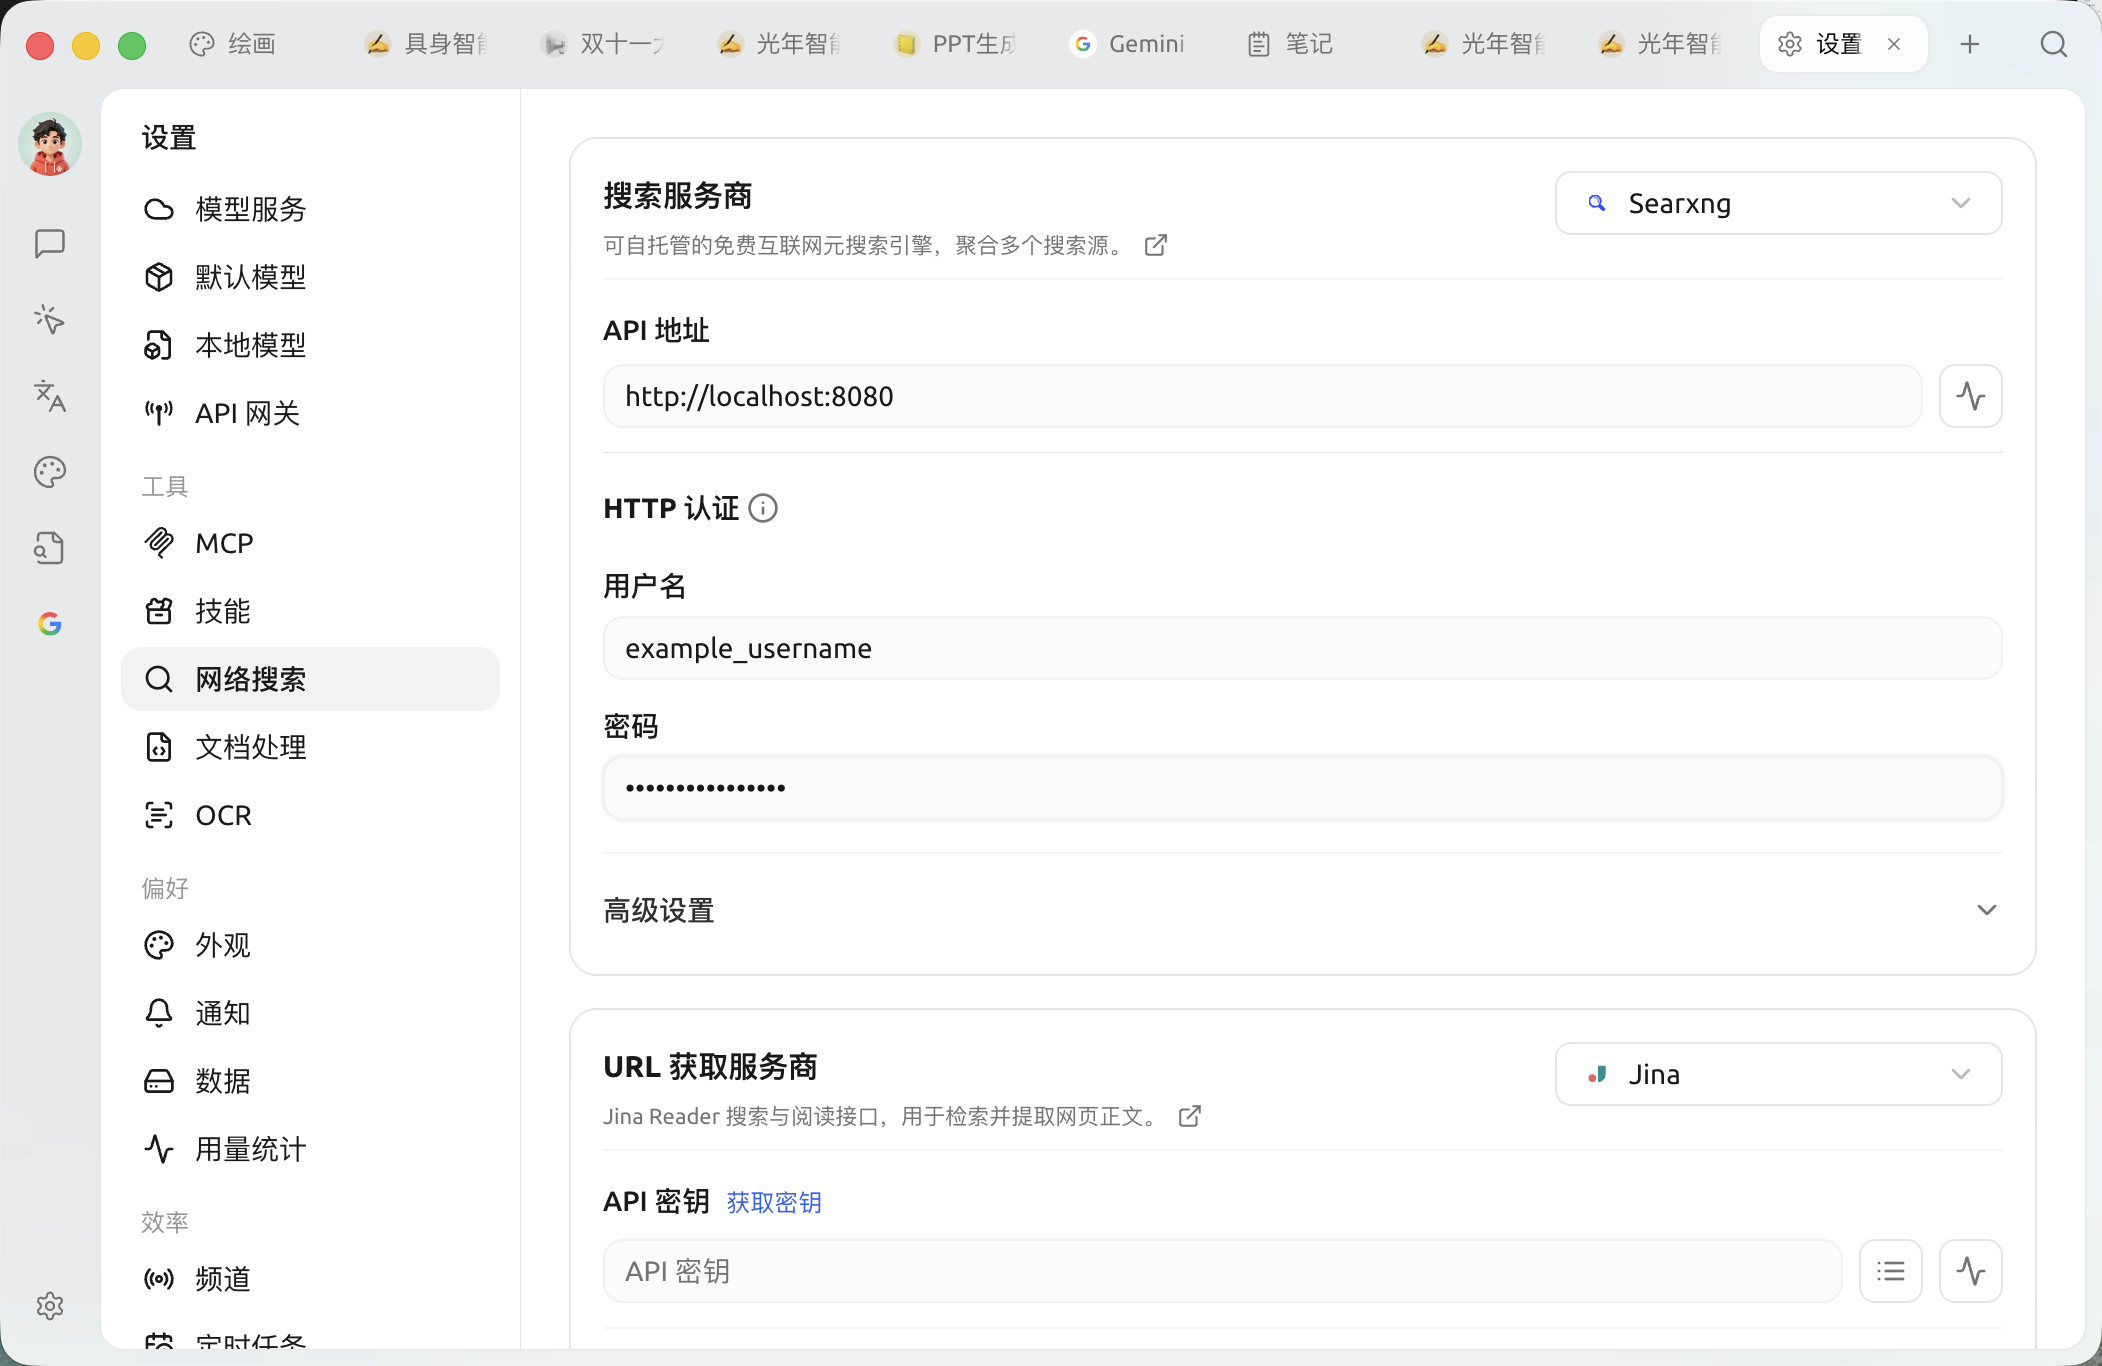
Configure HTTP Basic Authentication in the client and enter the username and password set just now:
Perform verification; it should succeed.
### Other configuration
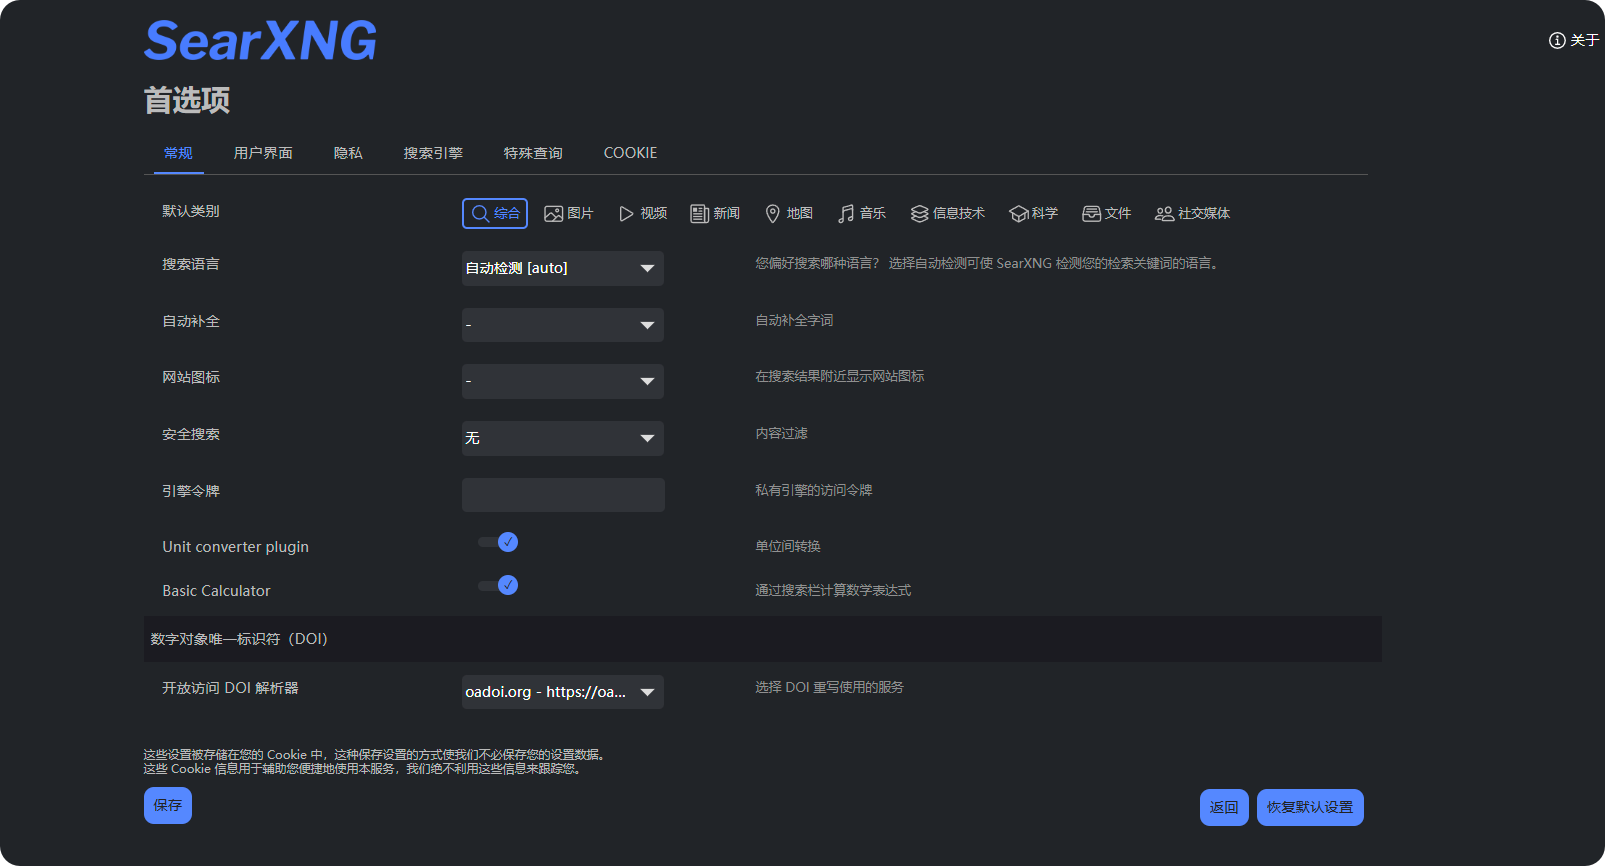
At this point, SearXNG already has the default ability to search online; if you need to customize search engines, you need to configure them yourself
Note that the preferences here do not affect the configuration when the large model is called
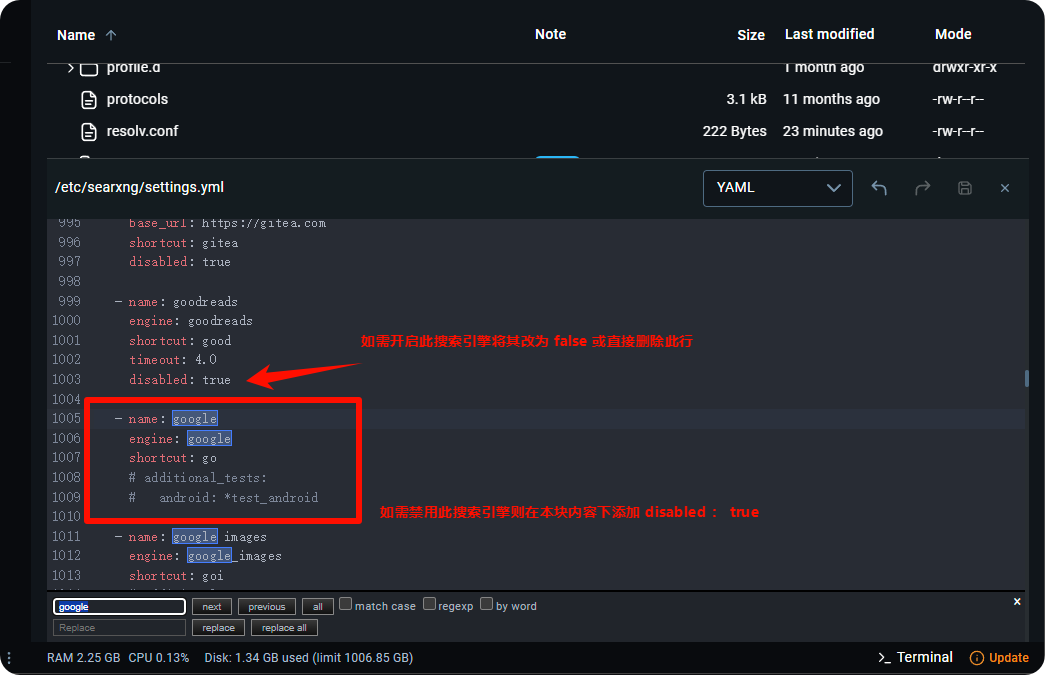
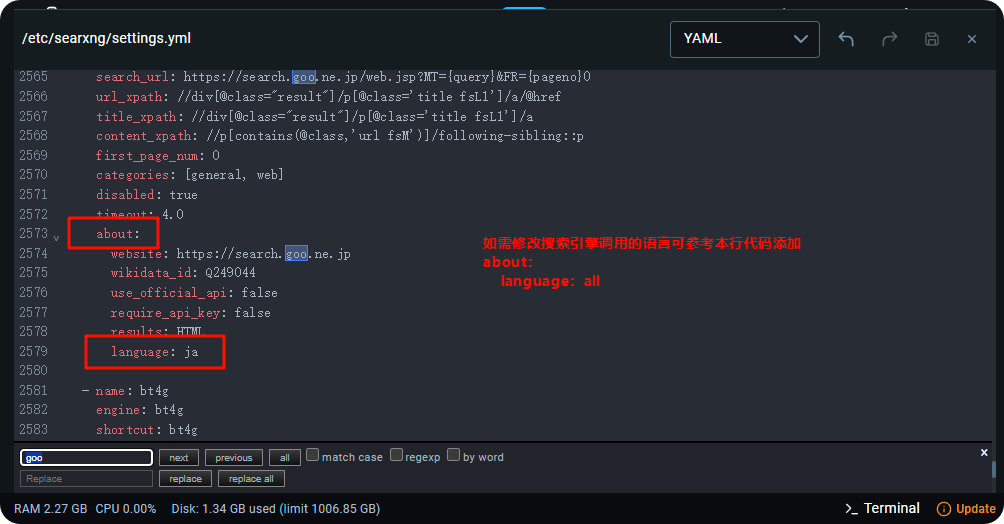
If you need to configure the search engine used for large-model calls, set it in the configuration file:
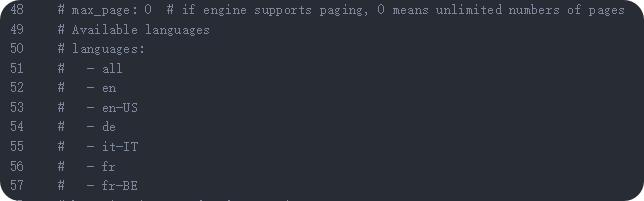
Language configuration reference:
If the content is too long to edit directly, you can copy it into a local IDE, then paste it back into the configuration file after modifying it.
## Common reasons for verification failure
### Return format not added with json format
Add json to the return formats in the configuration file:
### Search engine not configured correctly
Cherry Studio will by default select engines whose categories include both web and general for searching. By default it will select engines such as Google, but since Google and similar websites cannot be directly accessed from mainland China, this causes failure. Adding the following configuration forces searxng to use the baidu engine, which solves the problem:
```
use_default_settings:
engines:
keep_only:
- baidu
engines:
- name: baidu
engine: baidu
categories:
- web
- general
disabled: false
```
### Access rate too fast
The limiter configuration in searxng is blocking API access; try setting it to false in the settings:
***
### Get help and submit feedback
If you encounter any questions, bugs, or have suggestions for feature improvements during configuration or use, please refer to [Feedback and Suggestions](/docs/en-us/question-contact/suggestions.md) for the official channels provided.
---
# Agent Instructions
This documentation is published with GitBook. GitBook is the documentation platform designed so that both humans and AI agents can read, navigate, and reason over technical content effectively. Learn more at gitbook.com.
## Querying This Documentation
If you need additional information that is not directly available in this page, you can query the documentation by asking a question.
Perform an HTTP GET request on the following URL with the `ask` and `goal` query parameters:
```
GET https://docs.cherryai.com.cn/docs/en-us/pre-basic/settings/websearch/searxng.md?ask=&goal=
```
`ask` is the immediate question: it should be specific, self-contained, and written in natural language.
`goal` is what the user is ultimately trying to achieve, the reason they need the answer. Sharing it helps GitBook give you a better, more relevant answer. A goal is most helpful when it describes the outcome the user wants rather than restating the question. For example, with `ask=how do I create an API token`, a goal like `automate deployments from our CI pipeline` lets GitBook tailor the answer to that use case.
The response will contain a direct answer to the question and relevant excerpts and sources from the documentation.
Use this mechanism when the answer is not explicitly present in the current page, you need clarification or additional context, or you want to retrieve related documentation sections.