For the complete documentation index, see llms.txt. This page is also available as Markdown.

Notion Configuration Tutorial

Cherry Studio supports importing topics into a Notion database.

Step 1

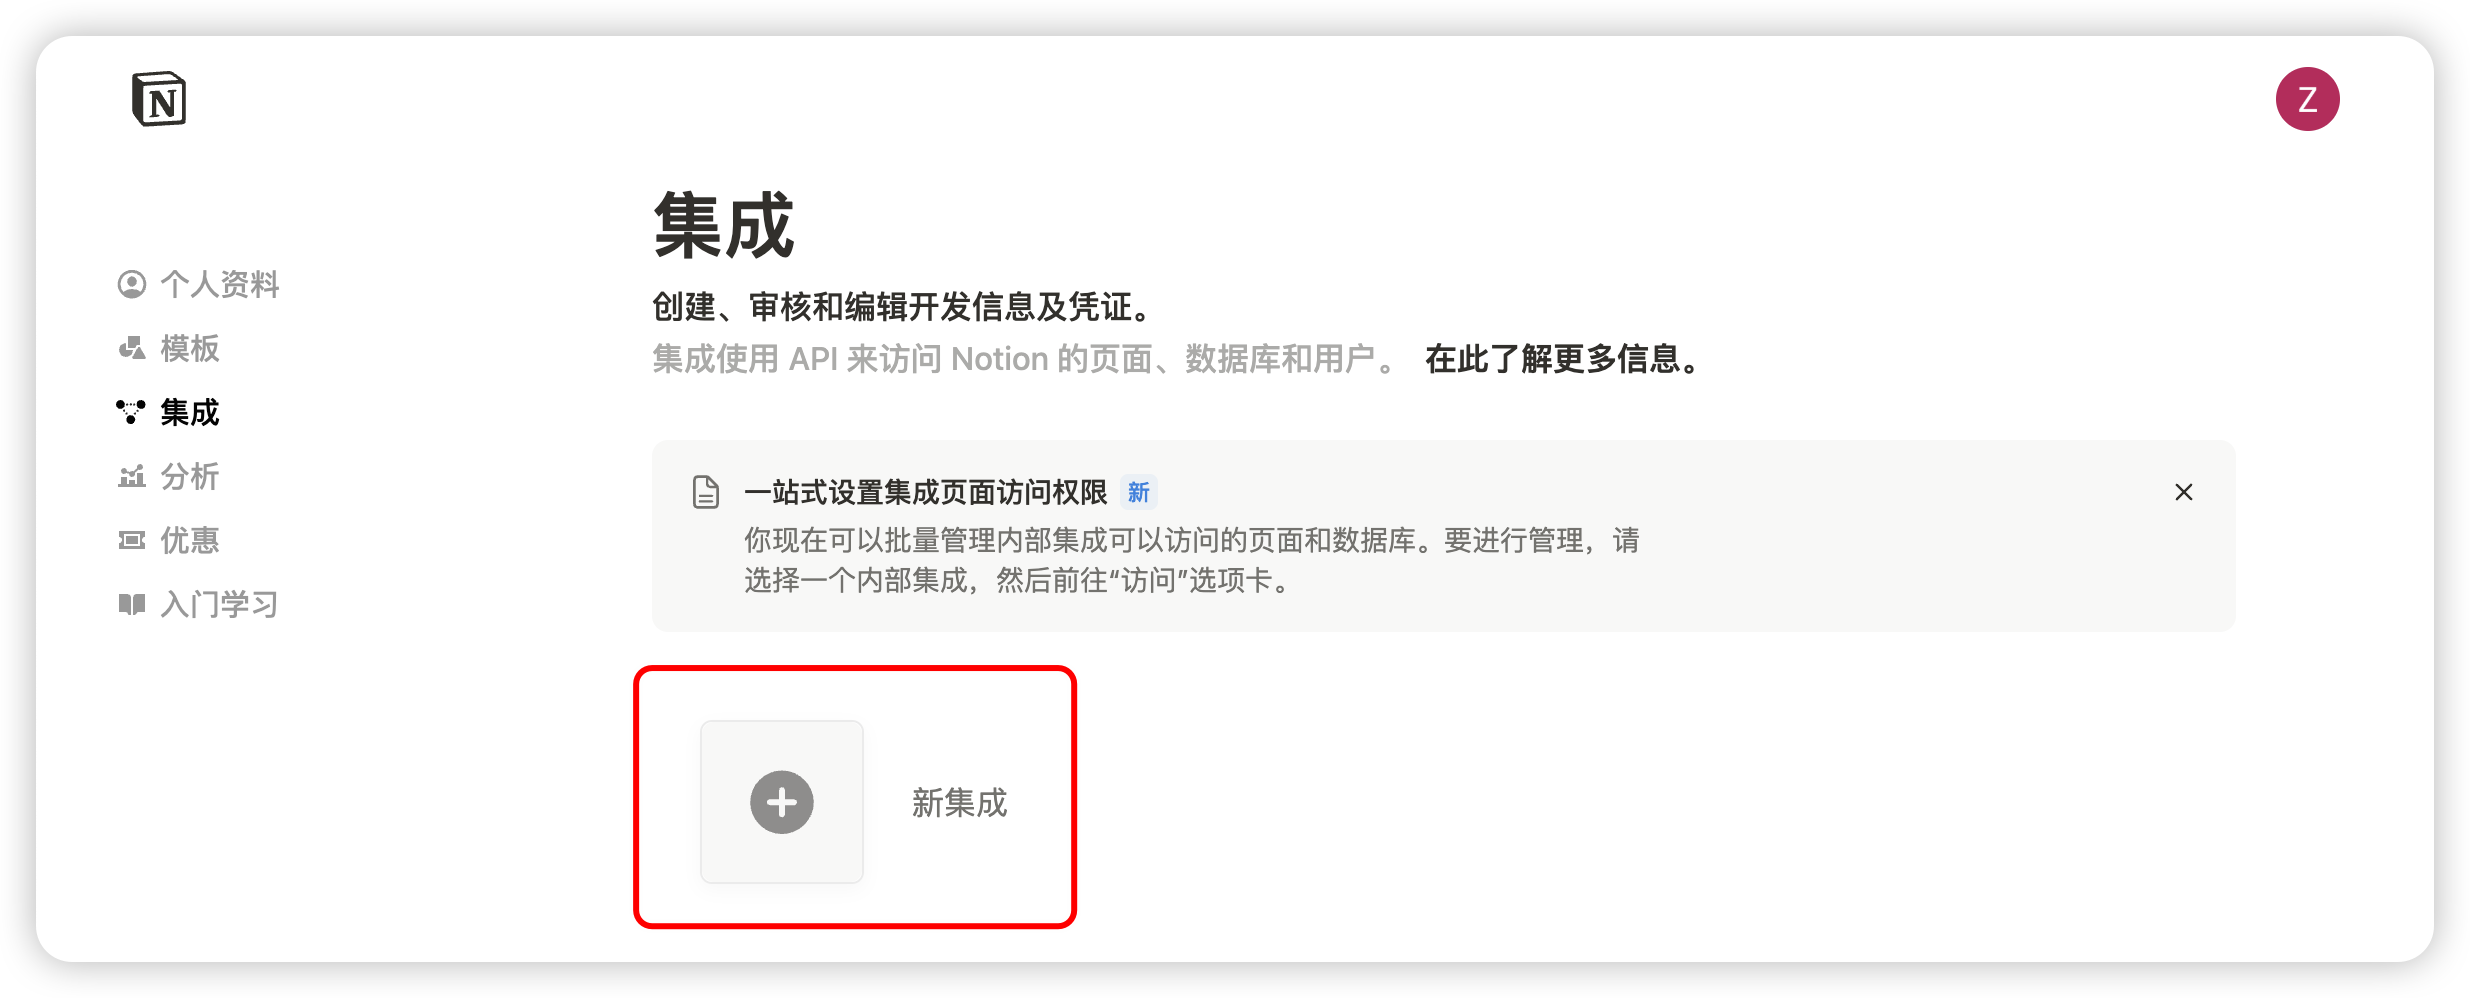
Open website Notion Integrations Create an app

Click the plus sign to create an app
Step 2

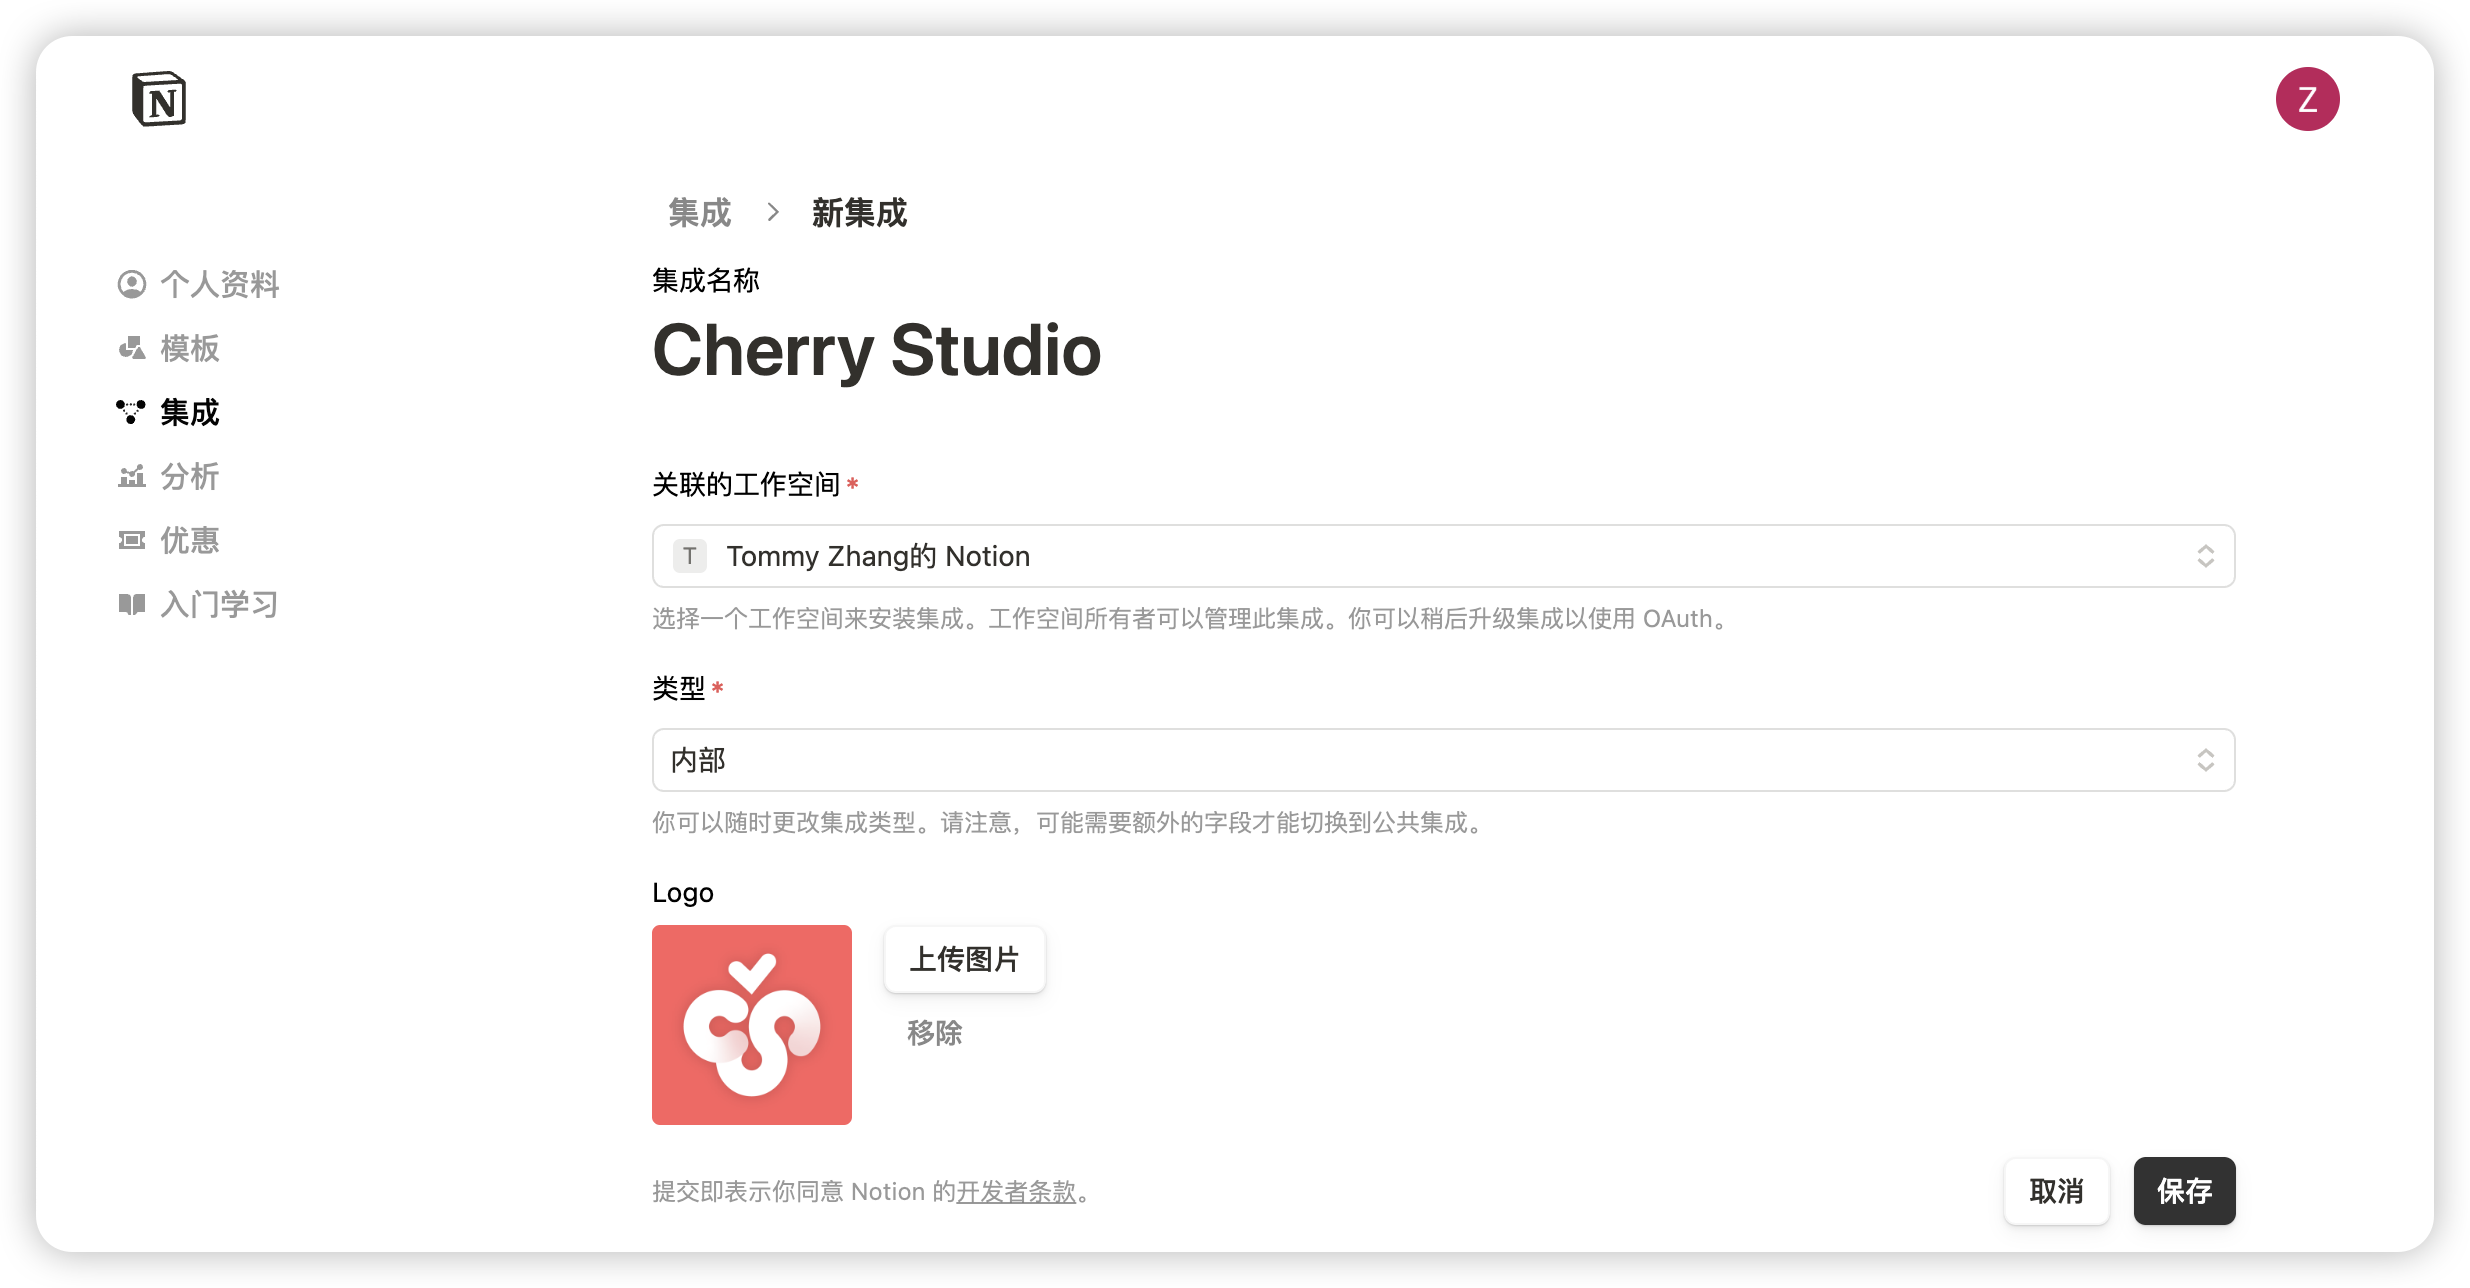
Create an app

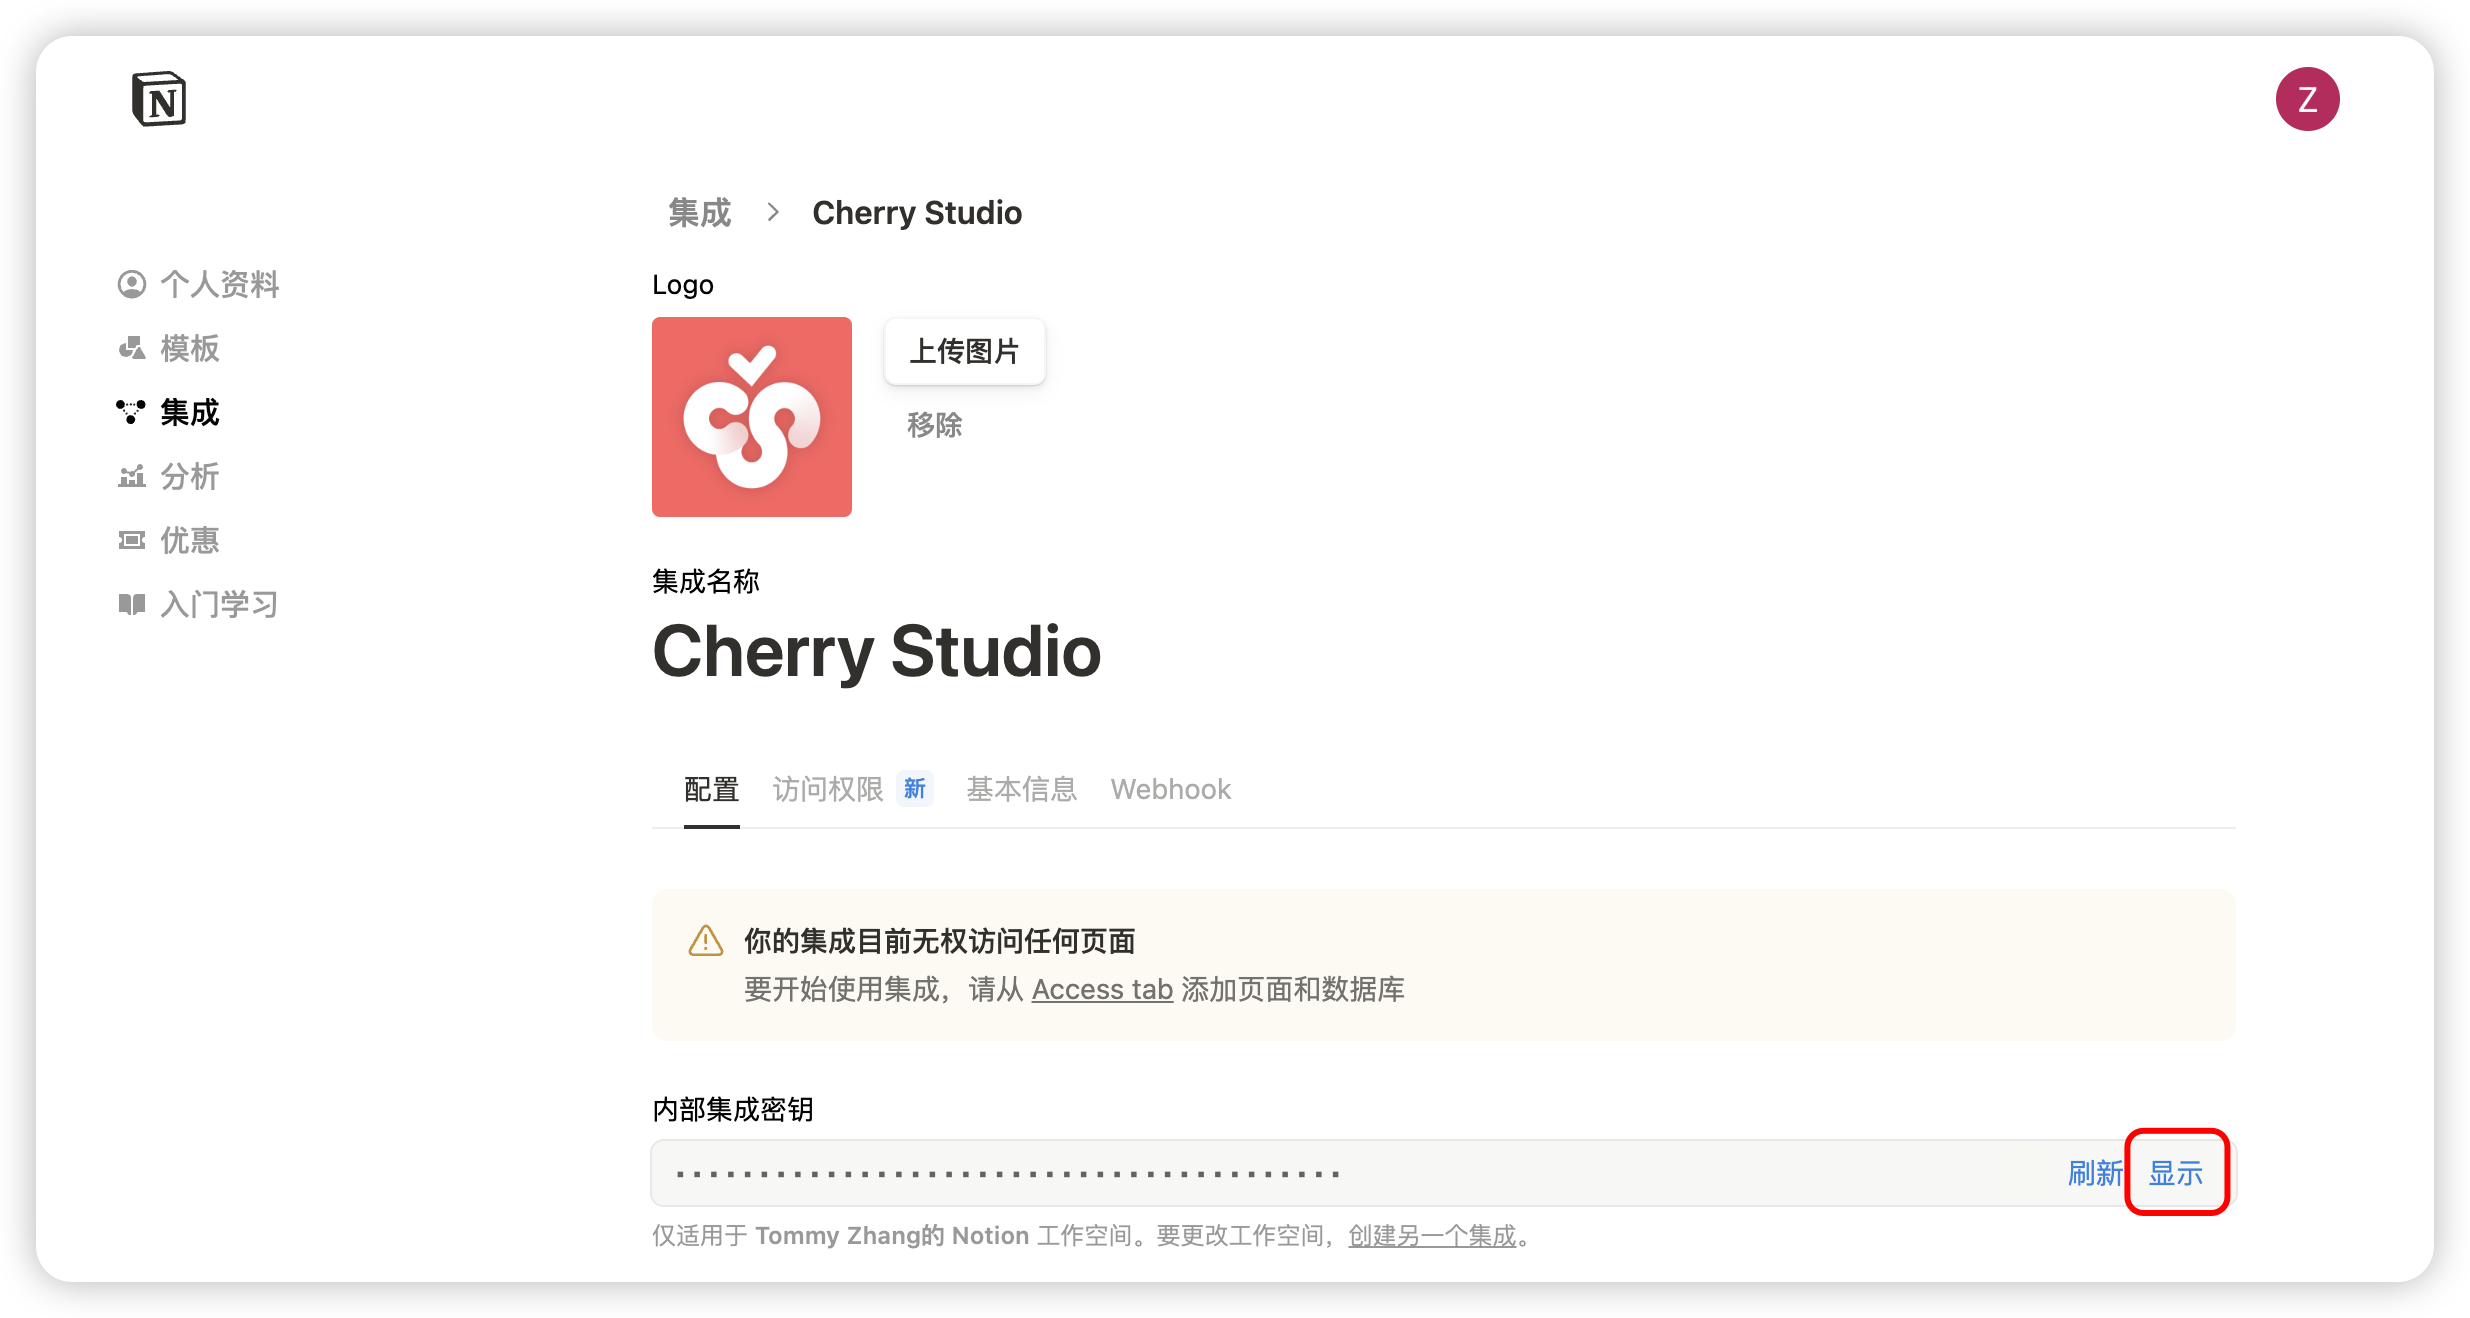
Fill in the app information

Name: Cherry Studio

Type: select the first one

Icon: you can save this image

Step 3

Copy the secret and enter it in Cherry Studio settings

Click Copy Secret
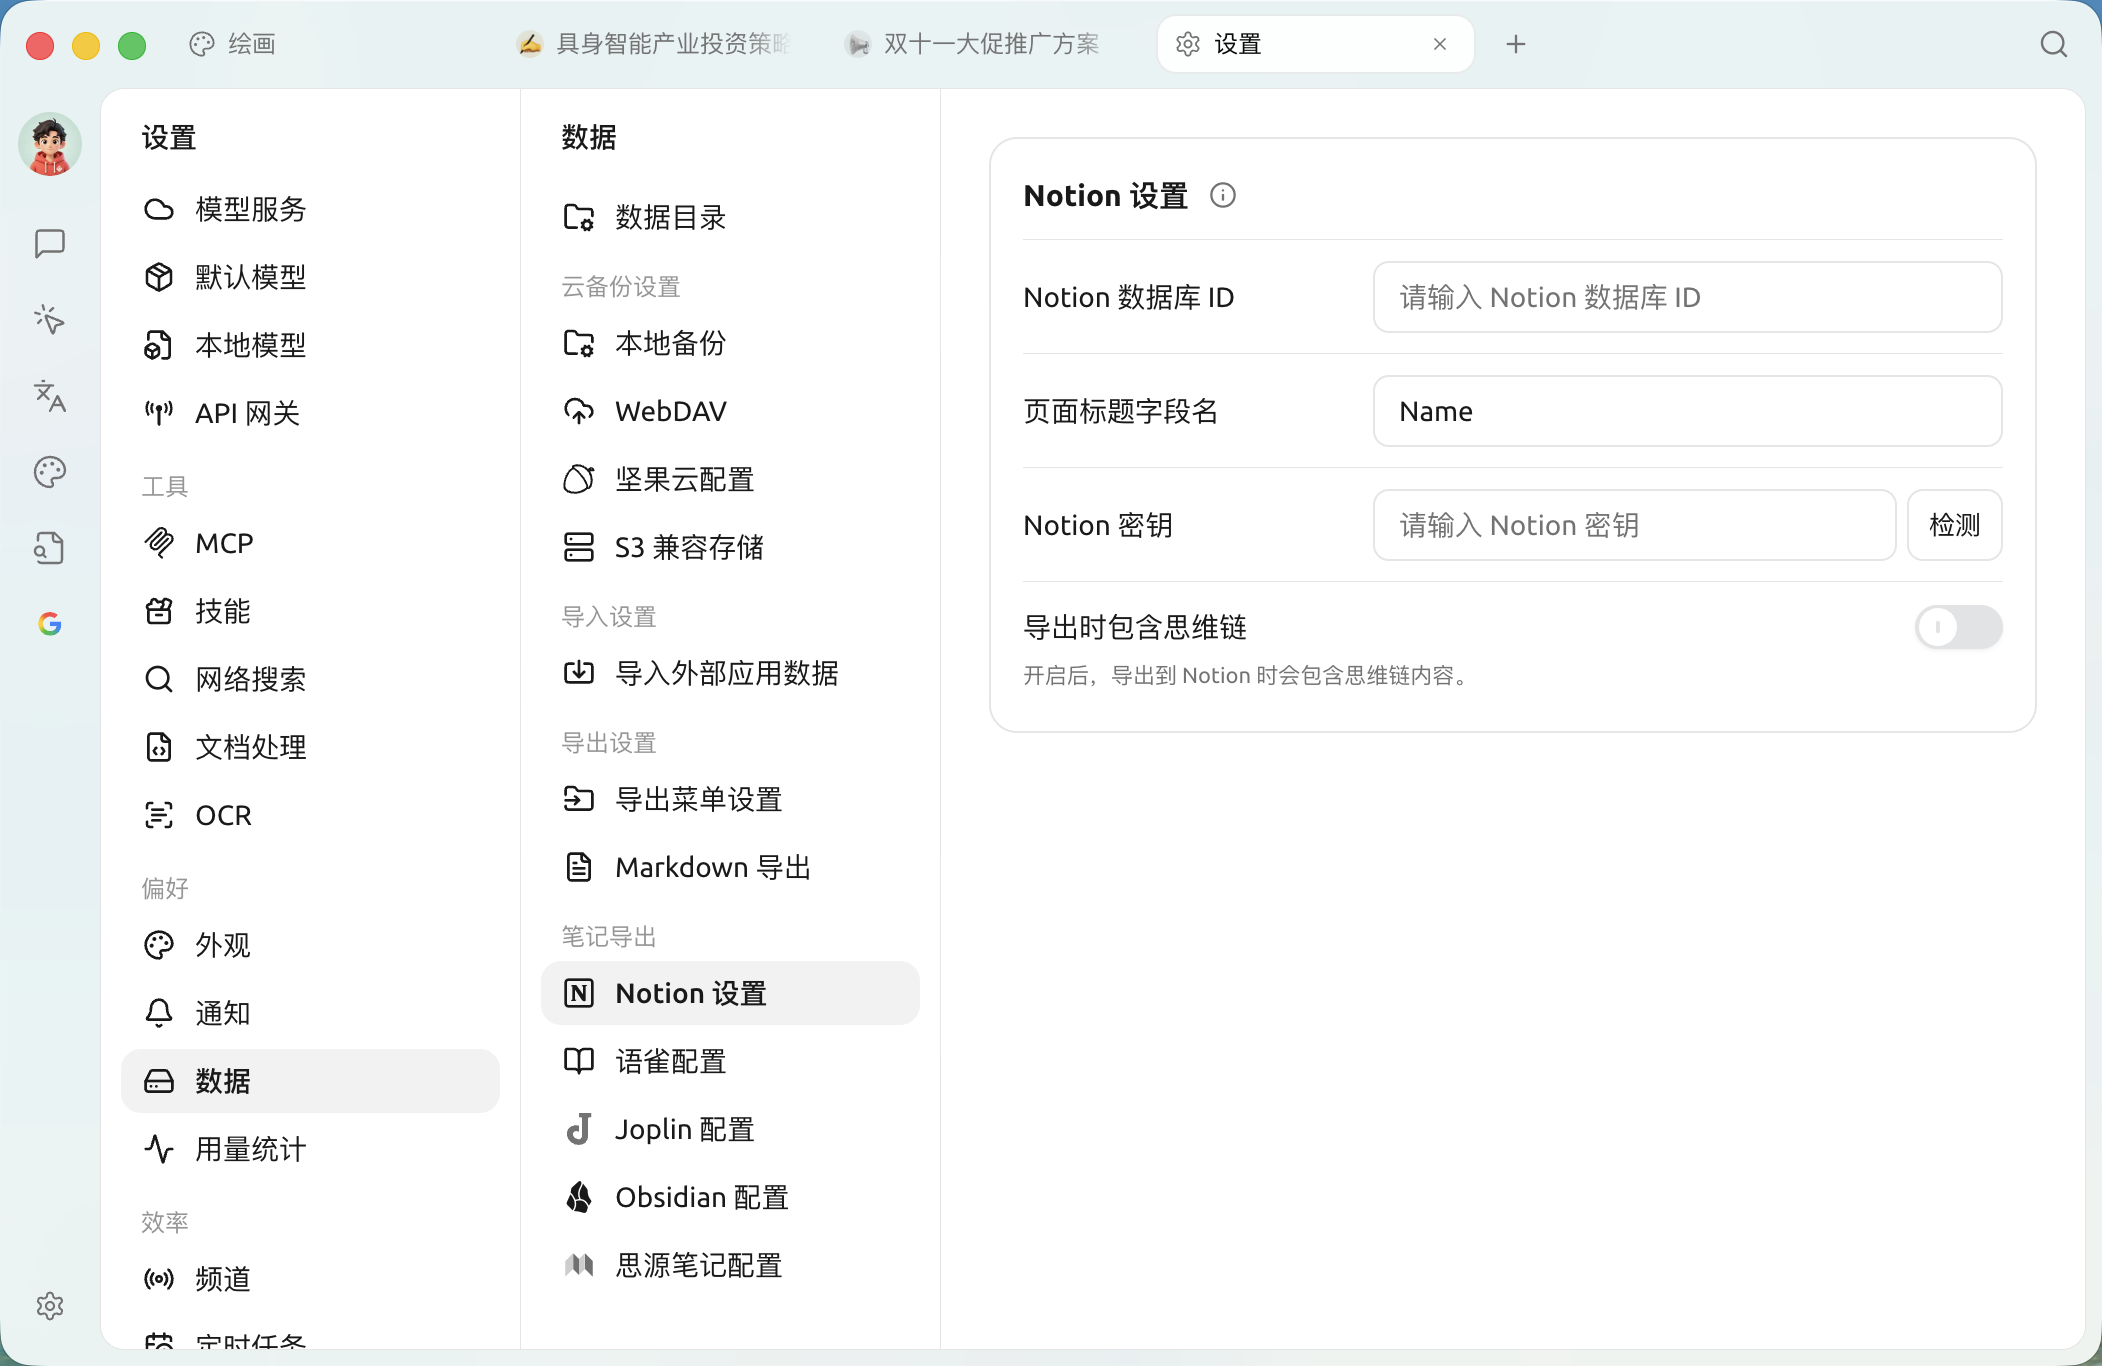
[Settings] → [Data] → [Notion Settings]: fill in the secret / database ID / page title field name on this page
Step 4

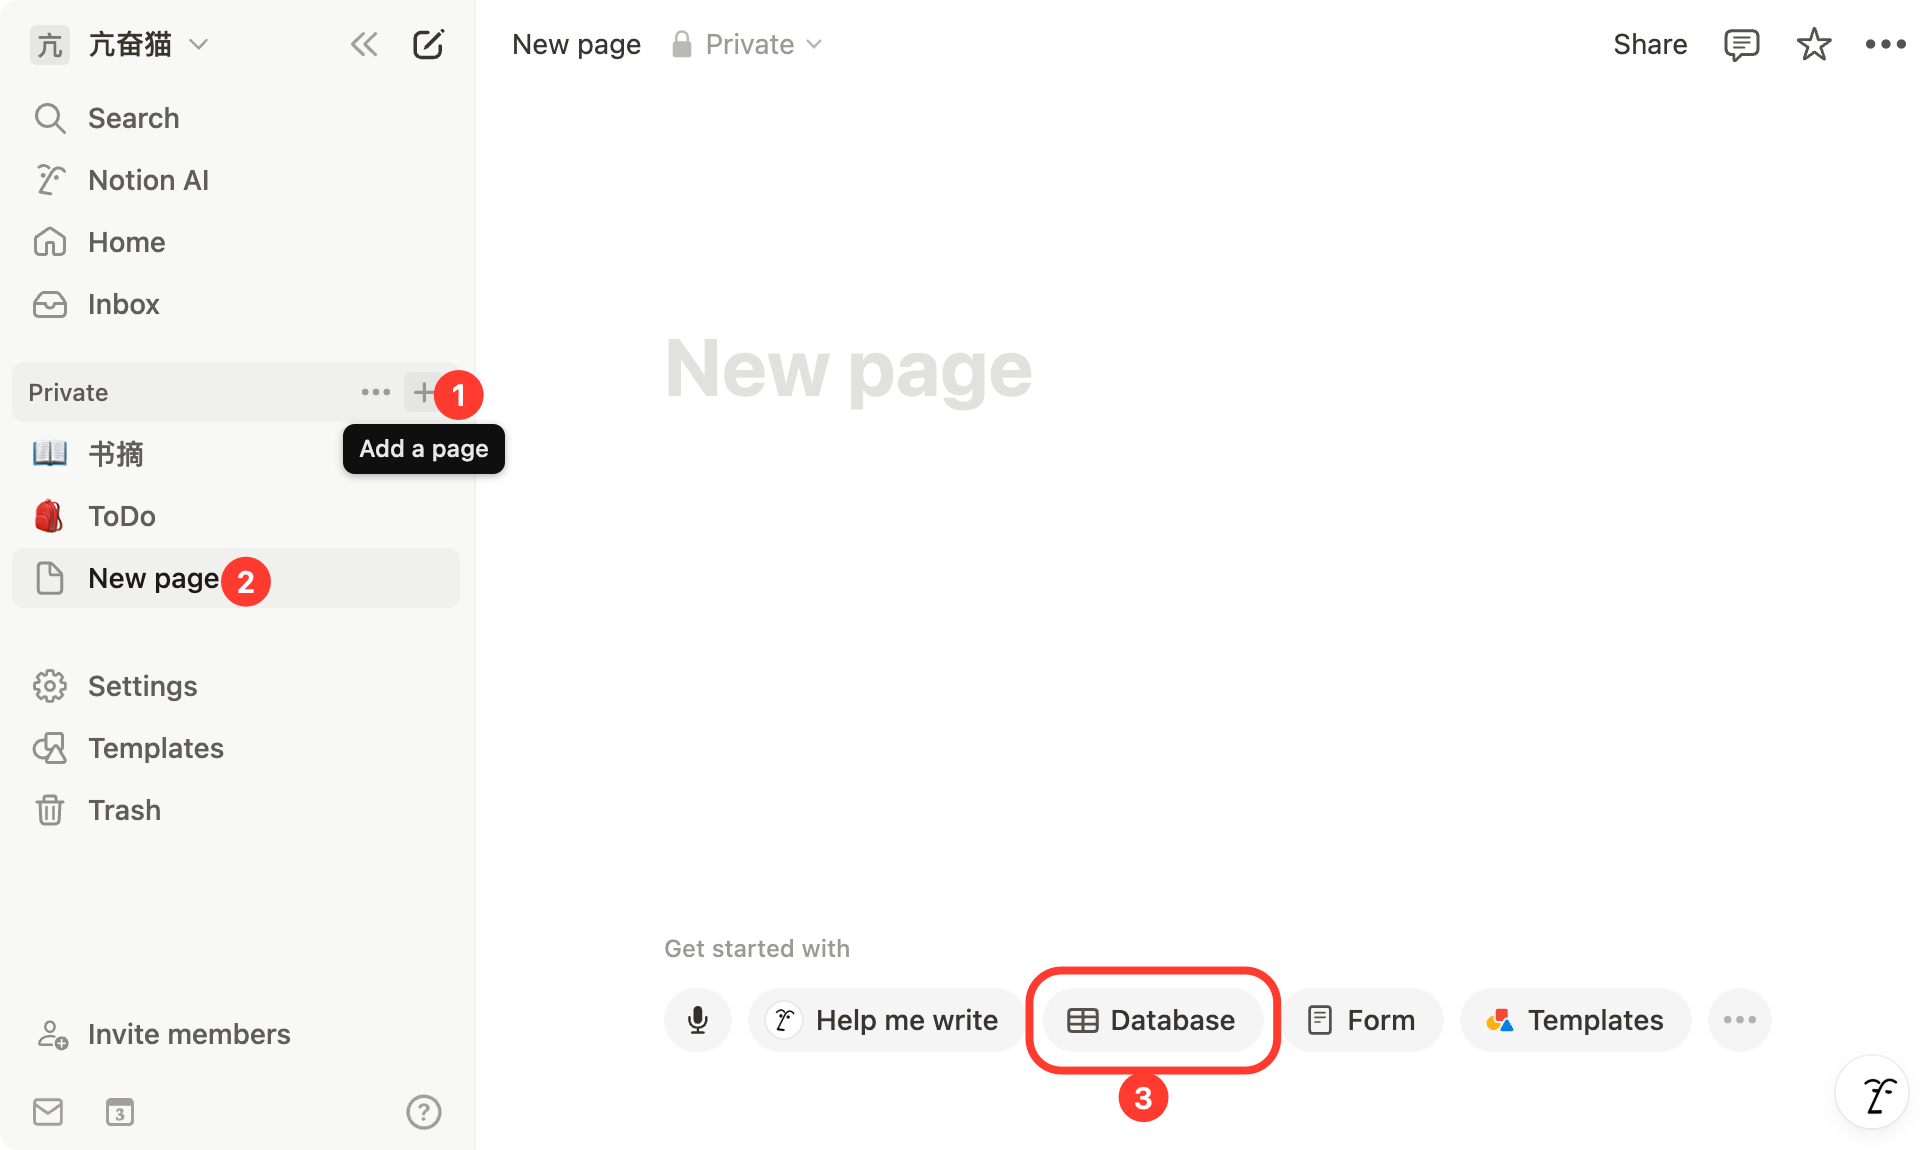
After enabling it Notion On the website, create a new page, select the database type below, enter Cherry Studio as the name, and connect following the illustration

Create a new page and select the database type
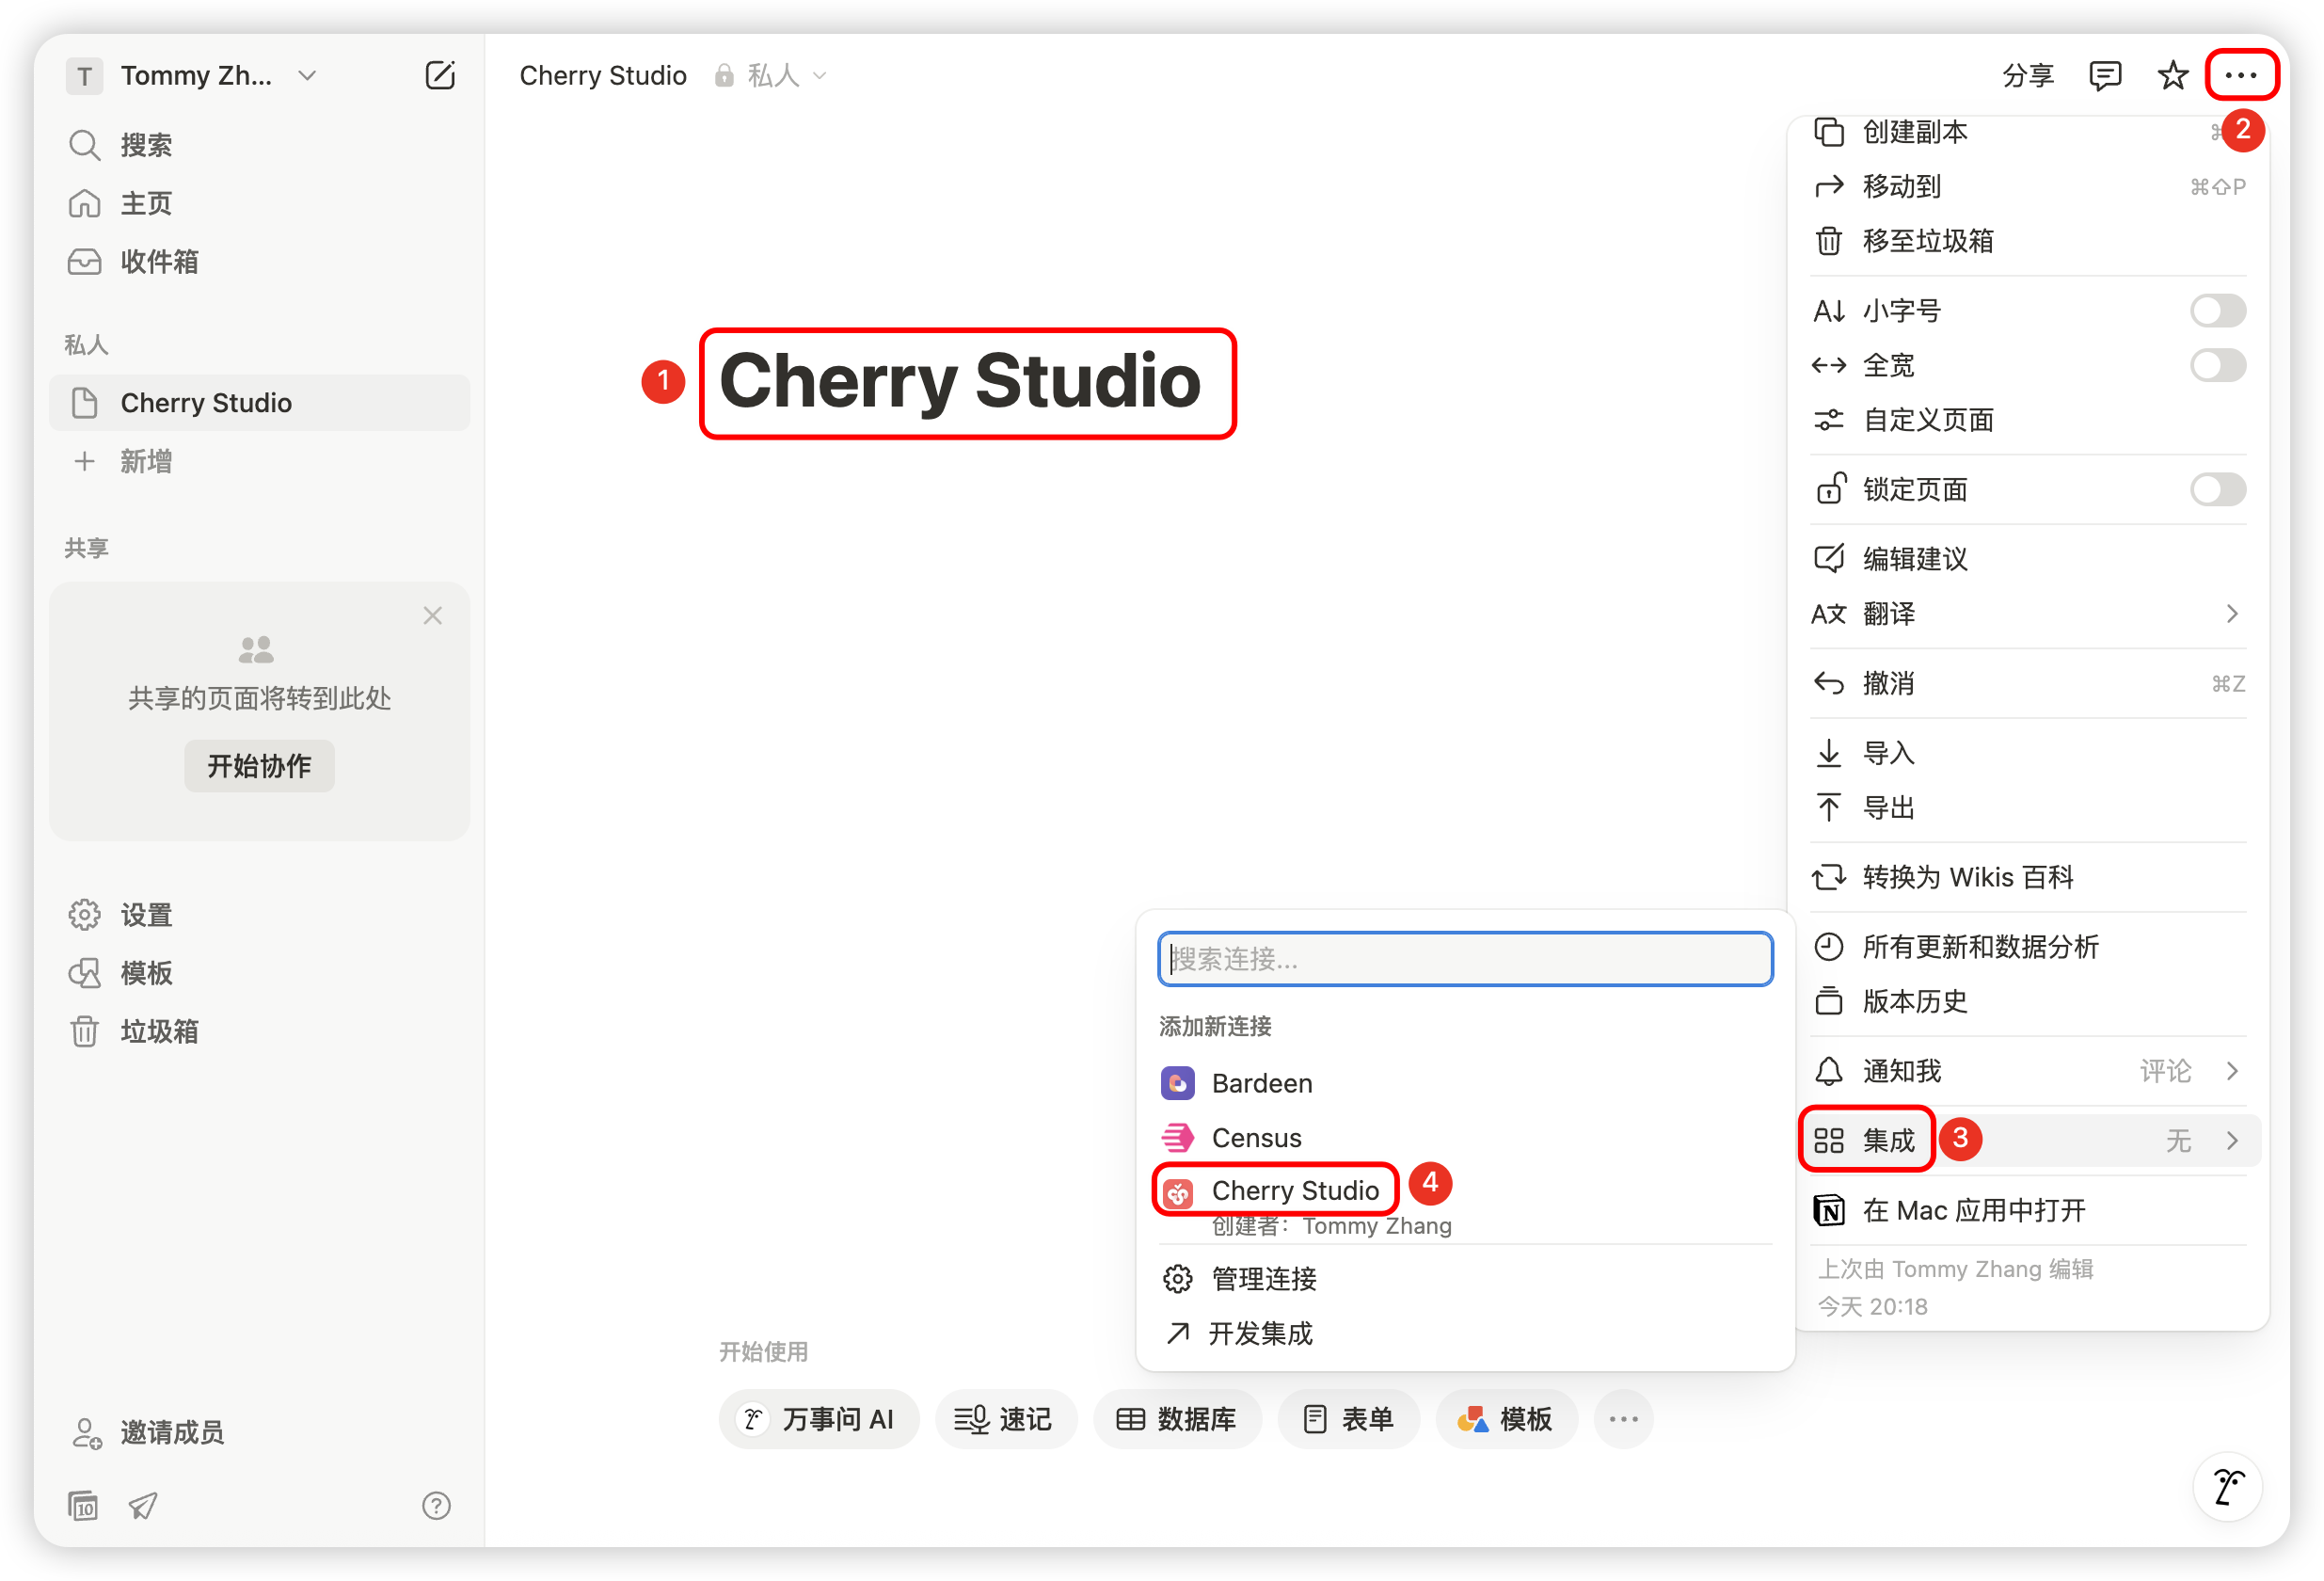
Enter the page name and choose to connect to the app
Step 5

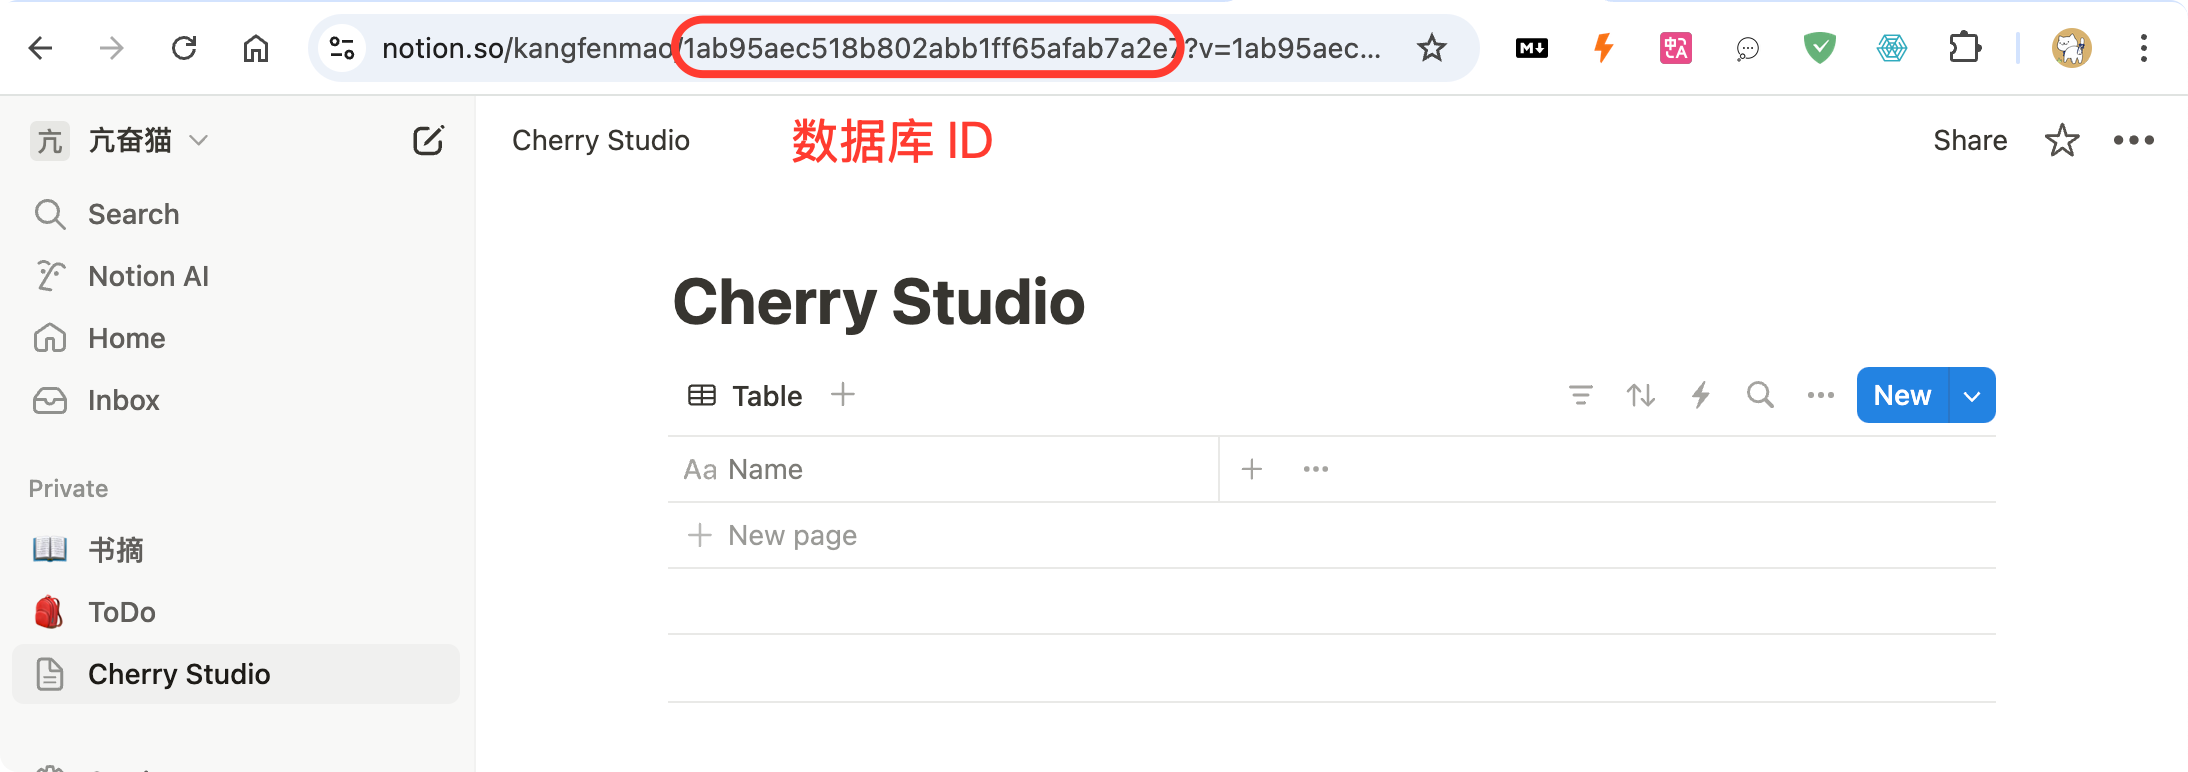
Copy the database ID

If your Notion database URL looks like this:

https://www.notion.so/<long_hash_1>?v=<long_hash_2>

Then the Notion database ID is <long_hash_1> For this part, go back to the Notion settings page above, fill it in, and click Check.

Step 6

Fill in Page title field name:

If your web interface is in English, enter Name If your web interface is in Chinese, enter Name

Step 7

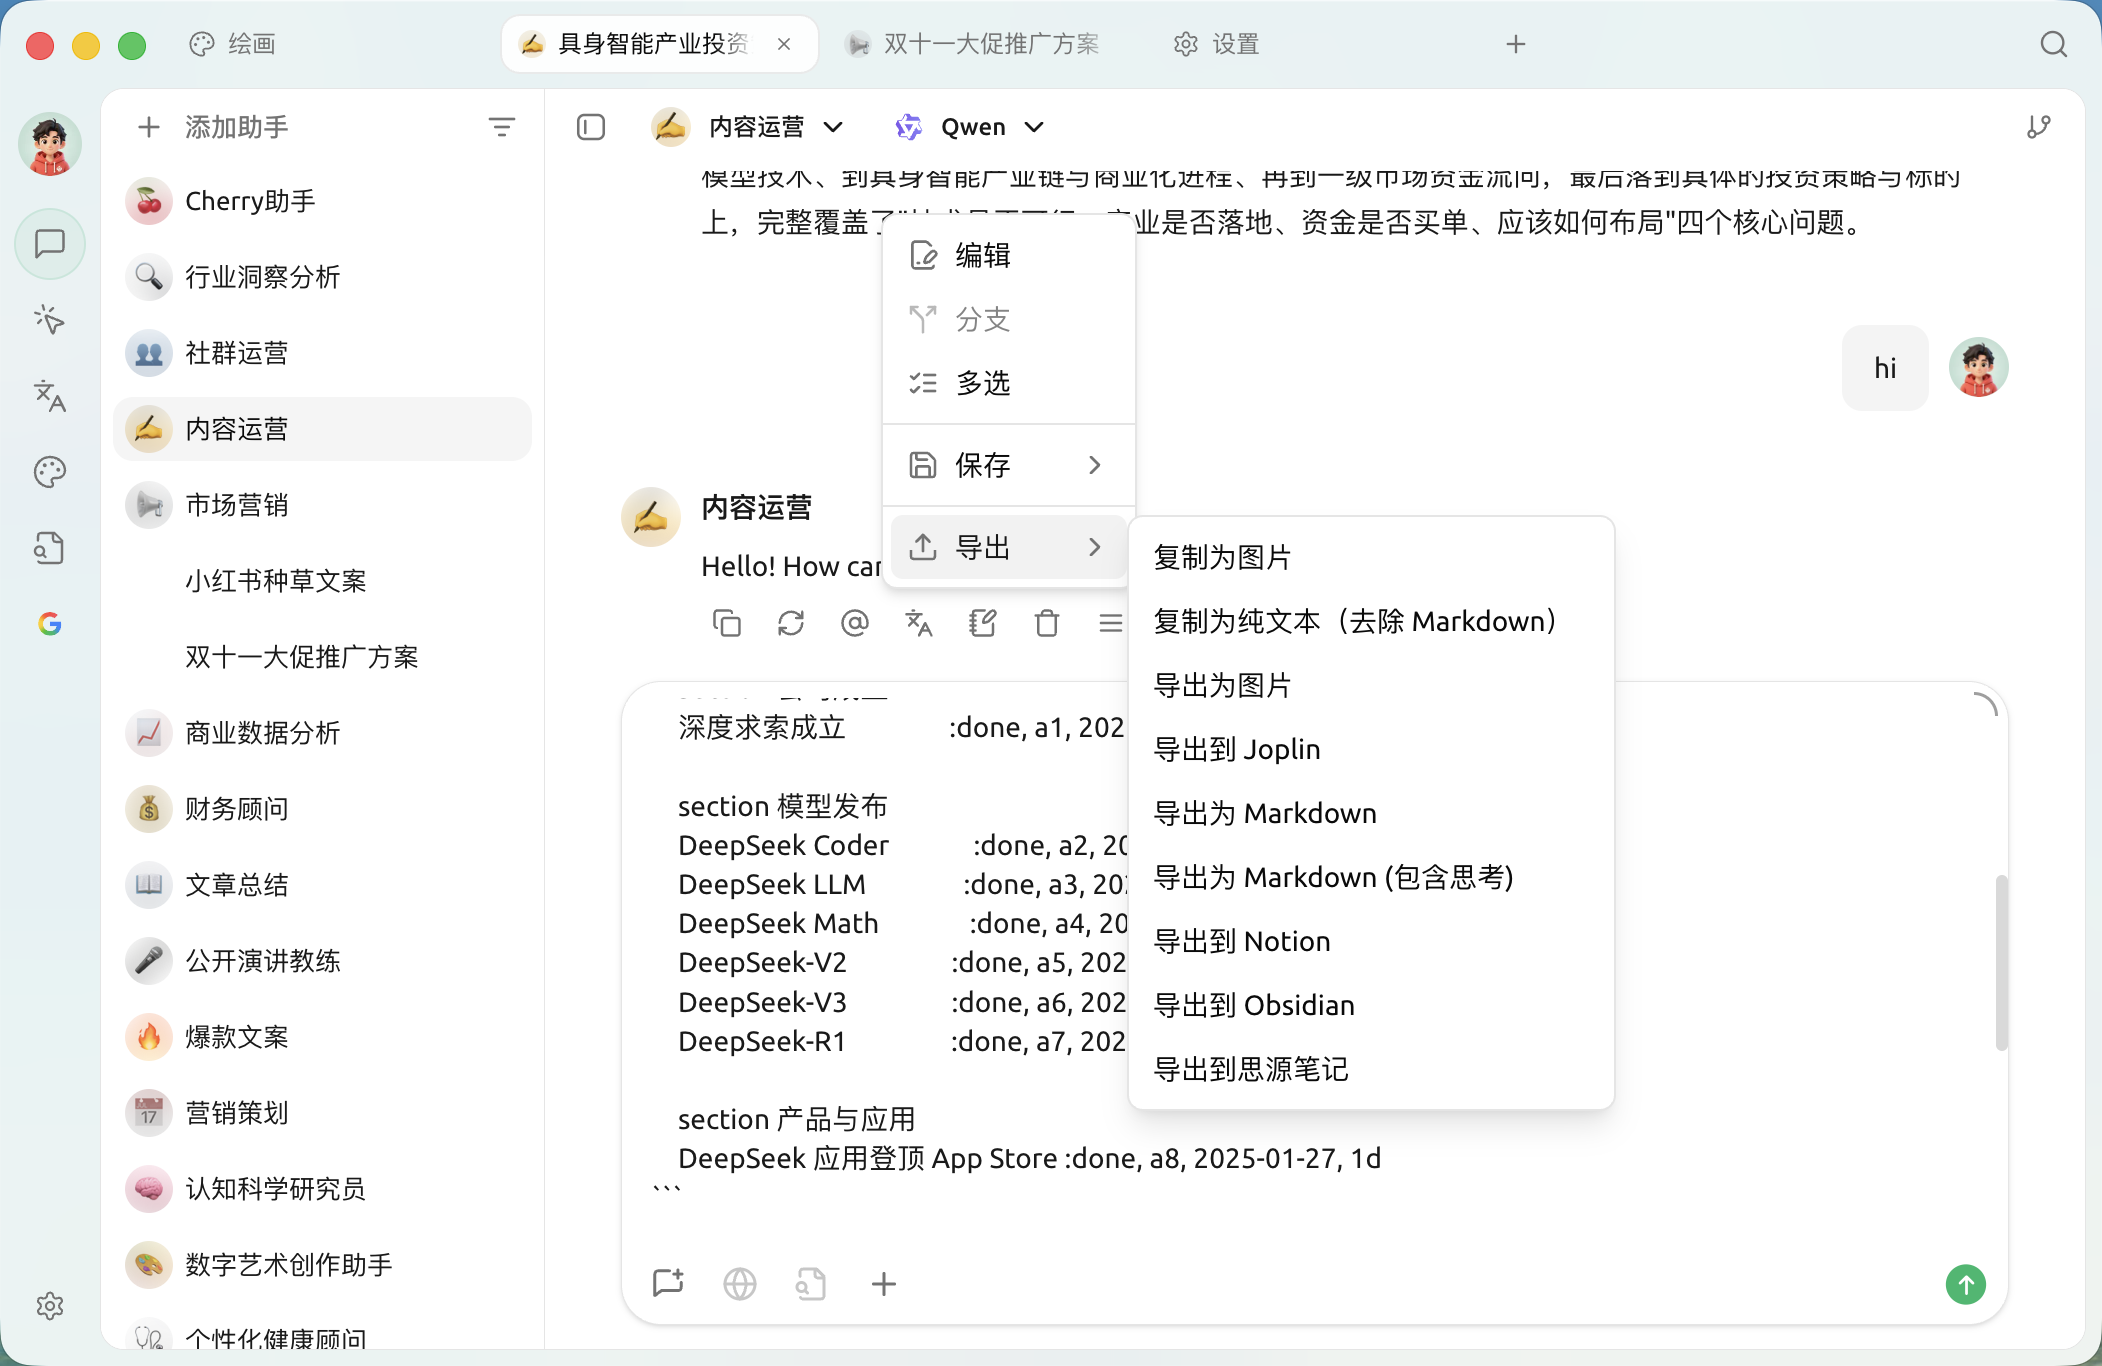
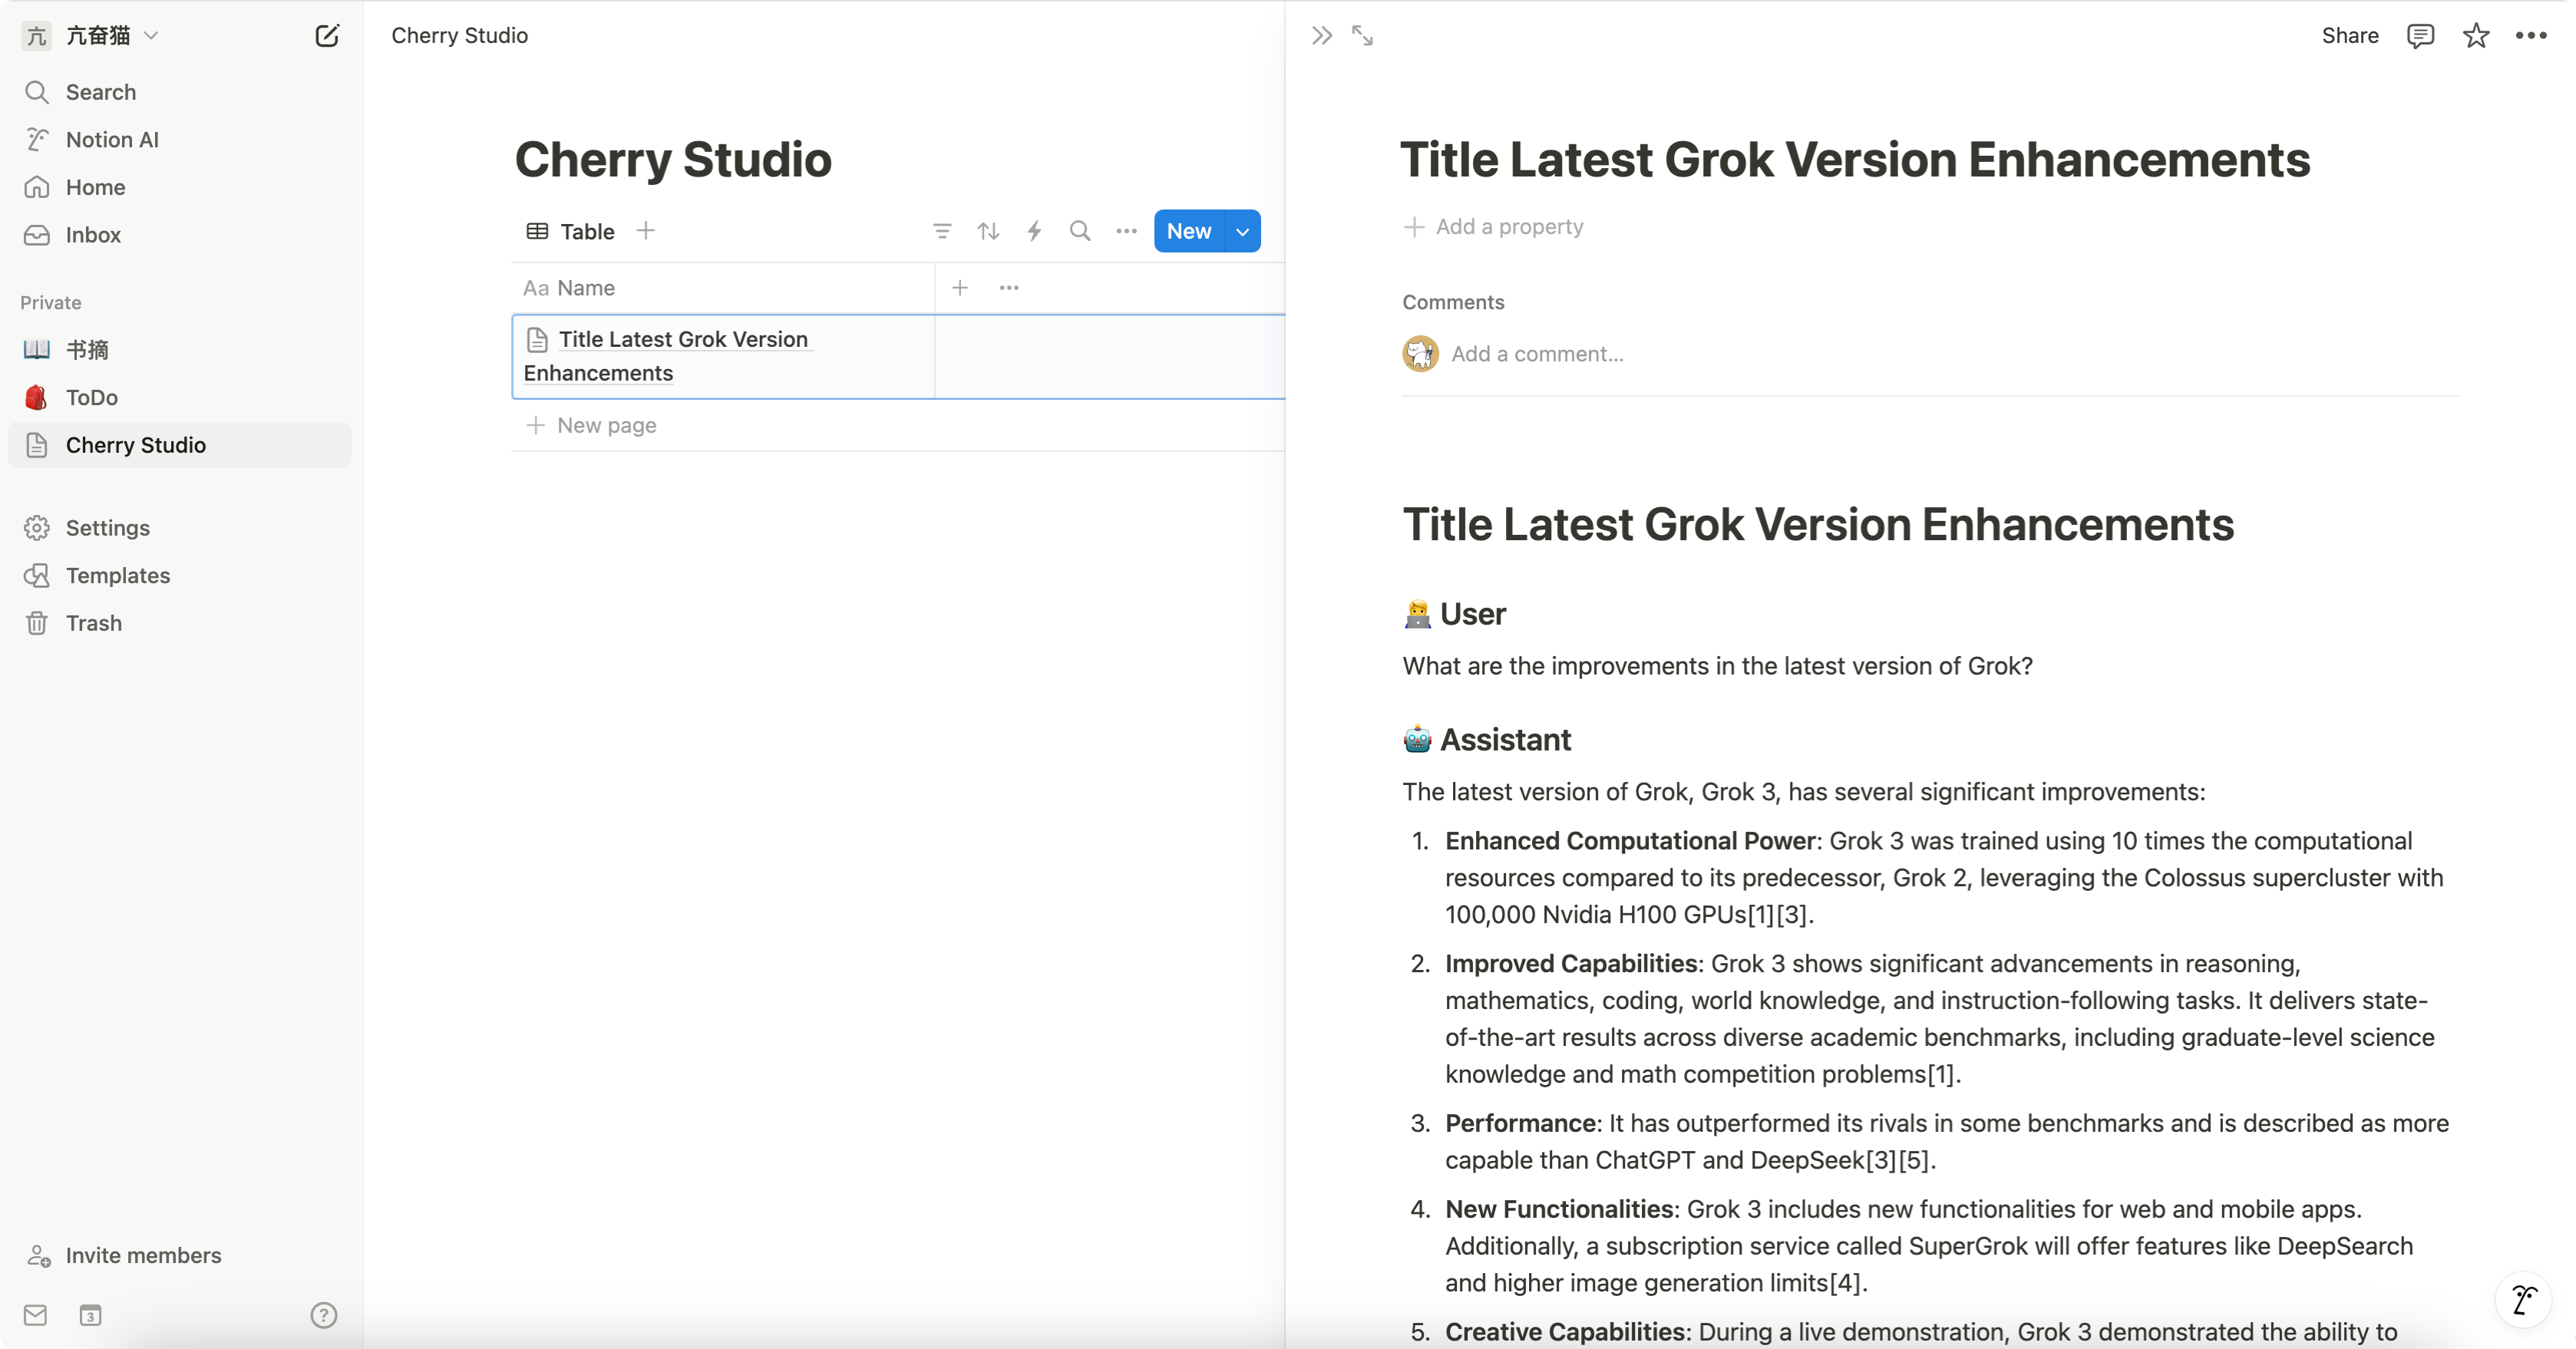
Congratulations, the Notion configuration is complete ✅ Next, you can export Cherry Studio content to your Notion database

Export to Notion
View export result

Get help and submit feedback

If you encounter any questions or bugs during configuration or use, or have suggestions for feature improvements, please refer to the official channels provided in Feedback and Suggestions .

Last updated

Was this helpful?