For the complete documentation index, see llms.txt. This page is also available as Markdown.

Text Selection Assistant

Selection Assistant (Selection Assistant) lets youselect text in any appafterwards, use the floating toolbar to invoke AI for translation, explanation, refinement, summarization, and more, without needing to paste the content back into Cherry Studio.

and Quick Assistant Differences:

  • Quick AssistantUse a global shortcut to summon aproactive inputwindow, where you type your question

  • Selection Assistant: after selecting textfor the selected contenta toolbar pops up, letting you run preset actions with one click

Platform support

  • macOS: fully supported, but on first enable you must grant Accessibility permissions

  • Windows: fully supported, no special permissions required

  • ⚠️ Linux: only fully supported in X11 mode; in Wayland mode the toolbar may not follow the selected text position. You also need to add the current user to the input group (sudo usermod -aG input $USER) to obtain key listening permissions

Enable Selection Assistant

Open Settings → Selection Assistant:

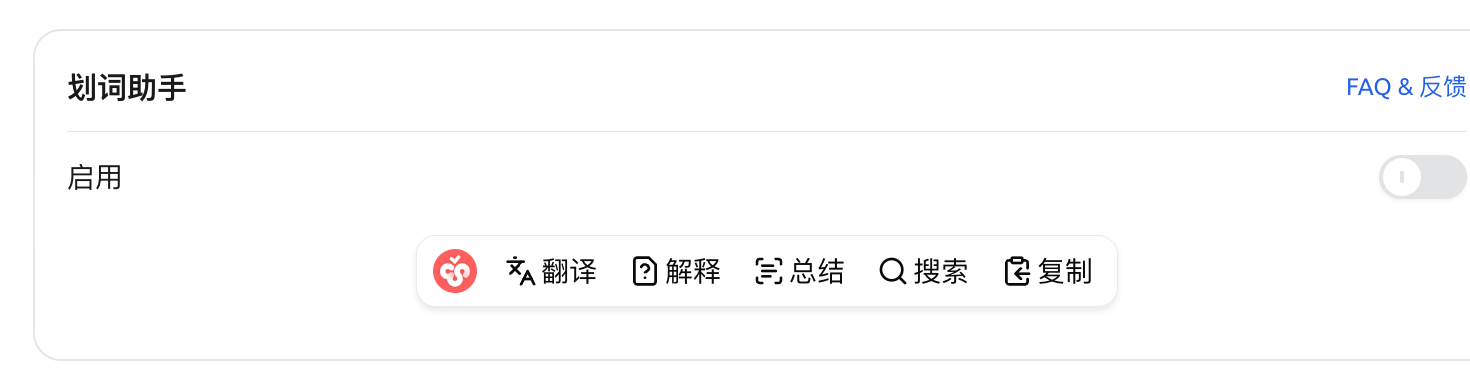
Selection Assistant settings panel
  1. Open Enable toggle

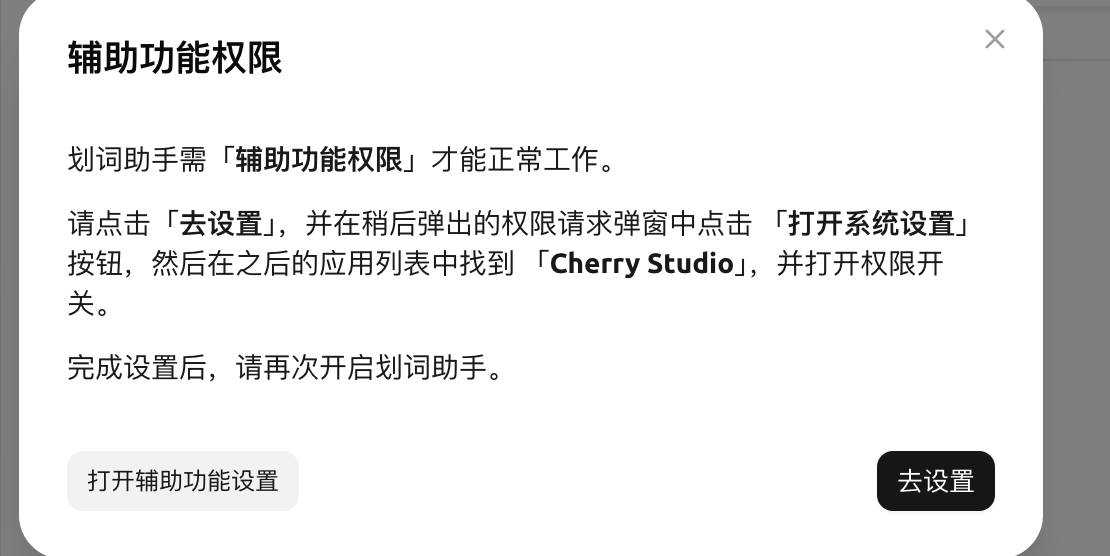
  2. macOS When enabled for the first time, the user will be prompted to request Accessibility permissions:

    Accessibility permission prompt on first enable
    Click Go to Settings → In the system settings that open, find Cherry Studio under “Privacy & Security → Accessibility” and turn on the switch → Return to Cherry Studio and enable it again.

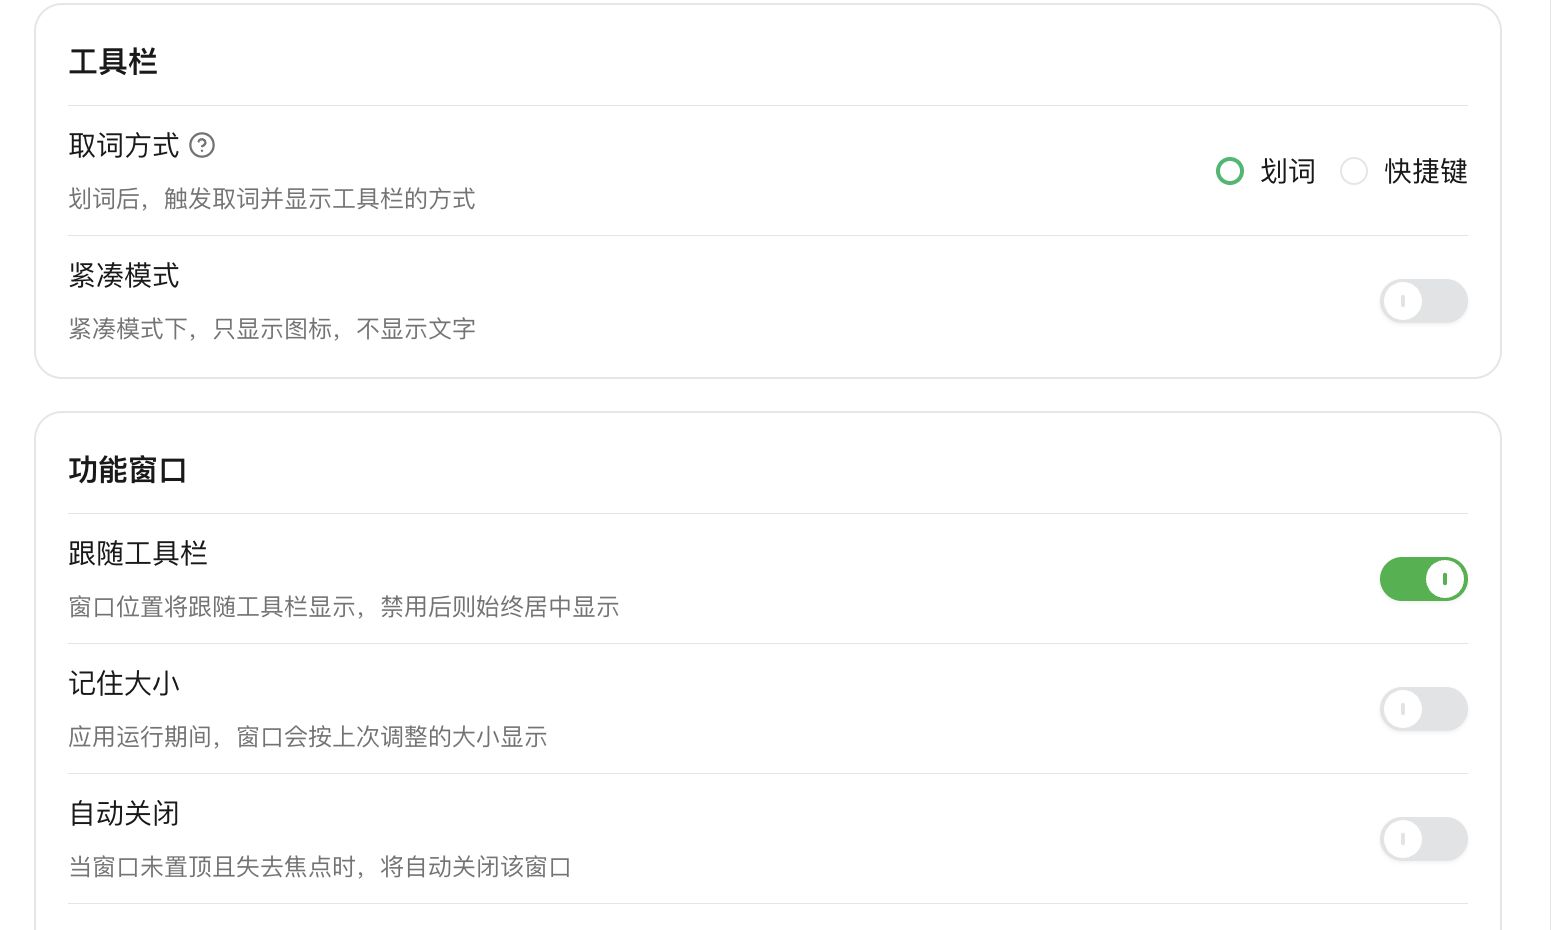
  3. (optional) in Toolbar → Text extraction method choose a trigger method (available options vary by platform):

    • Select text: the toolbar pops up immediately after selecting text (default)

    • Ctrl key(Windows only): after selecting textthen press and hold the Ctrl keyto pop it up (to avoid accidental triggers)

    • Shortcuts: after selecting text, press the shortcut to pop it up; change the shortcut in Settings → Shortcuts change it there

Settings panel after enabling: text extraction method / compact mode / follow toolbar...
Built-in actions

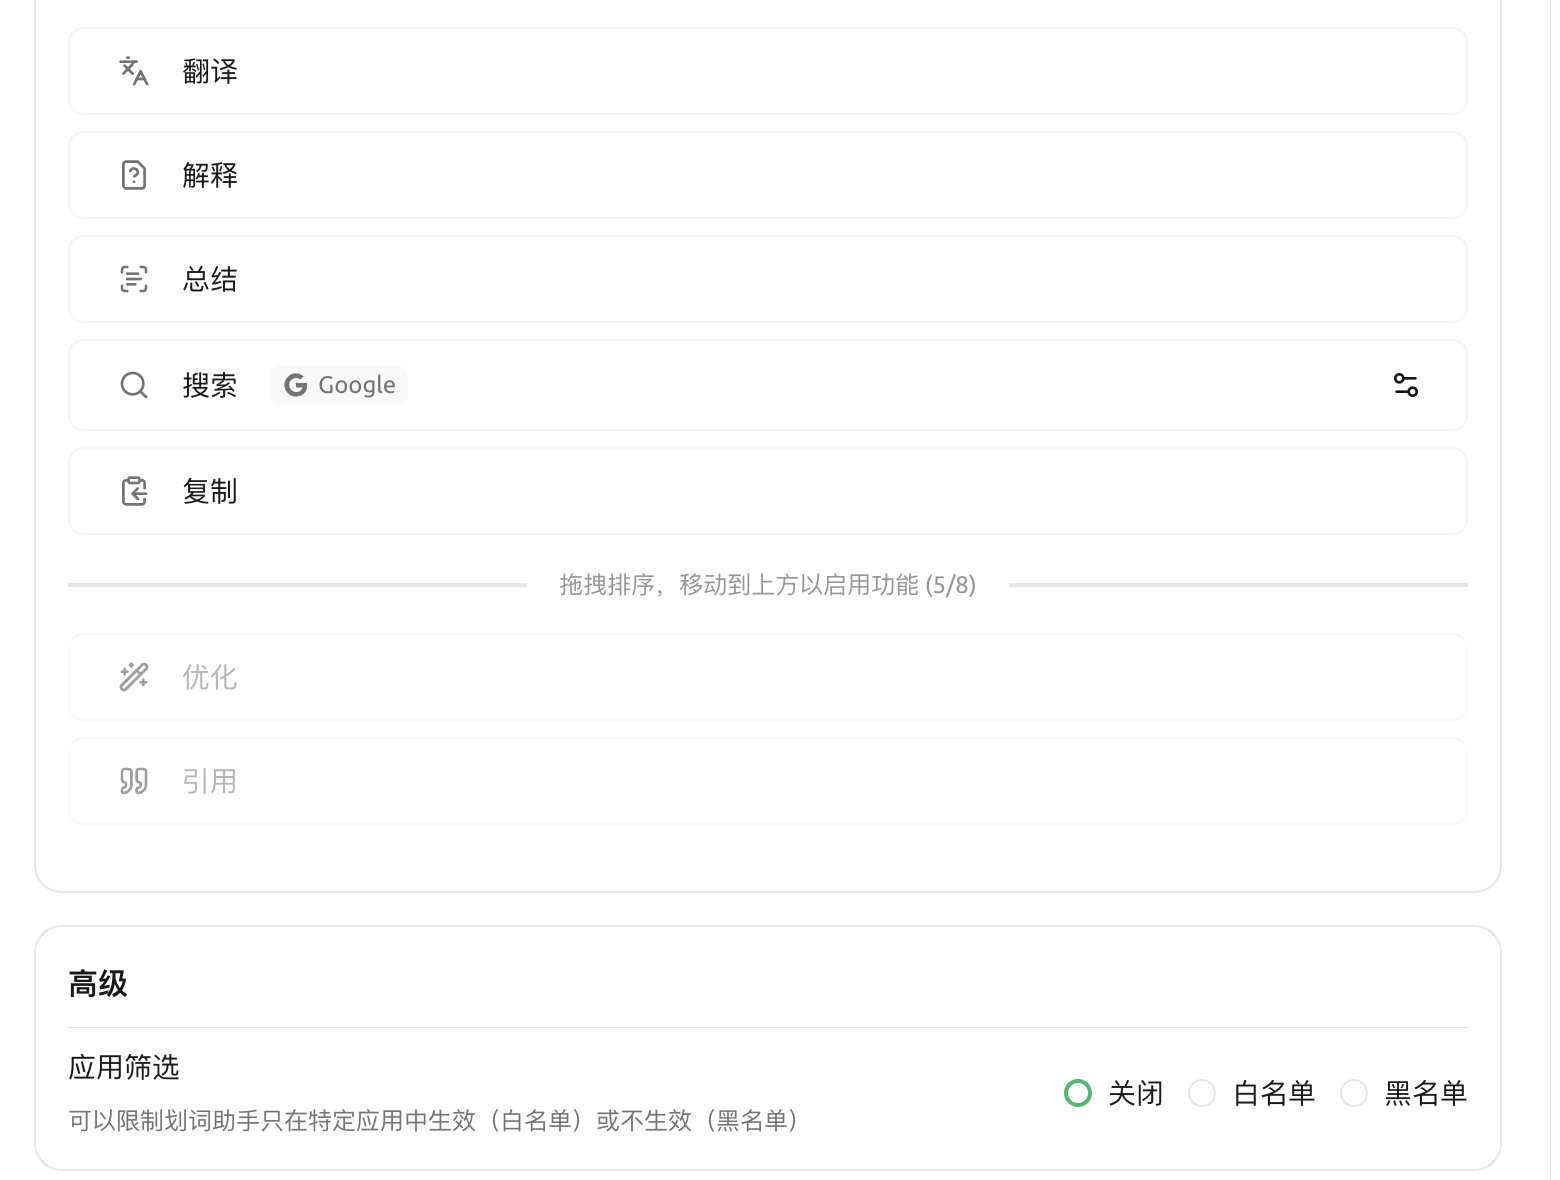
Selection Assistant provides 7 built-in actions,with 5 enabled by default: Translate / Explain / Summarize / Search / Copy. The Cherry icon on the left side of the toolbar is not an action button—it is only the toolbar drag handle; press and hold it to move the entire toolbar.

Action
Enabled by default
Purpose

Translate

Smart translation: prioritize translation into the target language; if it is already in the target language, translate into the fallback language

Explain

Have AI explain this content

Summarize

Have AI summarize the selected content in one paragraph

Search

Use the selected text to query a search engine (Google by default; change it via ⋯ on the right of each item)

Copy

Copy selected text

Refine

Pending enablement

Have AI rewrite it to sound smoother / more professional; drag it into the enabled area in settings

Quote

Pending enablement

Send the selected text to the current conversation as a quote; drag it into the enabled area in settings

In the settings panel’s “Features” section: enabled items are at the top, and drag items from the temporary area below to the top to enable them

Custom actions

In the Settings → Selection Assistant → Features you can:

  • editthe prompt for built-in actions

  • addcustom actions (name + prompt + default model)

  • dragto adjust the order of actions in the toolbar

  • Drag infrequently used actions to the temporary area below to “disable” them

Toolbar / result window appearance

Toolbar:

  • Compact mode: show icons only, no text, to save screen space

Result window (feature window section):

  • Follow toolbar: the window pops up next to the toolbar (on by default); when off, it is always centered

  • Remember size: the window size you manually adjusted this time will be kept next time

  • Auto close: click outside the window to close it

  • Always on top: always floats above other applications

  • Transparency: adjustable from 20% to 100%

Search engines

The built-in “Search” action in Selection Assistant can use preset engines (Google, Bing, DuckDuckGo, etc.). The configuration entry is in Settings → Selection Assistant → Features: find Search this item, click the gear icon on the right end of the row to open the “Search Engine” dialog, where you can choose from presets or add a custom engine; use {{queryString}} to indicate the search term position.

Application filtering (advanced)

can be set in Settings → Selection Assistant → Advanced → Application filtering configured in blacklist / whitelist, so Selection Assistant only takes effect in specified apps (whitelist) or does not pop up in specified apps (blacklist).

  • macOS: enter the app’s Bundle ID (e.g. com.google.Chrome,com.apple.mail)

  • Windows: enter the app’s executable filename (e.g. chrome.exe,Cherry Studio.exe)

Model used

Selection Assistant uses by default global default chat model, and you can also specify a separate model for each action.

Tips and tricks

  • If the toolbar does not appear on macOS, check whether System Settings → Privacy & Security → Accessibility has Cherry Studio checked

  • The toolbar pops up too often because text is selected by accident? Switch to Ctrl key trigger mode

  • Toolbar icons take up too much space? Turn on Compact mode

  • Want to do chained actions like “read aloud directly after translation”? Copy the “Translate” result and then call Quick Assistant Continue processing


💡 Get help and submit feedback

If you encounter any questions, bugs, or have suggestions for feature improvements during configuration or use, please refer to Feedback and Suggestions the official channels provided there.

Last updated

Was this helpful?