For the complete documentation index, see llms.txt. This page is also available as Markdown.

Notes

Notes is the built-in Markdown editor in Cherry Studio, convenient for organizing ideas outside of AI conversations, saving interim outputs, and further processing with AI and knowledge base capabilities.

Open Notes

Click [Notes] in the top tab bar, or click the [Notes] app icon in the [Launcher].

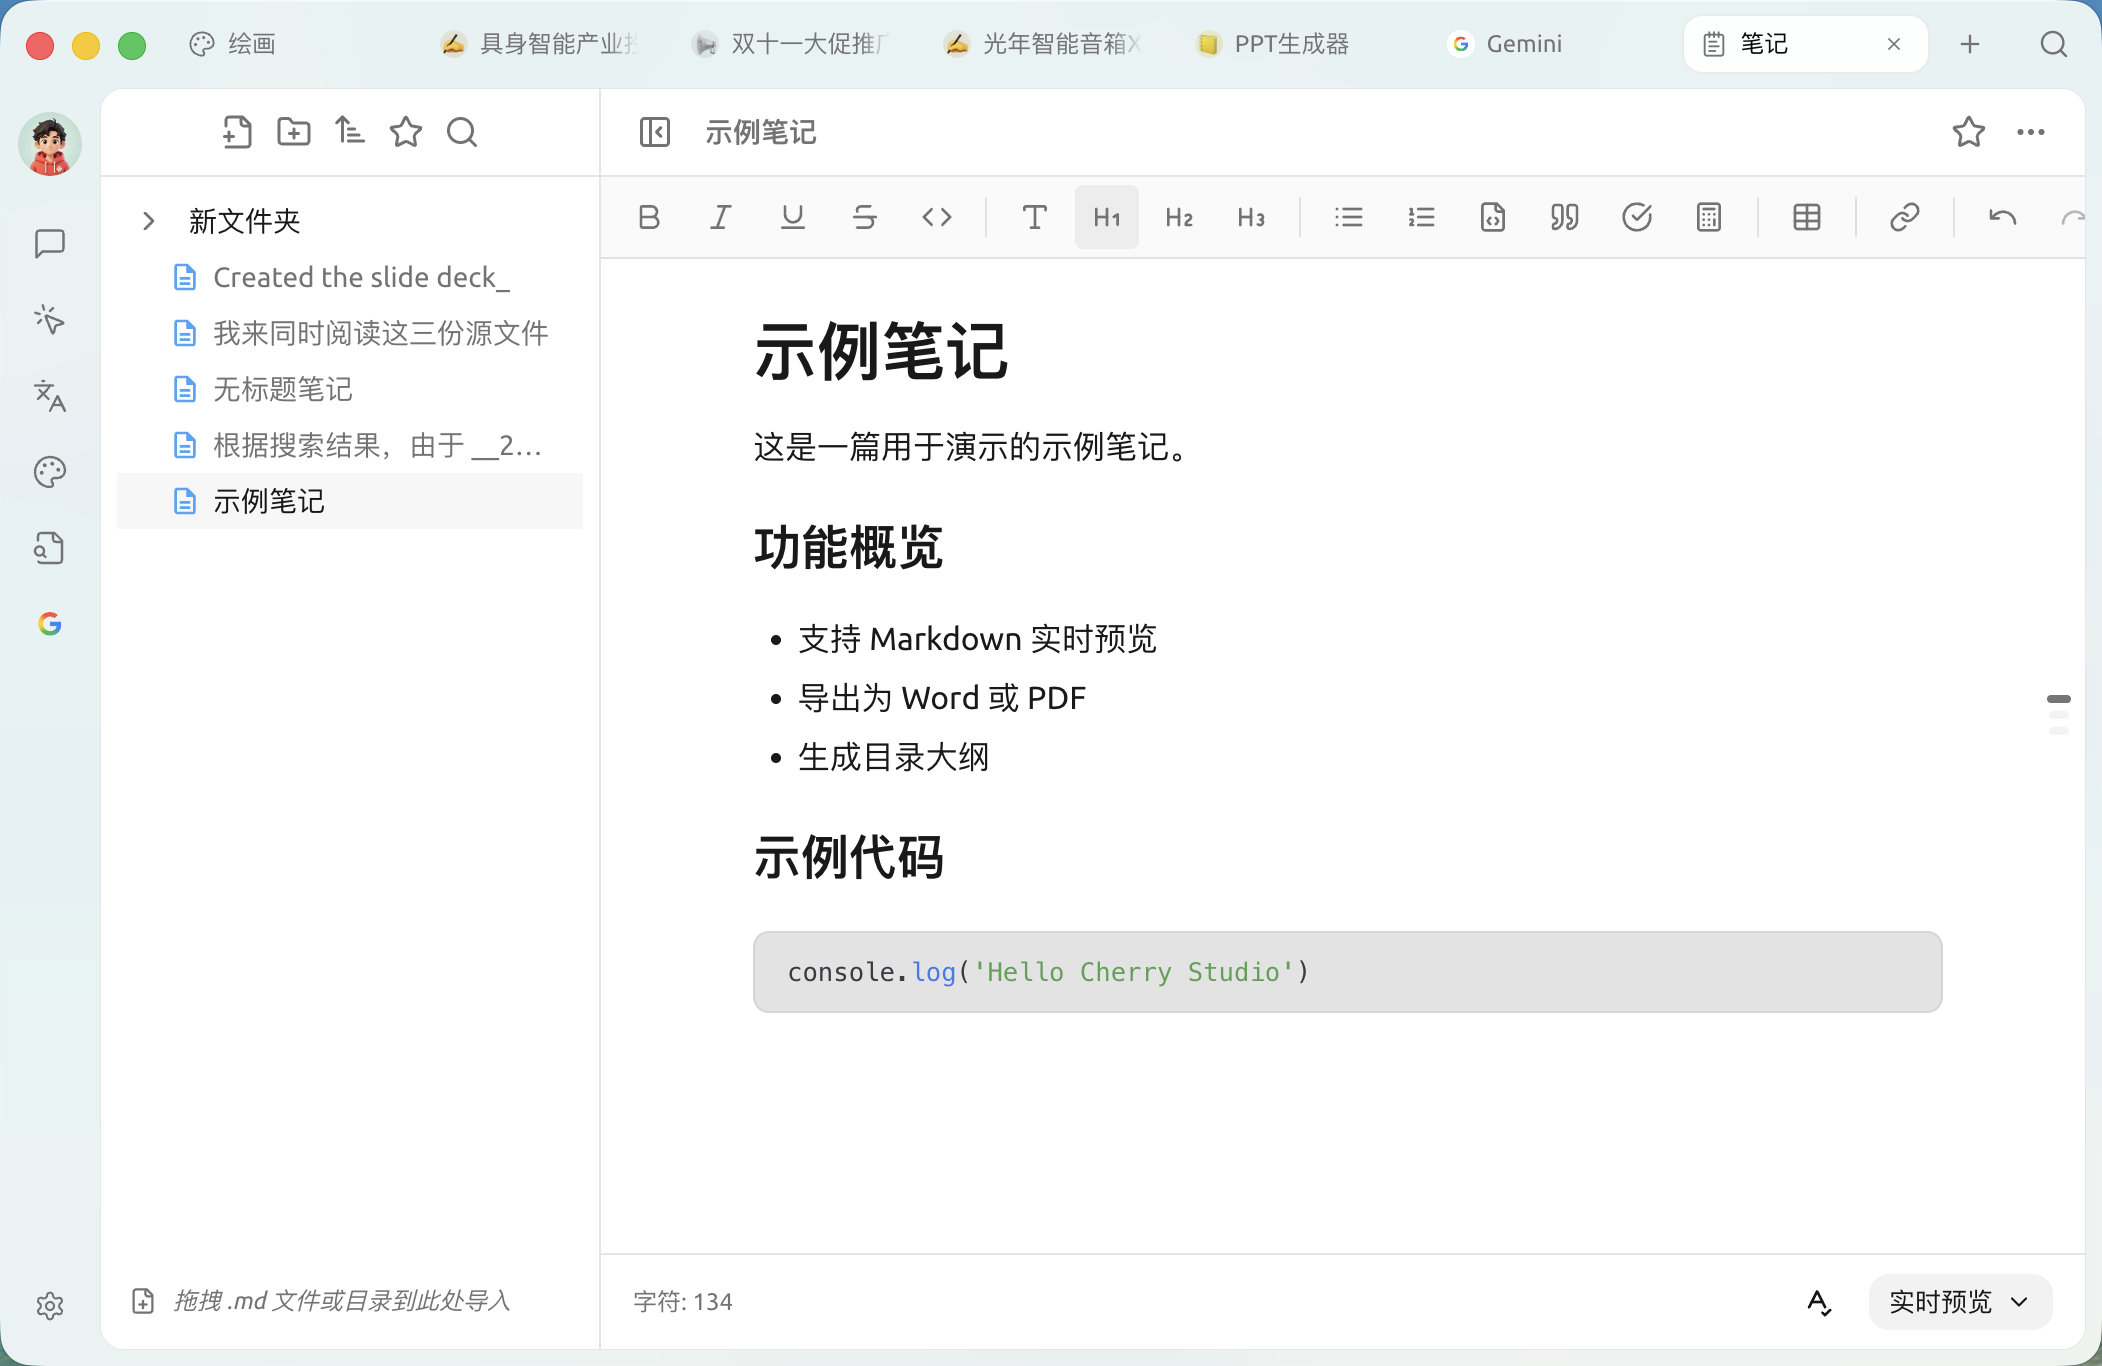
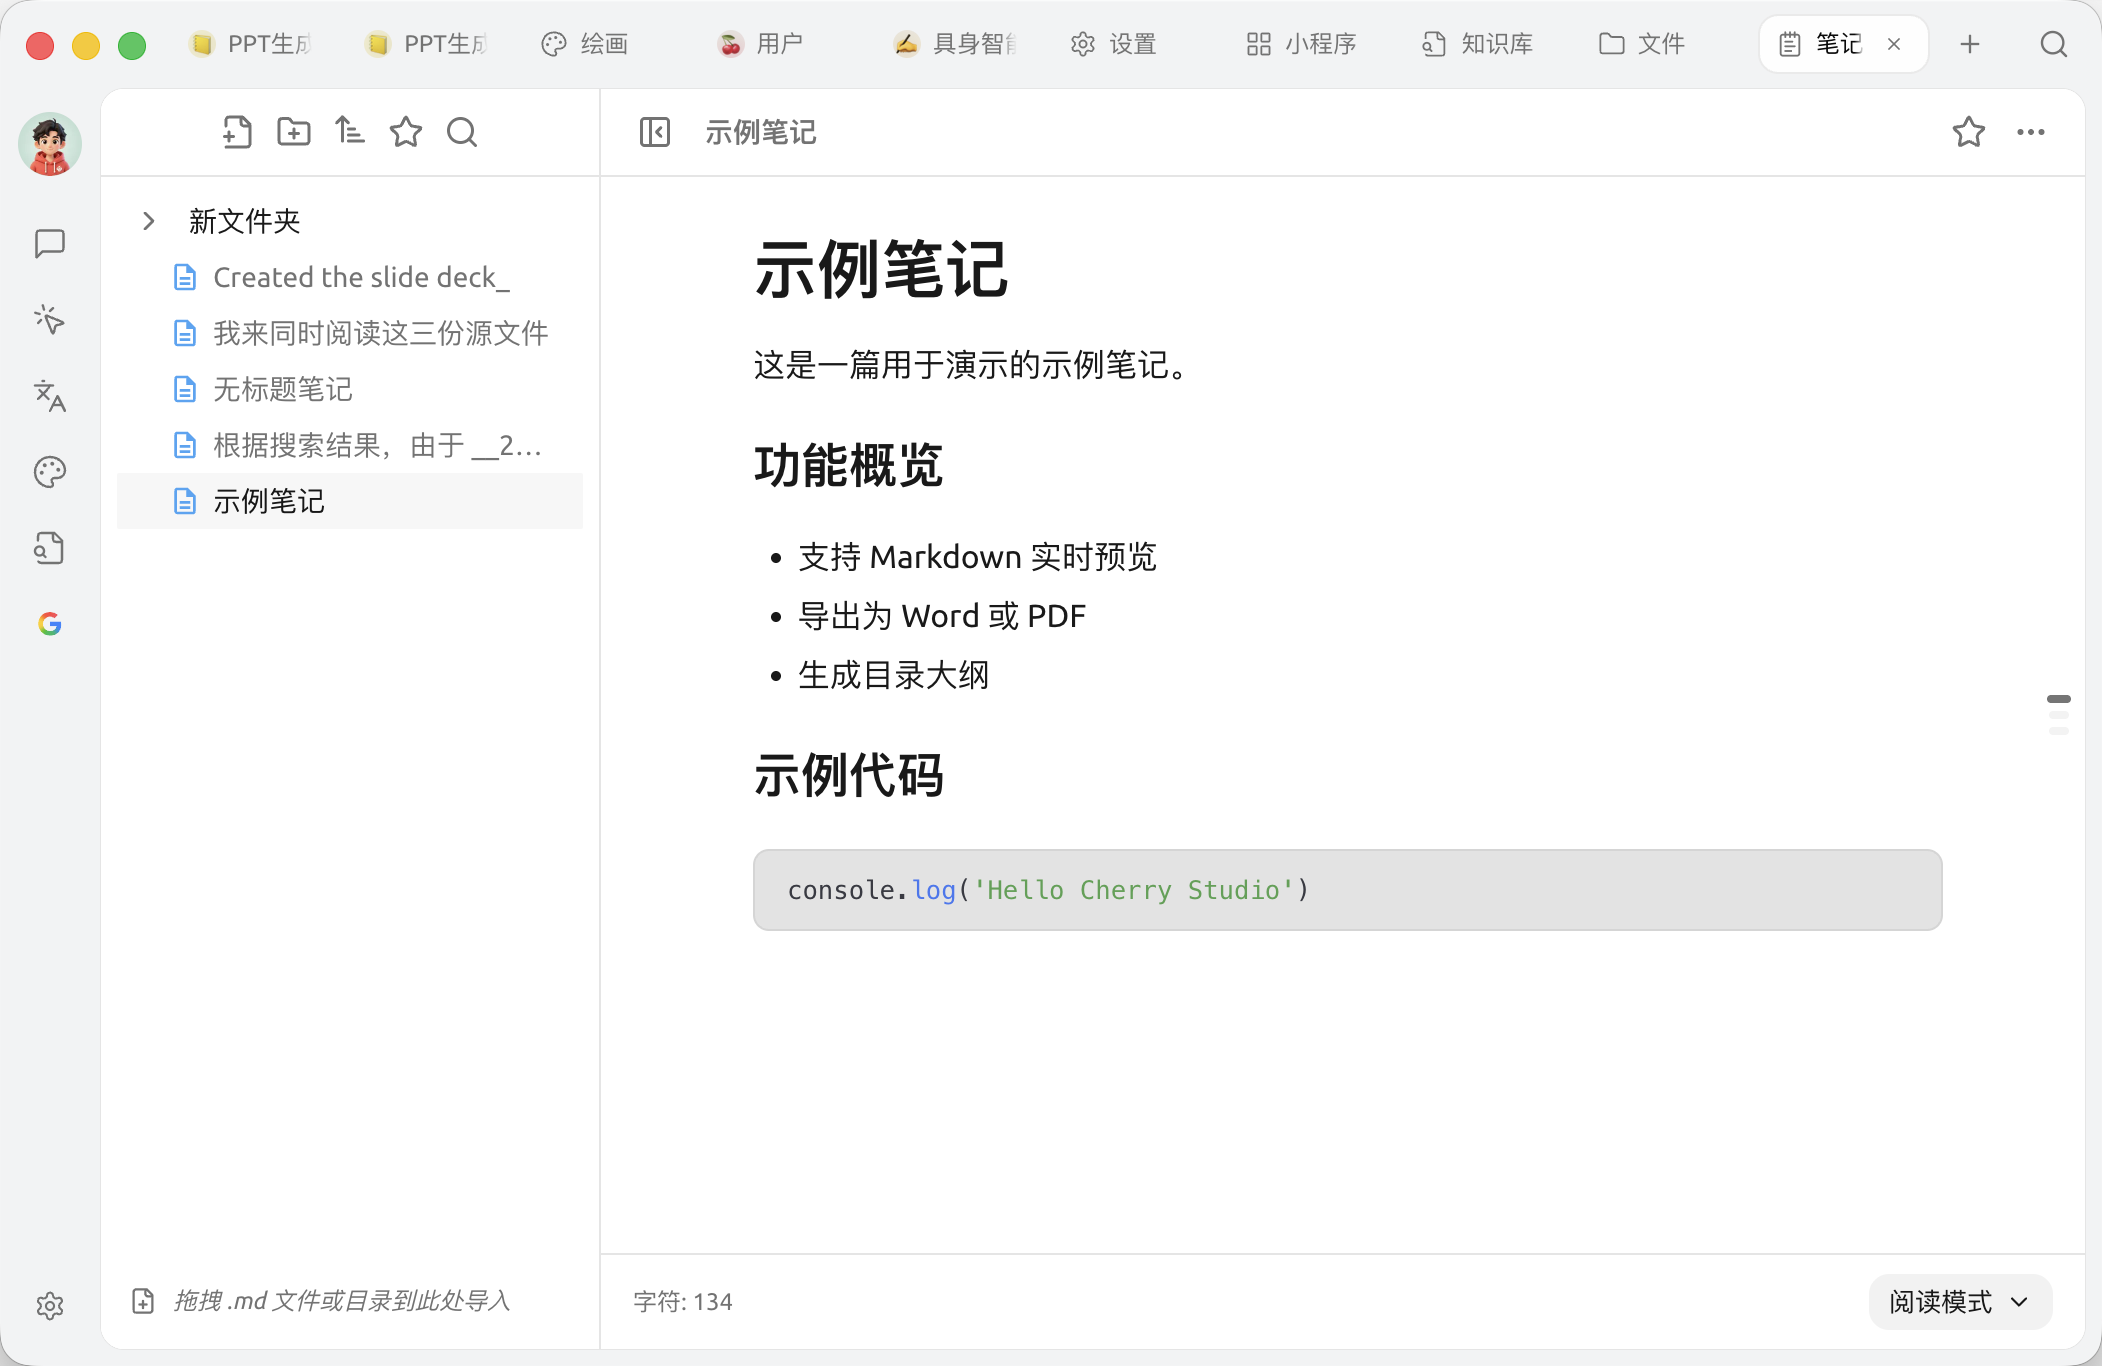
Notes screen: the left side is the directory tree and notes list, the right side is the Markdown editor
Create your first note

  1. Click the first [New Note] icon in the upper-left corner

  2. Enter the main text in the editor on the right; Markdown syntax and rich-text shortcut toolbar are supported

  3. Right-click a note in the note list to name it

Import existing Markdown files

  • Directly drag .md files or a folder containing .md files Drag and drop into the notes area to import them as new notes or a new folder

  • You can also click the second [New Folder] icon in the upper-left corner to create the directory first, then drag items into it

Editor features

The top toolbar of the note editor provides common rich-text capabilities:

  • Formatting: Bold (B), Italic (I), Underline (U), Strikethrough

  • Structure: inline code / H1–H3 headings / unordered list / ordered list / code block / blockquote / task list / formula

  • Embed: table, hyperlink

Editor after creating a note and entering the main text
The bottom status bar shows the current character count, the A✓ icon in the lower-left corner can toggle spell check, and the lower-right dropdown switches Live Preview,Source Mode or Reading Mode.

Directory management

At the top of the left sidebar are, in order: [New Note] / [New Folder] / [Sort] / [Favorites] / [Search].

  • Sort: 6 options—file name A→Z / Z→A, update time from newest to oldest / oldest to newest, creation time from newest to oldest / oldest to newest

  • Favorites: switch to the "Favorited" view with the star button

  • Search: magnifying-glass button; type in the search box to search.Search matches both title and body, entries matching the body will show a "content" or "name + content" tag next to the title to indicate the source

Right-click menu (AI integration + export)

In the left directory tree right-click any note to pop up the action menu—this is the entry for AI integration and multi-format export:

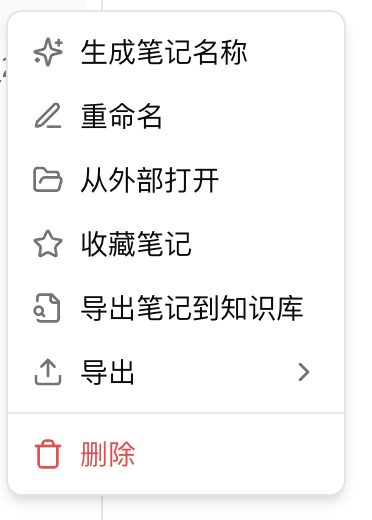
Menu that appears when you right-click a single note
  • Generate note name ✨: Let AI automatically generate a title based on the body text (only available for files)

  • Rename / Open externally(Show in Finder / File Explorer)

  • Favorite note / Remove from favorites

  • Export note to knowledge base: Send to the specified Knowledge base

  • Export › submenu: Markdown / Word (.docx) / Notion / Yuque / Obsidian / Joplin / Siyuan, and "Copy as Image / Export as Image"—the display of each item can be individually toggled in [Settings] → [Data Settings] → [Export Menu Settings]

  • Delete

The folder right-click menu is more streamlined, with only: New Note / New Folder / Rename / Open externally / Delete.

Top-right [⋯] menu (quick access to view and export)

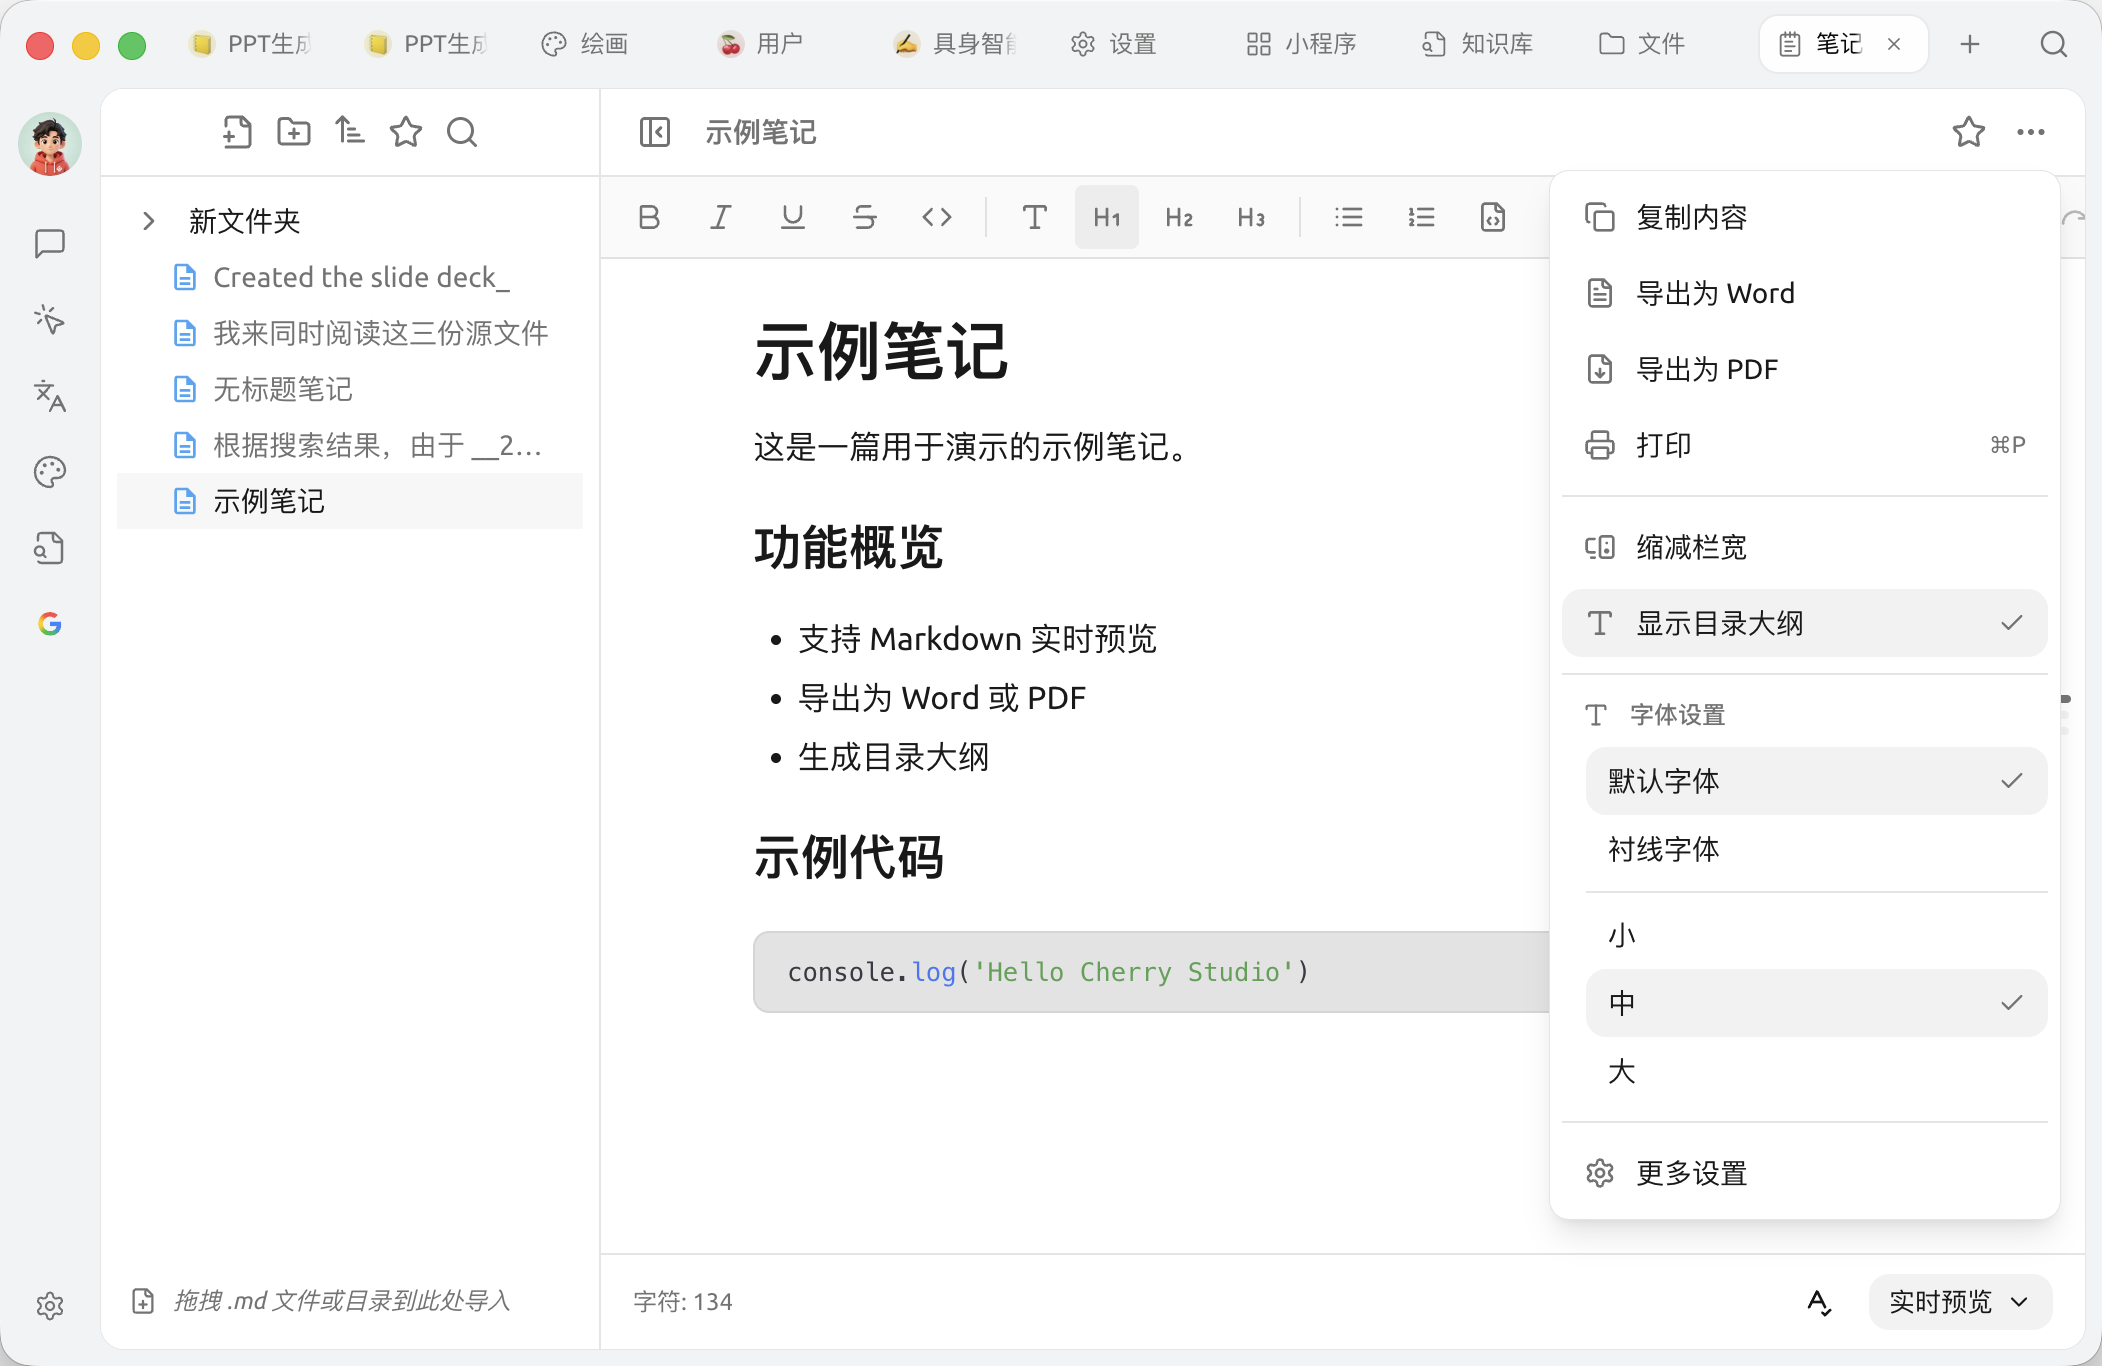
The [⋯] in the upper-right corner of the note title is the current note view / export quick entry; don't confuse it with the right-click menu:

Top-right [⋯] menu
  • Copy content: copy as plain text

  • Export as Word: quickly generate .docx(if you need more formats, use the "Export ›" in the right-click menu)

  • Export as PDF: export the current note as a PDF file

  • Print: invoke the system print dialog for the current note

  • Reduce column width: Limit the maximum number of characters per line

  • Show directory outline: Show the current note's heading tree on the right

  • Font settings ›: Default / serif font, three font sizes (small / medium / large)

  • More settings: Open the note settings panel (three groups of settings: Data / Editor / Display)

Working directory and backups

Note content is stored as local files.Working directory View and modify it in [Data Settings] of the note settings panel (opened from top-right [⋯] → [More settings]).

  • By default stored in the Cherry Studio application data directory

  • First [Choose] a custom path, then click [Apply] to switch (the change will not automatically migrate existing files; copy them manually); click [Reset to Default] to restore the default directory

  • Backups are recommended to be used together with WebDAV / S3-compatible storage

Editor and display settings

Open the note settings panel from top-right [⋯] → [More settings]; in addition to [Data Settings], there are two more groups:

Editor settings

  • Default view: Whether new notes enter [Edit Mode] or [Reading Mode] by default

  • Default edit view: In edit mode, use [Live Preview] or [Source Mode] by default

Display settings

  • Font: Default / serif font

  • Font size: between 10–30 px

  • Reduce column width: Limit the number of characters per line so long lines don't stretch across the whole screen

  • Show directory outline: Show the current note's heading tree on the right to facilitate in-note navigation

Font and size can be adjusted both in this display settings panel and quickly switched from top-right [⋯] → [Font settings].

Tips and tricks

  • Notes support task list - [ ] syntax, which can be used for daily to-dos

  • Drag and drop .md Files (or folders containing .md ) can be dragged into the directory tree for batch import

  • If after restoring configuration across devices you find the notes directory empty, manually copy the files to the path shown in the prompt

If you want AI to directly answer questions based on note content, the easiest way is to export the target note to the knowledge base, then enable that knowledge base in the chat.


Get help and submit feedback

If you encounter any questions, bugs, or have suggestions for feature improvements during configuration or use, please refer to Feedback and Suggestions for the official channels provided.

Last updated

Was this helpful?