> For the complete documentation index, see [llms.txt](https://docs.cherryai.com.cn/llms.txt). Markdown versions of documentation pages are available by appending `.md` to page URLs; this page is available as [Markdown](https://docs.cherryai.com.cn/docs/en-us/cherry-studio/preview/app/generative-mini-apps.md).

# Generative Mini Apps

Create, install, and use custom mini apps that can call Cherry Studio AI capabilities

Generative MiniApps are local web applications that run inside Cherry Studio \[MiniApps]. Their interface and business flow are defined by you, and they can be accessed through `window.cherry` to call the AI models configured in Cherry Studio and turn a general-purpose model into a writing assistant, information extractor, learning tool, or specialized business application.

The difference from ordinary website-style MiniApps is not in appearance, but in where their capabilities come from: website-style MiniApps simply open a URL; generative MiniApps must be packaged as `.miniapp`and, after installation and authorization, can then use Cherry's AI, sandbox data, files, notifications, network, and clipboard capabilities.

{% hint style="info" %}
Cherry Studio provides the runtime environment, authorization mechanism, and AI interface. You can write the MiniApp yourself, or have an AI coding tool generate HTML, CSS, and JavaScript first, then package and install it according to the instructions on this page.
{% endhint %}

## Goals and prerequisites

After completing this page, you will be able to:

* Install and use generative MiniApps provided by others;
* Create your own `.miniapp` package from a simple requirement;
* Let the MiniApp call Cherry Studio's \[Default Model] or \[Quick Model];
* Check permissions, activity logs, storage, updates, and uninstall status.

To use an existing MiniApp, you only need a trusted `.miniapp` file or installation URL. When making one yourself, you also need to be able to edit web files and create ZIP archives; if you want to test AI features, first configure an available chat model in Cherry Studio.

## Terms

| Terms                 | Interface name                   | Meaning on this page                                                                                                   |
| --------------------- | -------------------------------- | ---------------------------------------------------------------------------------------------------------------------- |
| Generative MiniApp    | \[Generative MiniApp]            | A MiniApp with customizable interface and workflow that can call Cherry Studio's AI capabilities                       |
| Local MiniApp         | \[Local MiniApp]                 | A type of MiniApp installed as a `.miniapp` package and run in an independent sandbox                                  |
| Website-style MiniApp | \[Website]                       | A web page opened through a URL that does not have `window.cherry` capabilities                                        |
| Permissions           | \[Permissions]                   | The scope of capabilities requested when the MiniApp is installed and reviewed by the user                             |
| Model slots           | \[Default Model], \[Quick Model] | Two model positions selected by the user for this MiniApp; the MiniApp cannot see the provider, model name, or API key |

## Path

Using an existing MiniApp:`[Launcher] → [Generative MiniApps] → [Local MiniApp] → select a file or enter an installation URL → review permissions → [Install]`

You can also enter from the MiniApp page:`[Launcher] → [MiniApps] → [Add MiniApp] in the upper-right corner → [Local MiniApp]`

Manage installed MiniApps:`[MiniApps] → right-click the target MiniApp → [View Details]`

## Steps

### Install and use for the first time

{% stepper %}
{% step %}

### Open the installation entry

In the \[Launcher], click \[Generative MiniApps], or after entering \[MiniApps], click \[Add MiniApp] in the upper-right corner. In the panel that appears, switch to \[Local MiniApp].
{% endstep %}

{% step %}

### Choose the installation source

Drag a `.miniapp` package into the installation area, or click \[Choose File...]. If the developer provides an HTTPS installation URL, you can also paste the URL and click \[Load].
{% endstep %}

{% step %}

### Review permissions

The installation confirmation page will show the MiniApp name, version, description, and all permissions. Required permissions cannot be deselected; optional permissions are checked by default, and you can deselect them before installation or adjust them afterward.

Proceed only if the MiniApp's purpose matches its permissions and the source is trustworthy. MiniApps that need AI usually show \[AI Capability] → \[Chat].
{% endstep %}

{% step %}

### Install and open

Click \[Install]. After installation, the MiniApp will appear in the \[MiniApps] grid; click the icon to run it.
{% endstep %}
{% endstepper %}

### Choose an AI model for the MiniApp

1. In the \[MiniApps] grid, right-click the target MiniApp and select \[View Details].
2. Switch to \[Settings] and find \[AI Model].
3. Set the \[Default Model] and \[Quick Model] according to the MiniApp's purpose. When left blank, they follow Cherry Studio's global default model and global quick model respectively.
4. Reopen the MiniApp and trigger an AI operation once. If no available model exists, the MiniApp should indicate that AI is temporarily unavailable.

The \[Default Model] is suitable for primary tasks such as long-form generation and complex analysis; the \[Quick Model] is suitable for low-latency tasks such as title suggestions, short rewrites, and tag extraction. Which slot is ultimately used is determined by the MiniApp design.

### Create a minimal version

A generative MiniApp is essentially a static web project. The minimal directory only needs two files:

```
my-writer/
├── manifest.json
└── index.html
```

First create `manifest.json`, declare the app information and `ai.chat` permission:

```json
{
  "id": "com.example.my-writer",
  "name": { "zh": "Inspiration Rewrite", "en": "Rewrite Helper" },
  "description": "Input a piece of text and use Cherry Studio's AI model to rewrite it.",
  "version": "1.0.0",
  "entry": "index.html",
  "permissions": ["ai.chat"]
}
```

`id` It is recommended to use a reverse-domain format you control, and it may only contain lowercase letters, numbers, dots, and hyphens.`com.cherrystudio.*` is an official reserved namespace; do not use it.

Then in `index.html` use the global object `cherry` to call AI. The example below first checks whether the \[Default Model] is available, then displays the streamed text segment by segment:

```html
<!doctype html>
<html lang="zh-CN">
  <head>
    <meta charset="UTF-8" />
    <meta name="viewport" content="width=device-width, initial-scale=1" />
    <link rel="stylesheet" href="/__cherry/theme.css" />
    <title>Rewrite Inspiration</title>
  </head>
  <body>
    <textarea id="source" placeholder="Enter text to rewrite"></textarea>
    <button id="rewrite">Start rewriting</button>
    <pre id="result"></pre>

    <script>
      const button = document.querySelector('#rewrite')
      const source = document.querySelector('#source')
      const result = document.querySelector('#result')

      button.addEventListener('click', async () => {
        const capability = await cherry.ai.getCapabilities({ model: 'default' })
        if (!capability.available) {
          result.textContent = 'Please configure an available model in MiniApp details first.'
          return
        }

        result.textContent = ''
        await cherry.ai.chat(
          {
            model: 'default',
            reasoning: 'off',
            messages: [
              { role: 'system', content: 'You are a Chinese editor; keep the original meaning and make the expression clearer.' },
              { role: 'user', content: source.value }
            ]
          },
          {
            callId: `rewrite-${Date.now()}`,
            onChunk: (text) => {
              result.textContent += text
            }
          }
        )
      })
    </script>
  </body>
</html>
```

`window.cherry` and `cherry` point to the same set of host APIs, so no SDK needs to be imported. MiniApps can only send text messages; image input and tool calls are not supported yet. It only specifies using the `default` or `quick` slot, and will not receive the model name, provider information, or API key.

### Package and test

1. Confirm `manifest.json` it is located in the project root, and the entry file matches `entry` .
2. Compress within the project directory; on macOS or Linux, you can use:

```bash
zip -r ../my-writer.miniapp . -x '.*' -x '__MACOSX/*'
```

On Windows PowerShell, first generate a ZIP, then change the `.miniapp` extension:

```powershell
Compress-Archive -Path .\* -DestinationPath ..\my-writer.zip
Rename-Item ..\my-writer.zip my-writer.miniapp
```

3. In Cherry Studio's \[Local MiniApp] installation area, select the generated `my-writer.miniapp`.
4. Make sure the installation page only requests the expected permissions, then open it after installation and test input, AI output, error prompts, and state after re-entering.
5. When debugging is needed, open \[Developer Tools] in the MiniApp toolbar to inspect page errors and requests blocked by the sandbox.

{% hint style="warning" %}
Do not compress the entire project folder from an outer directory; make sure the root of the archive can directly show `manifest.json`. Cherry Studio can also recognize archives wrapped in only one directory layer, but a clear root structure makes troubleshooting easier.
{% endhint %}

## Expected result

After installation, you should see a new icon in the \[MiniApps] grid. After opening it, enter text and click the button, and the result area will continuously display the text returned by the model. Right-click the MiniApp and enter \[View Details] to see the \[AI Capability] permission it requested, the model slot it uses, and the most recent call records.

If installation succeeds but AI is unavailable, first check the model in \[View Details] → \[Settings], then check whether \[AI Capability] → \[Chat] is allowed in \[Permissions].

## Key screenshots

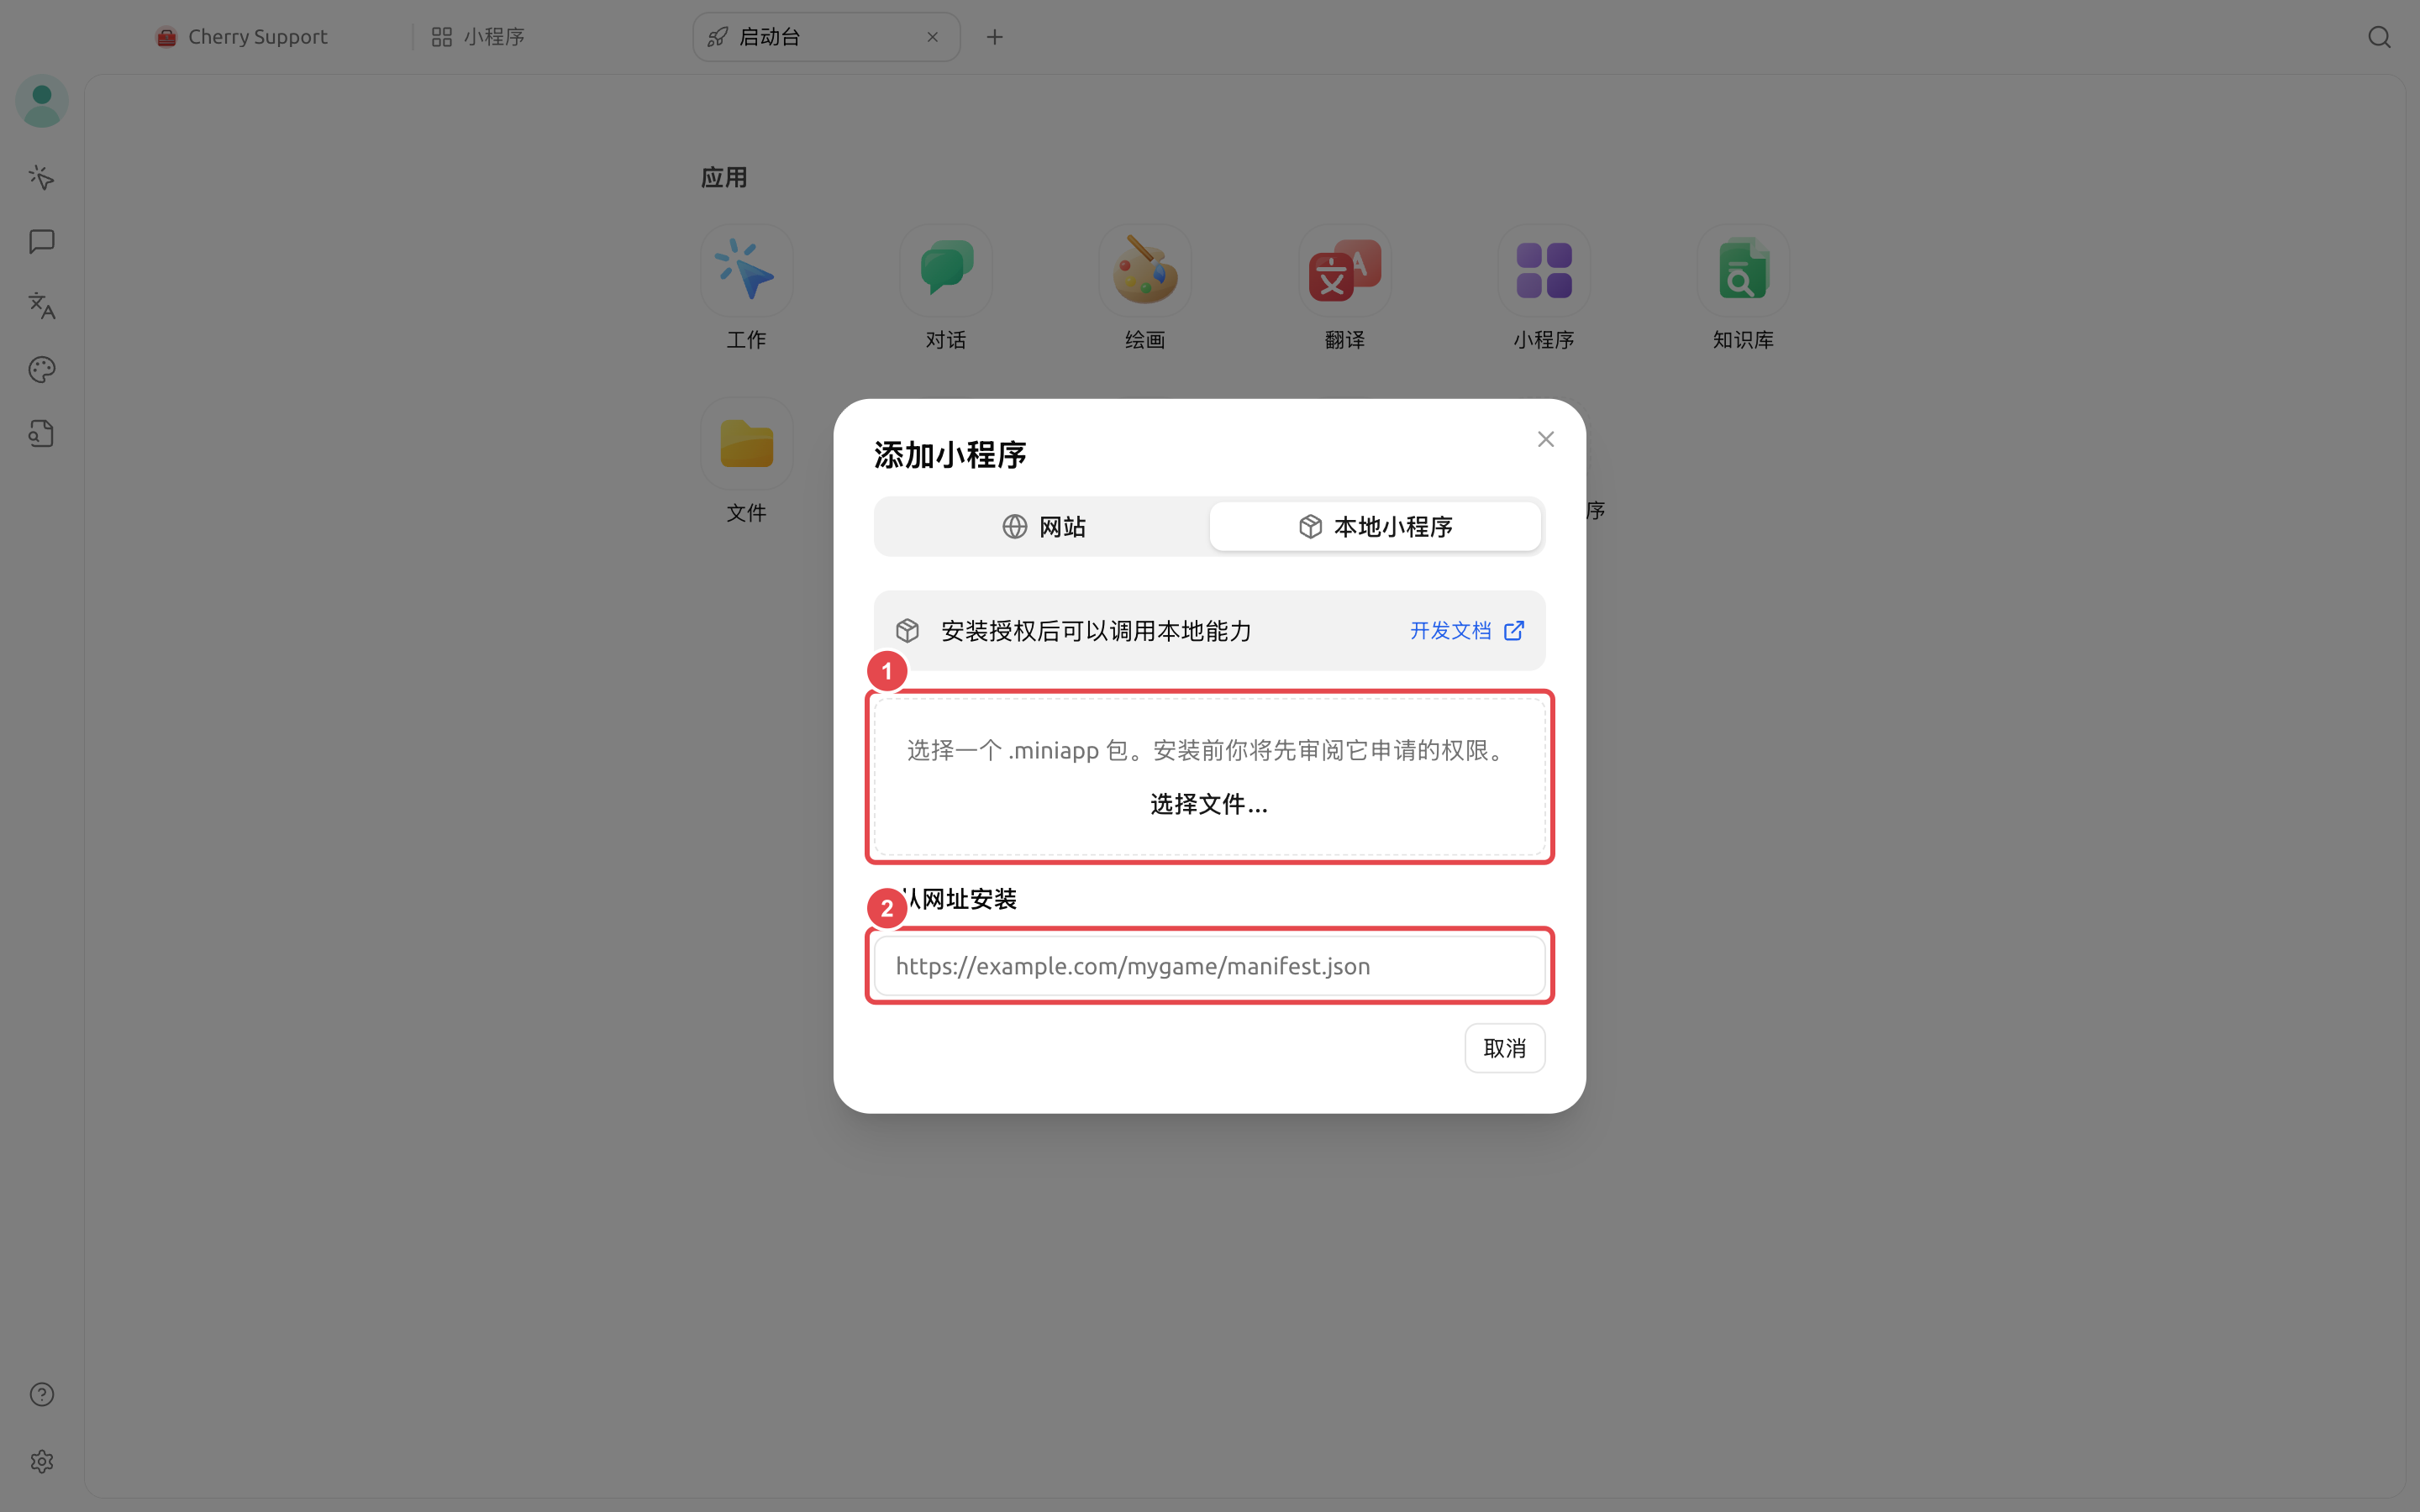
<figure><img src="https://1658303467-files.gitbook.io/~/files/v0/b/gitbook-x-prod.appspot.com/o/spaces%2F0Ut5BptC3t8CtSU1UWpM%2Fuploads%2Fgit-blob-ceba627dd766df1bcb0baa130442dd777e8426bd%2Fgenerative-mini-app-launchpad.png?alt=media" alt="启动台中的生成式小程序入口"><figcaption><p>The [Generative MiniApps] entry in the Launcher.</p></figcaption></figure>

1. Click \[Generative MiniApps] to open the \[Add MiniApp] panel.

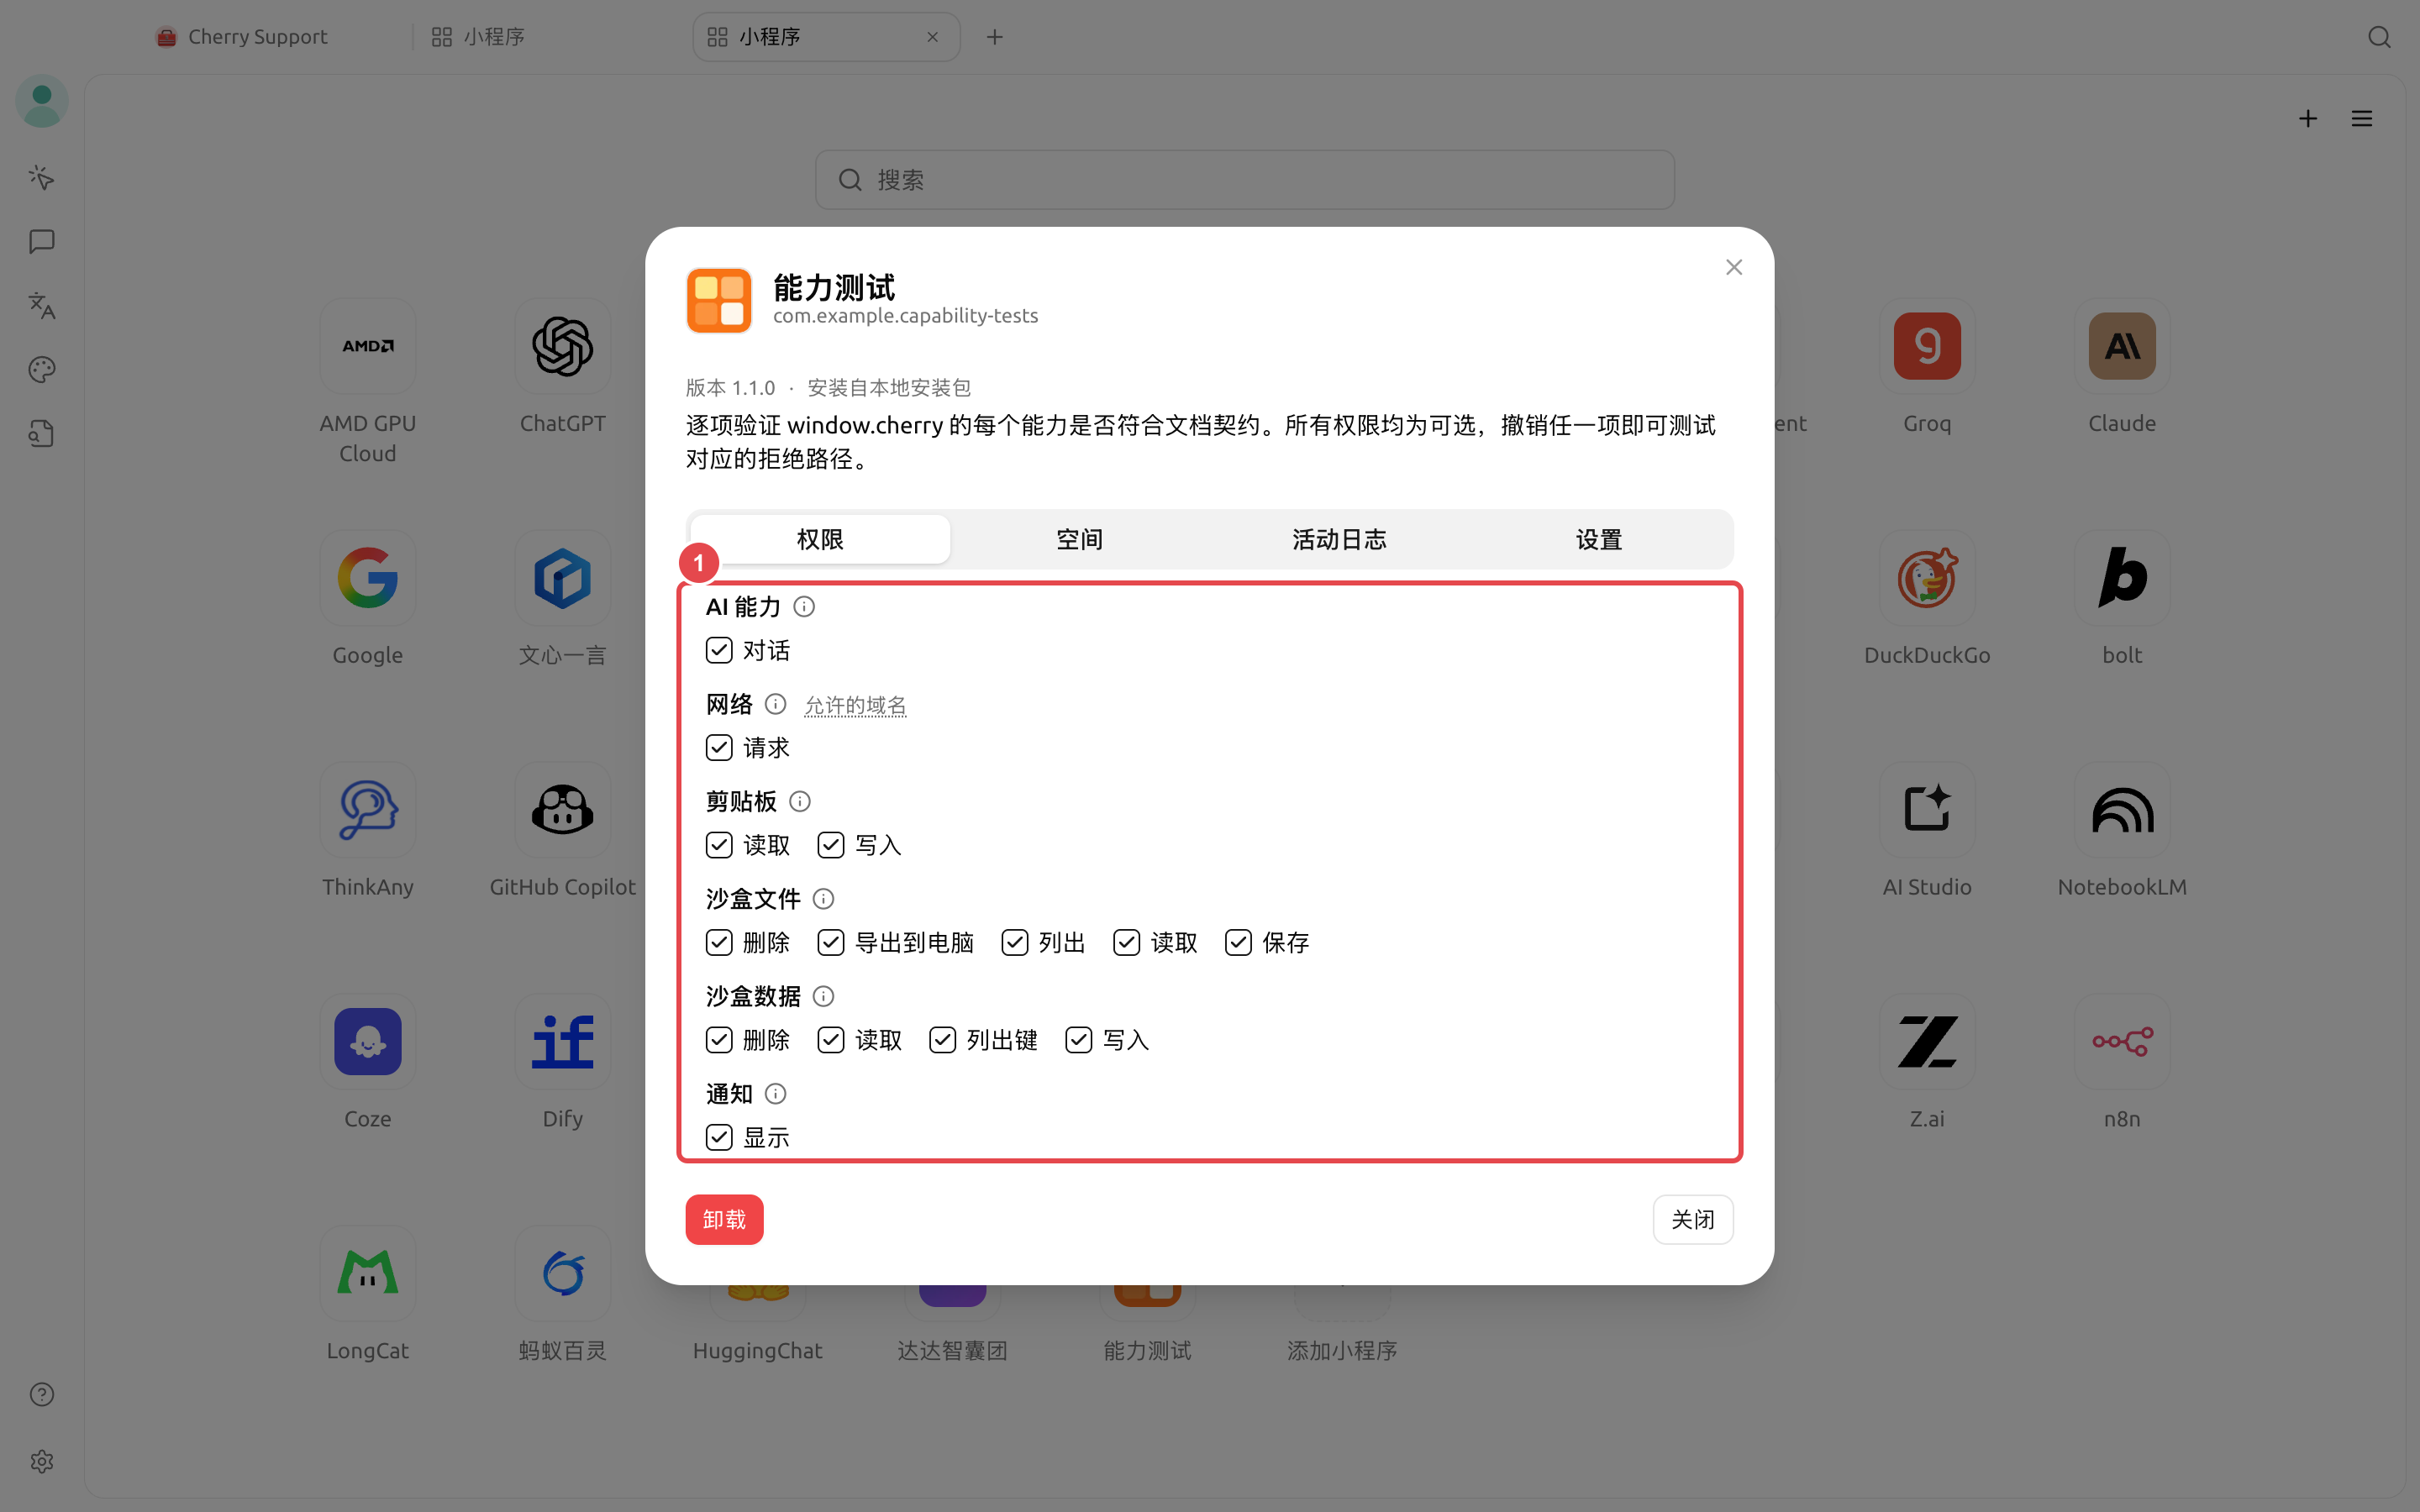
<figure><img src="https://1658303467-files.gitbook.io/~/files/v0/b/gitbook-x-prod.appspot.com/o/spaces%2F0Ut5BptC3t8CtSU1UWpM%2Fuploads%2Fgit-blob-27f5a4e70aba636ed033f23f658a9b5cc43c1ce8%2Fgenerative-mini-app-install.png?alt=media" alt="本地小程序安装面板中的文件和网址安装入口"><figcaption><p>Local MiniApps support installation from files or URLs.</p></figcaption></figure>

1. Drag in the `.miniapp` package or click \[Choose File...].
2. You can also enter the HTTPS installation URL provided by the developer.

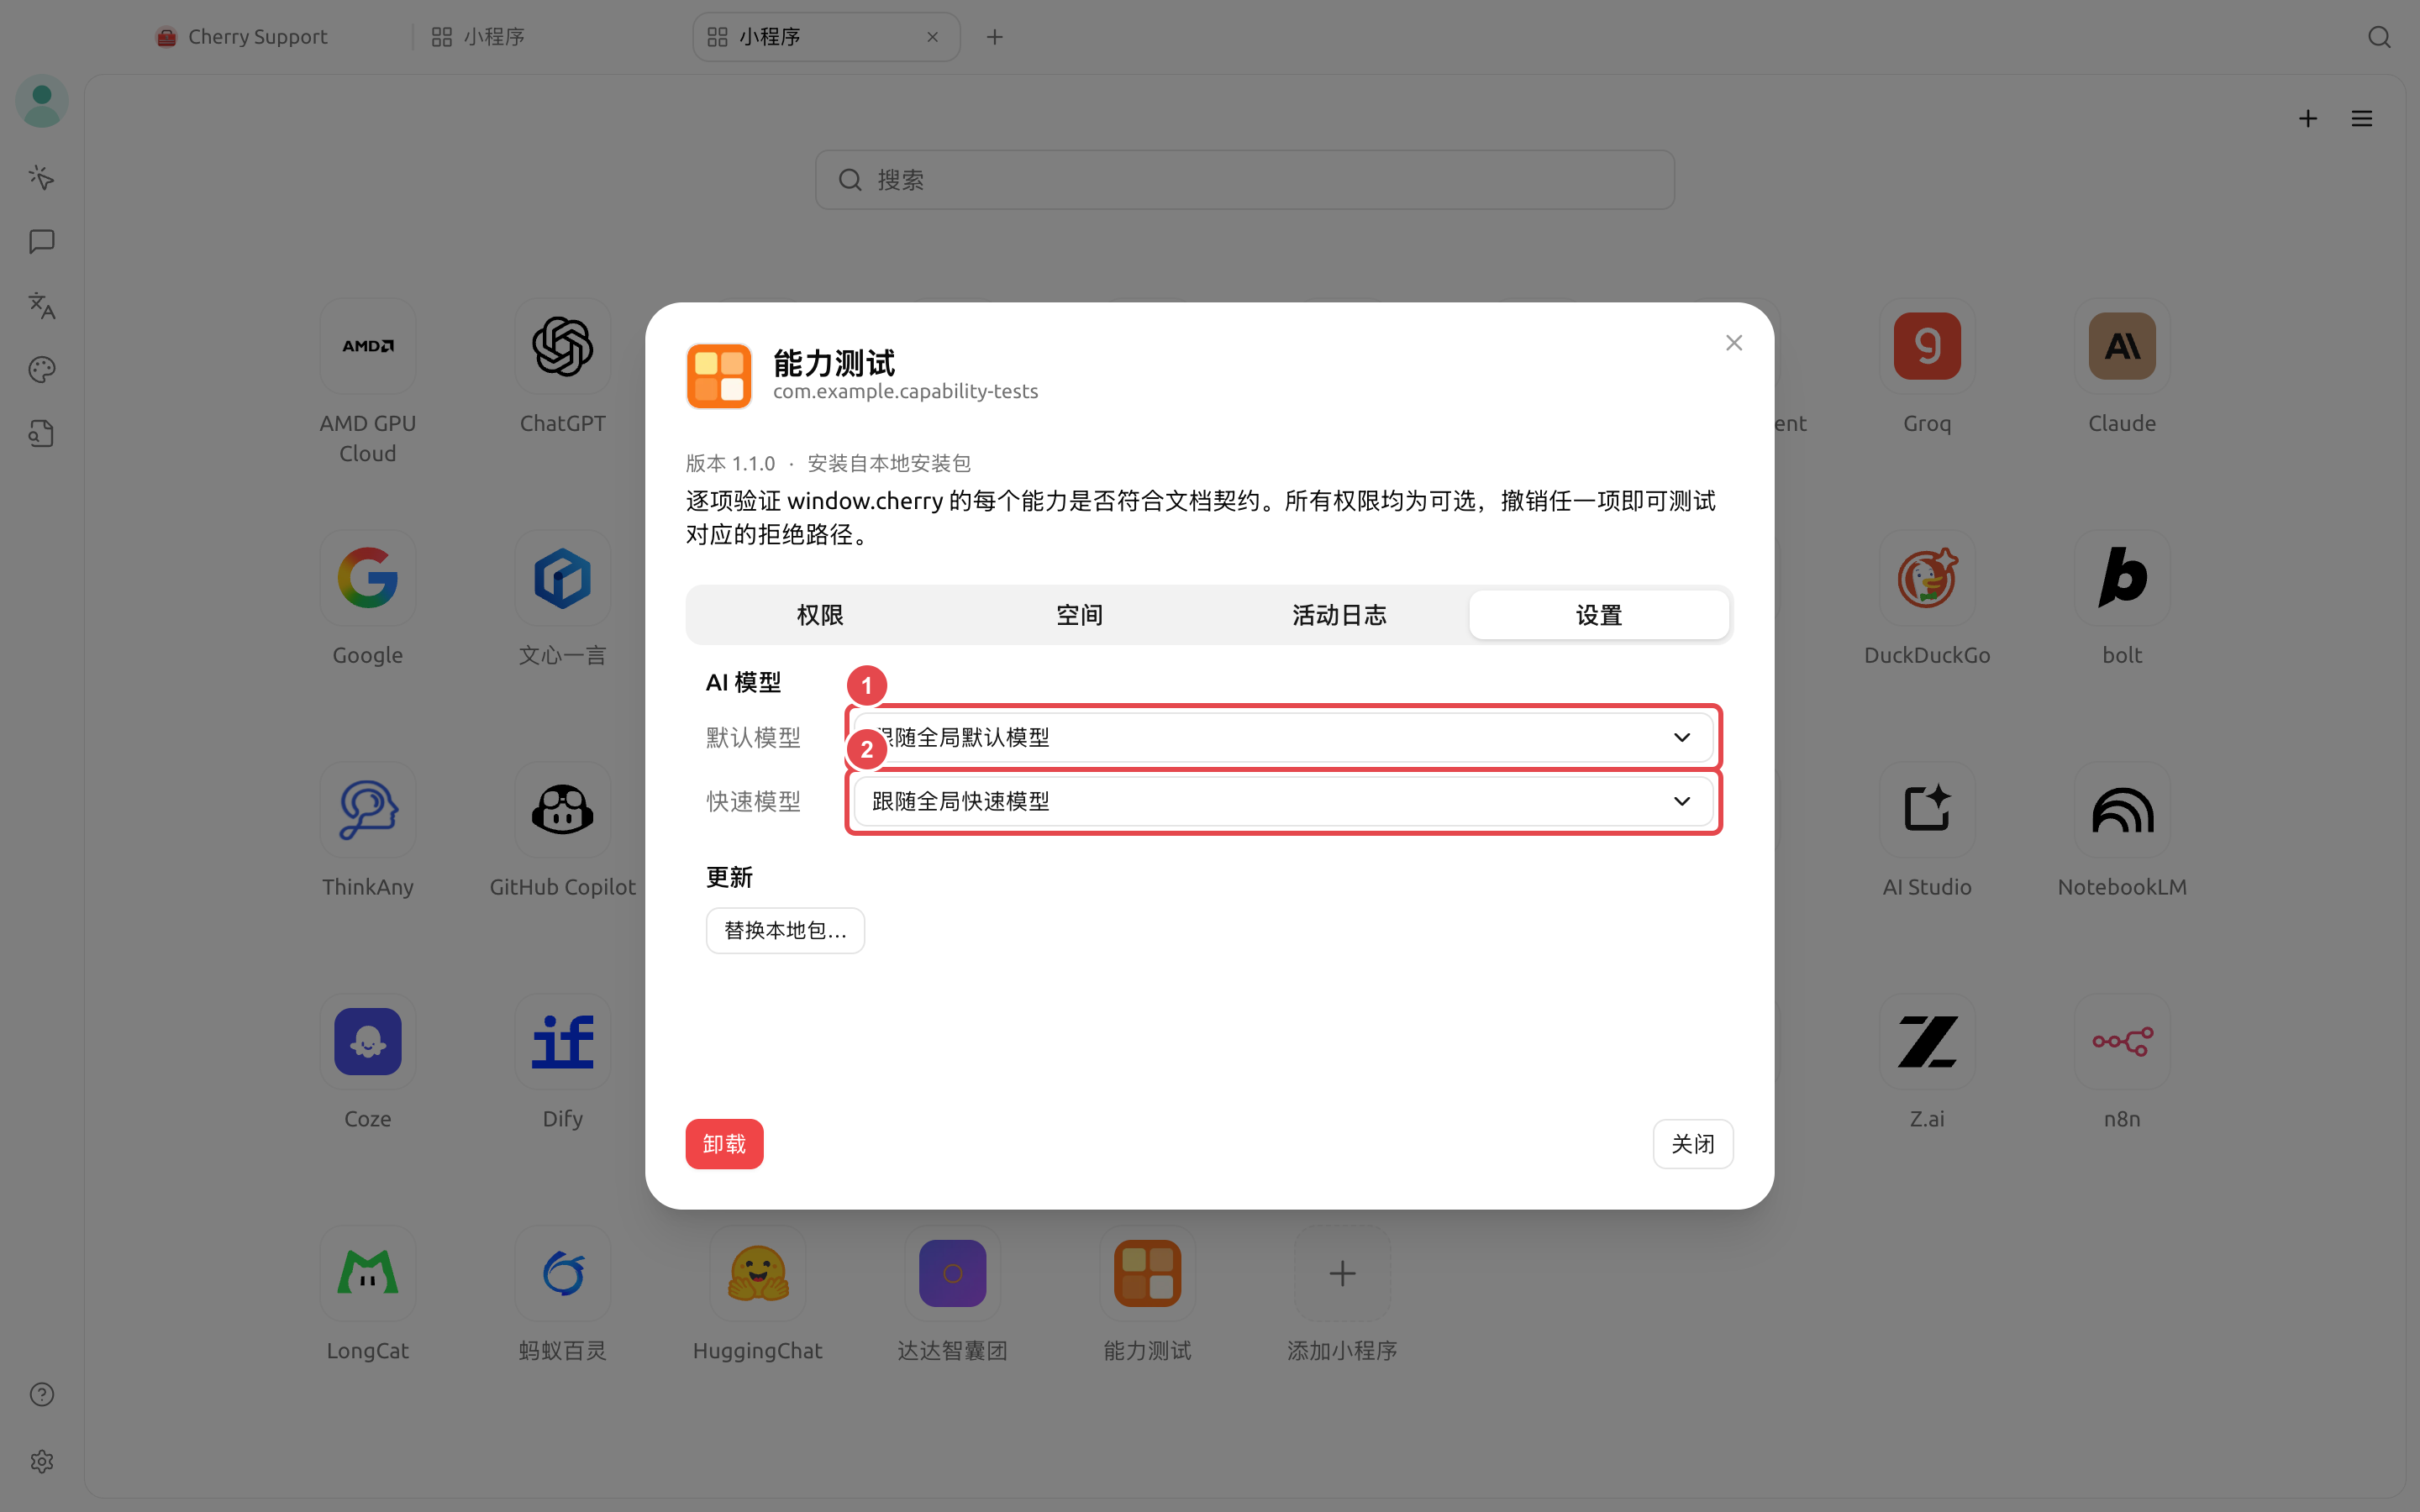
<figure><img src="https://1658303467-files.gitbook.io/~/files/v0/b/gitbook-x-prod.appspot.com/o/spaces%2F0Ut5BptC3t8CtSU1UWpM%2Fuploads%2Fgit-blob-520ed8e91e1e9cfe2ba3322b88d99041eaedd4f0%2Fgenerative-mini-app-permissions.png?alt=media" alt="本地小程序详情中的权限页"><figcaption><p>The [Permissions] page lists the host capabilities the MiniApp is allowed to call.</p></figcaption></figure>

1. Check that \[AI Capability] and authorizations such as network, clipboard, files, data, and notifications match the MiniApp's purpose.

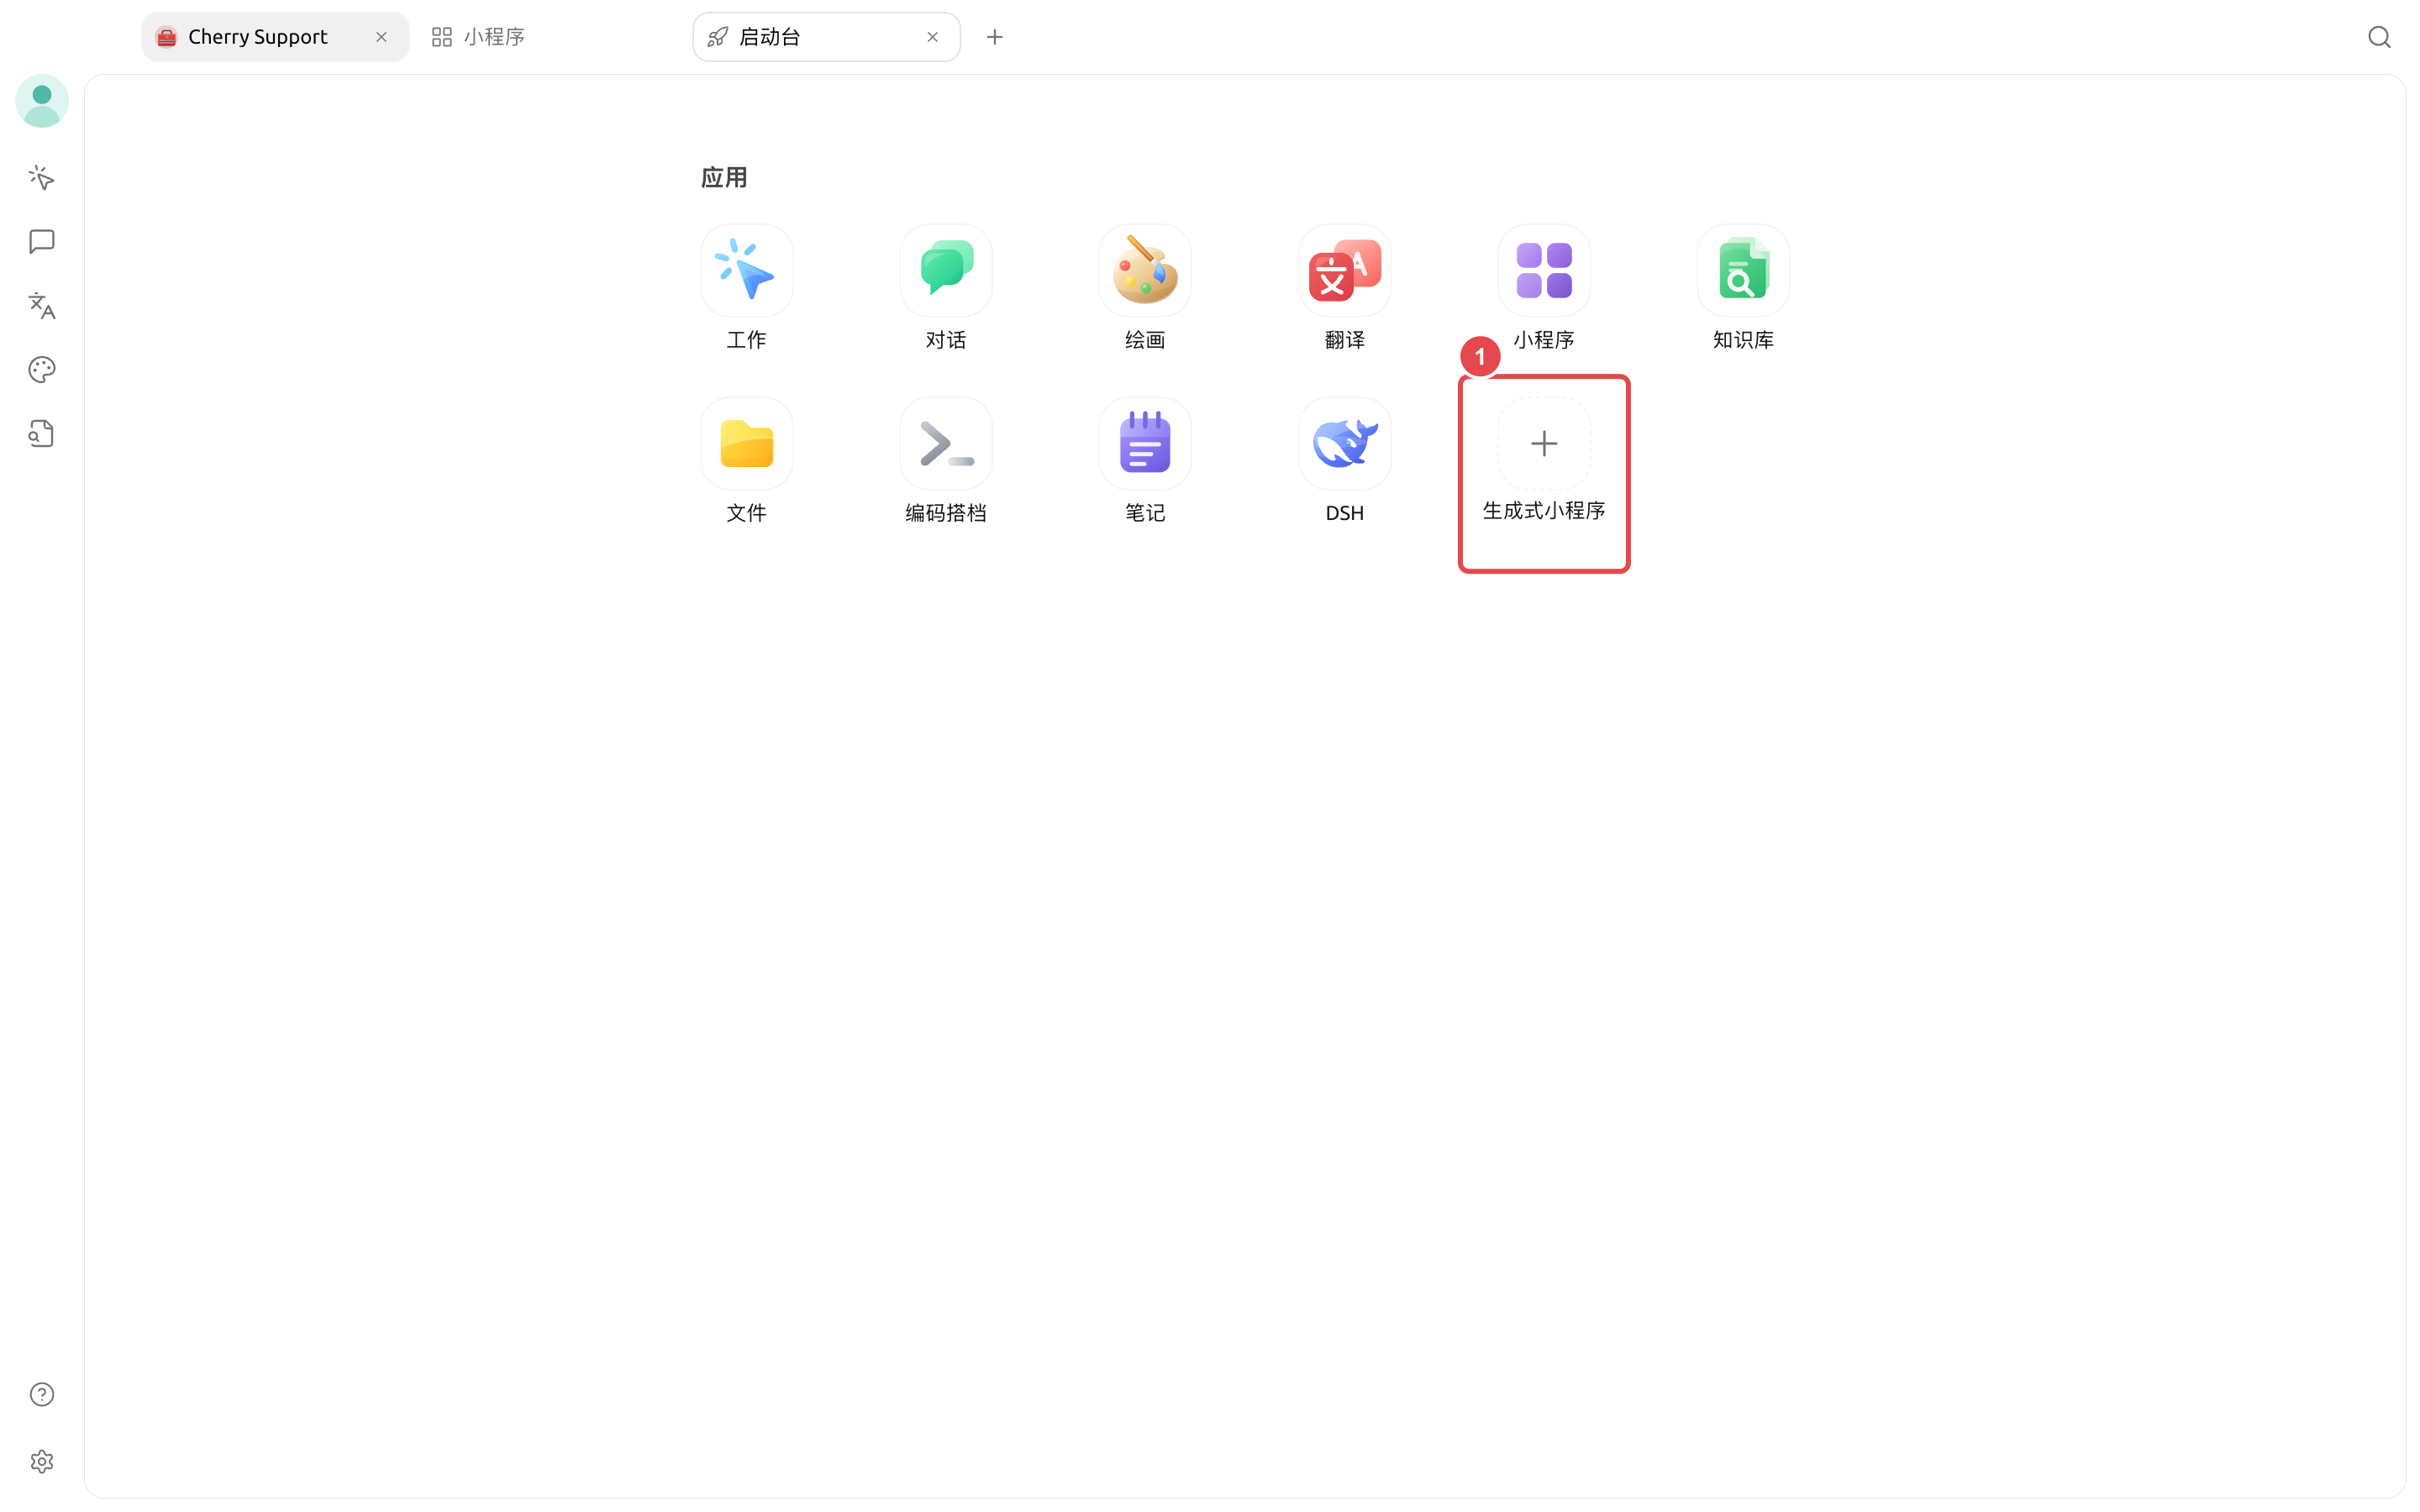
<figure><img src="https://1658303467-files.gitbook.io/~/files/v0/b/gitbook-x-prod.appspot.com/o/spaces%2F0Ut5BptC3t8CtSU1UWpM%2Fuploads%2Fgit-blob-42ee78e313fab6bfc87286060fd027d7ed2458bd%2Fgenerative-mini-app-models.png?alt=media" alt="本地小程序详情中的默认模型和快速模型设置"><figcaption><p>Manage AI model slots in the MiniApp details.</p></figcaption></figure>

1. The \[Default Model] handles the MiniApp's main AI requests and follows the global default model when left blank.
2. The \[Quick Model] handles low-latency requests specified by the MiniApp and follows the global quick model when left blank.

{% hint style="info" %}
The MiniApp's actual interface and output are determined by the MiniApp itself; the image above uses the official capability test example to illustrate the permissions and model management locations after installation.
{% endhint %}

## Configuration instructions

| Configuration item  | Product default                                                                          | Suggested starting point                                      | Function                                                           | Applicable scenarios                                 | Notes                                                                                     |
| ------------------- | ---------------------------------------------------------------------------------------- | ------------------------------------------------------------- | ------------------------------------------------------------------ | ---------------------------------------------------- | ----------------------------------------------------------------------------------------- |
| Installation source | —                                                                                        | Use a local `.miniapp` file                                   | Determines whether to install from a local package or an HTTPS URL | Self-use testing, team distribution                  | For third-party MiniApps, first verify the publisher, source code, and permissions        |
| AI permissions      | Declared by the MiniApp; optional permissions are checked by default during installation | Grant only the permissions necessary to complete the function | Allow calling `cherry.ai.chat()`                                   | All AI features                                      | Required permissions cannot be revoked individually; uninstall if you no longer trust it  |
| Default model       | Follow the global default model                                                          | Use a chat model that you have verified is available          | Handles primary generation and analysis tasks                      | Long text, complex instructions, structured output   | Calls count toward the usage of the corresponding model service                           |
| Quick model         | Follow the global quick model                                                            | Choose a faster-responding model for short tasks              | Handles low-latency tasks                                          | Revise titles, complete text, classify, extract tags | The MiniApp must explicitly choose `quick` to use                                         |
| Reasoning mode      | Off when not passed by the MiniApp                                                       | Turn off for ordinary rewriting first                         | Allow models that support reasoning to reason first                | Complex analysis, planning                           | Models that do not support switching will ignore this item                                |
| Theme style         | Follow Cherry Studio's light/dark theme                                                  | Reference `/__cherry/theme.css`                               | Use color variables provided by the host                           | All custom interfaces                                | External CDN resources will be blocked by the sandbox and should be packaged into the app |

### What other capabilities can be used

| capabilities          | Purpose                                                                      | Declaration method                               |
| --------------------- | ---------------------------------------------------------------------------- | ------------------------------------------------ |
| `cherry.storage`      | Save settings and state as strings                                           | `storage.*` or specific methods                  |
| `cherry.file`         | Save, read, and export files within the MiniApp's own sandbox                | `file.*` or specific methods                     |
| `cherry.notification` | Send system notifications through Cherry Studio                              | `notification.show`                              |
| `cherry.network`      | Access HTTPS domains declared in the manifest                                | `network.fetch`and fill in `network` domain list |
| `cherry.clipboard`    | Read and write plain text when the MiniApp is visible and has keyboard focus | `clipboard.read`、`clipboard.write`               |
| `cherry.app`          | Read app version, language, and current permissions                          | No declaration required                          |

Local MiniApps cannot directly use `localStorage`、browser `fetch`、cookies, pop-ups, or external CDNs. Use `cherry.storage`when you need to save state, use `cherry.network.fetch` when you need network access, and declare the allowed domains in the manifest.

## User cases

| Scenario                          | Input                                        | What the MiniApp does                                                                              | Completion criterion                                                               |
| --------------------------------- | -------------------------------------------- | -------------------------------------------------------------------------------------------------- | ---------------------------------------------------------------------------------- |
| Writing and rewriting             | Draft, tone, and word-count requirements     | Use the \[Default Model] to generate the main text and the \[Quick Model] to provide title options | Can preserve the original meaning and quickly switch between different expressions |
| Meeting notes organization        | Pasted meeting notes                         | Extract conclusions, owners, and deadlines, and output them in a fixed format                      | Each action has an owner and time field                                            |
| Multilingual translation          | Original text, target language, and glossary | Fix terminology and output format in the system message, and stream the translation                | Proper nouns are consistent, paragraph structure is preserved                      |
| Structured information extraction | Contract, resume, or feedback text           | Ask the model to return results in fixed fields, then have the page validate missing items         | Required fields are complete, and abnormal content is flagged                      |
| Learning practice                 | Notes, question types, and difficulty        | Generate questions, hints, and explanations, and save progress with sandbox data                   | You can continue the last practice session after reopening                         |
| Vertical workflow                 | Team templates and business rules            | Combine input, AI processing, human confirmation, and export in one interface                      | Repeated tasks can be completed stably through the same workflow                   |

{% hint style="warning" %}
The results of a generative MiniApp are still generated by the selected model. High-risk uses such as medical, legal, and financial scenarios, as well as data that affects formal business operations, must be reviewed by qualified personnel.
{% endhint %}

## FAQ

<details>

<summary>Why can I not call Cherry AI after entering a web URL?</summary>

\[Website] only opens the web page and does not inject `window.cherry`. Please package the app as `.miniapp` and install it from \[Local MiniApp].

</details>

<details>

<summary>Can a MiniApp see my API key or model provider?</summary>

No. MiniApps only request the \[Default Model] or \[Quick Model] slot. Cherry Studio performs the call on their behalf and does not expose the model name, provider information, or API key to the MiniApp.

</details>

<details>

<summary>Why does it say AI is unavailable after installation?</summary>

First open \[View Details] → \[Settings] and confirm that the corresponding model slot has an available model; then go to \[Permissions] and confirm that \[AI Capability] → \[Chat] is authorized. If the permission is a required permission but you no longer trust the app, uninstall it directly.

</details>

<details>

<summary>How can I confirm which capabilities the MiniApp called?</summary>

Open \[View Details] → \[Activity Log]. This records external calls such as AI, network, clipboard, and file export, as well as denied calls, but it does not record prompts, model responses, clipboard content, or file content.

</details>

<details>

<summary>What is the difference between update, rollback, and clearing data?</summary>

Updating preserves sandbox data and requests confirmation again when new permissions are added; after updating, you can roll back to the previous version. Clearing data deletes the data and files saved by the MiniApp, but keeps the app; uninstalling deletes the app, authorization, and data as well.

</details>

## References

* [Cherry Studio MiniApps development documentation and community list](https://github.com/CherryHQ/cherry-studio-miniapps/blob/main/README.zh-CN.md)
* [MiniApp official reference documentation](https://github.com/CherryHQ/cherry-studio/tree/main/docs/references/mini-app)
* [Manifest format](https://github.com/CherryHQ/cherry-studio/blob/main/docs/references/mini-app/manifest.md)
* [Capability interface](https://github.com/CherryHQ/cherry-studio/blob/main/docs/references/mini-app/capabilities.md)
* [Packaging, updating, and uninstalling](https://github.com/CherryHQ/cherry-studio/blob/main/docs/references/mini-app/packaging.md)


---

# Agent Instructions
This documentation is published with GitBook. GitBook is the documentation platform designed so that both humans and AI agents can read, navigate, and reason over technical content effectively. Learn more at gitbook.com.

## Querying This Documentation
If you need additional information that is not directly available in this page, you can query the documentation dynamically by asking a question.

Perform an HTTP GET request on the current page URL with the `ask` query parameter, and the optional `goal` query parameter:

```
GET https://docs.cherryai.com.cn/docs/en-us/cherry-studio/preview/app/generative-mini-apps.md?ask=<question>&goal=<endgoal>
```

`ask` is the immediate question: it should be specific, self-contained, and written in natural language.
`goal` is optional and describes the broader end goal you are ultimately trying to accomplish on behalf of the user. GitBook uses it to tailor the answer towards what is most useful for that goal.

The response will contain a direct answer to the question and relevant excerpts and sources from the documentation.

Use this mechanism when the answer is not explicitly present in the current page, you need clarification or additional context, or you want to retrieve related documentation sections.