> For the complete documentation index, see [llms.txt](https://docs.cherryai.com.cn/llms.txt). Markdown versions of documentation pages are available by appending `.md` to page URLs; this page is available as [Markdown](https://docs.cherryai.com.cn/docs/en-us/advanced-basic/cases/brand-image-kit.md).

# Brand Illustration Kit

The content team needs to create landscape, square, and portrait illustrations for the same event, while keeping the main subject, color tone, and brand rules consistent. First determine the main visual, then expand it into different sizes; this is easier than generating each image from scratch while maintaining consistency.

<figure><img src="/files/b127156db3f9cbfffb53b86f8bf2508d028d0c8a" alt="设置中的默认绘画模型选择"><figcaption><p>First configure and verify the painting model, so the Agent’s [Generate Image] and [Painting] workflows have available connections.</p></figcaption></figure>

<figure><img src="/files/f0cb9ea37113b8f9a19c80cd71df49cbe4423b65" alt="Agent 中的生成图片工具与绘画模型"><figcaption><p>Have the Agent generate a sample image first to confirm the direction, then move on to batch production.</p></figcaption></figure>

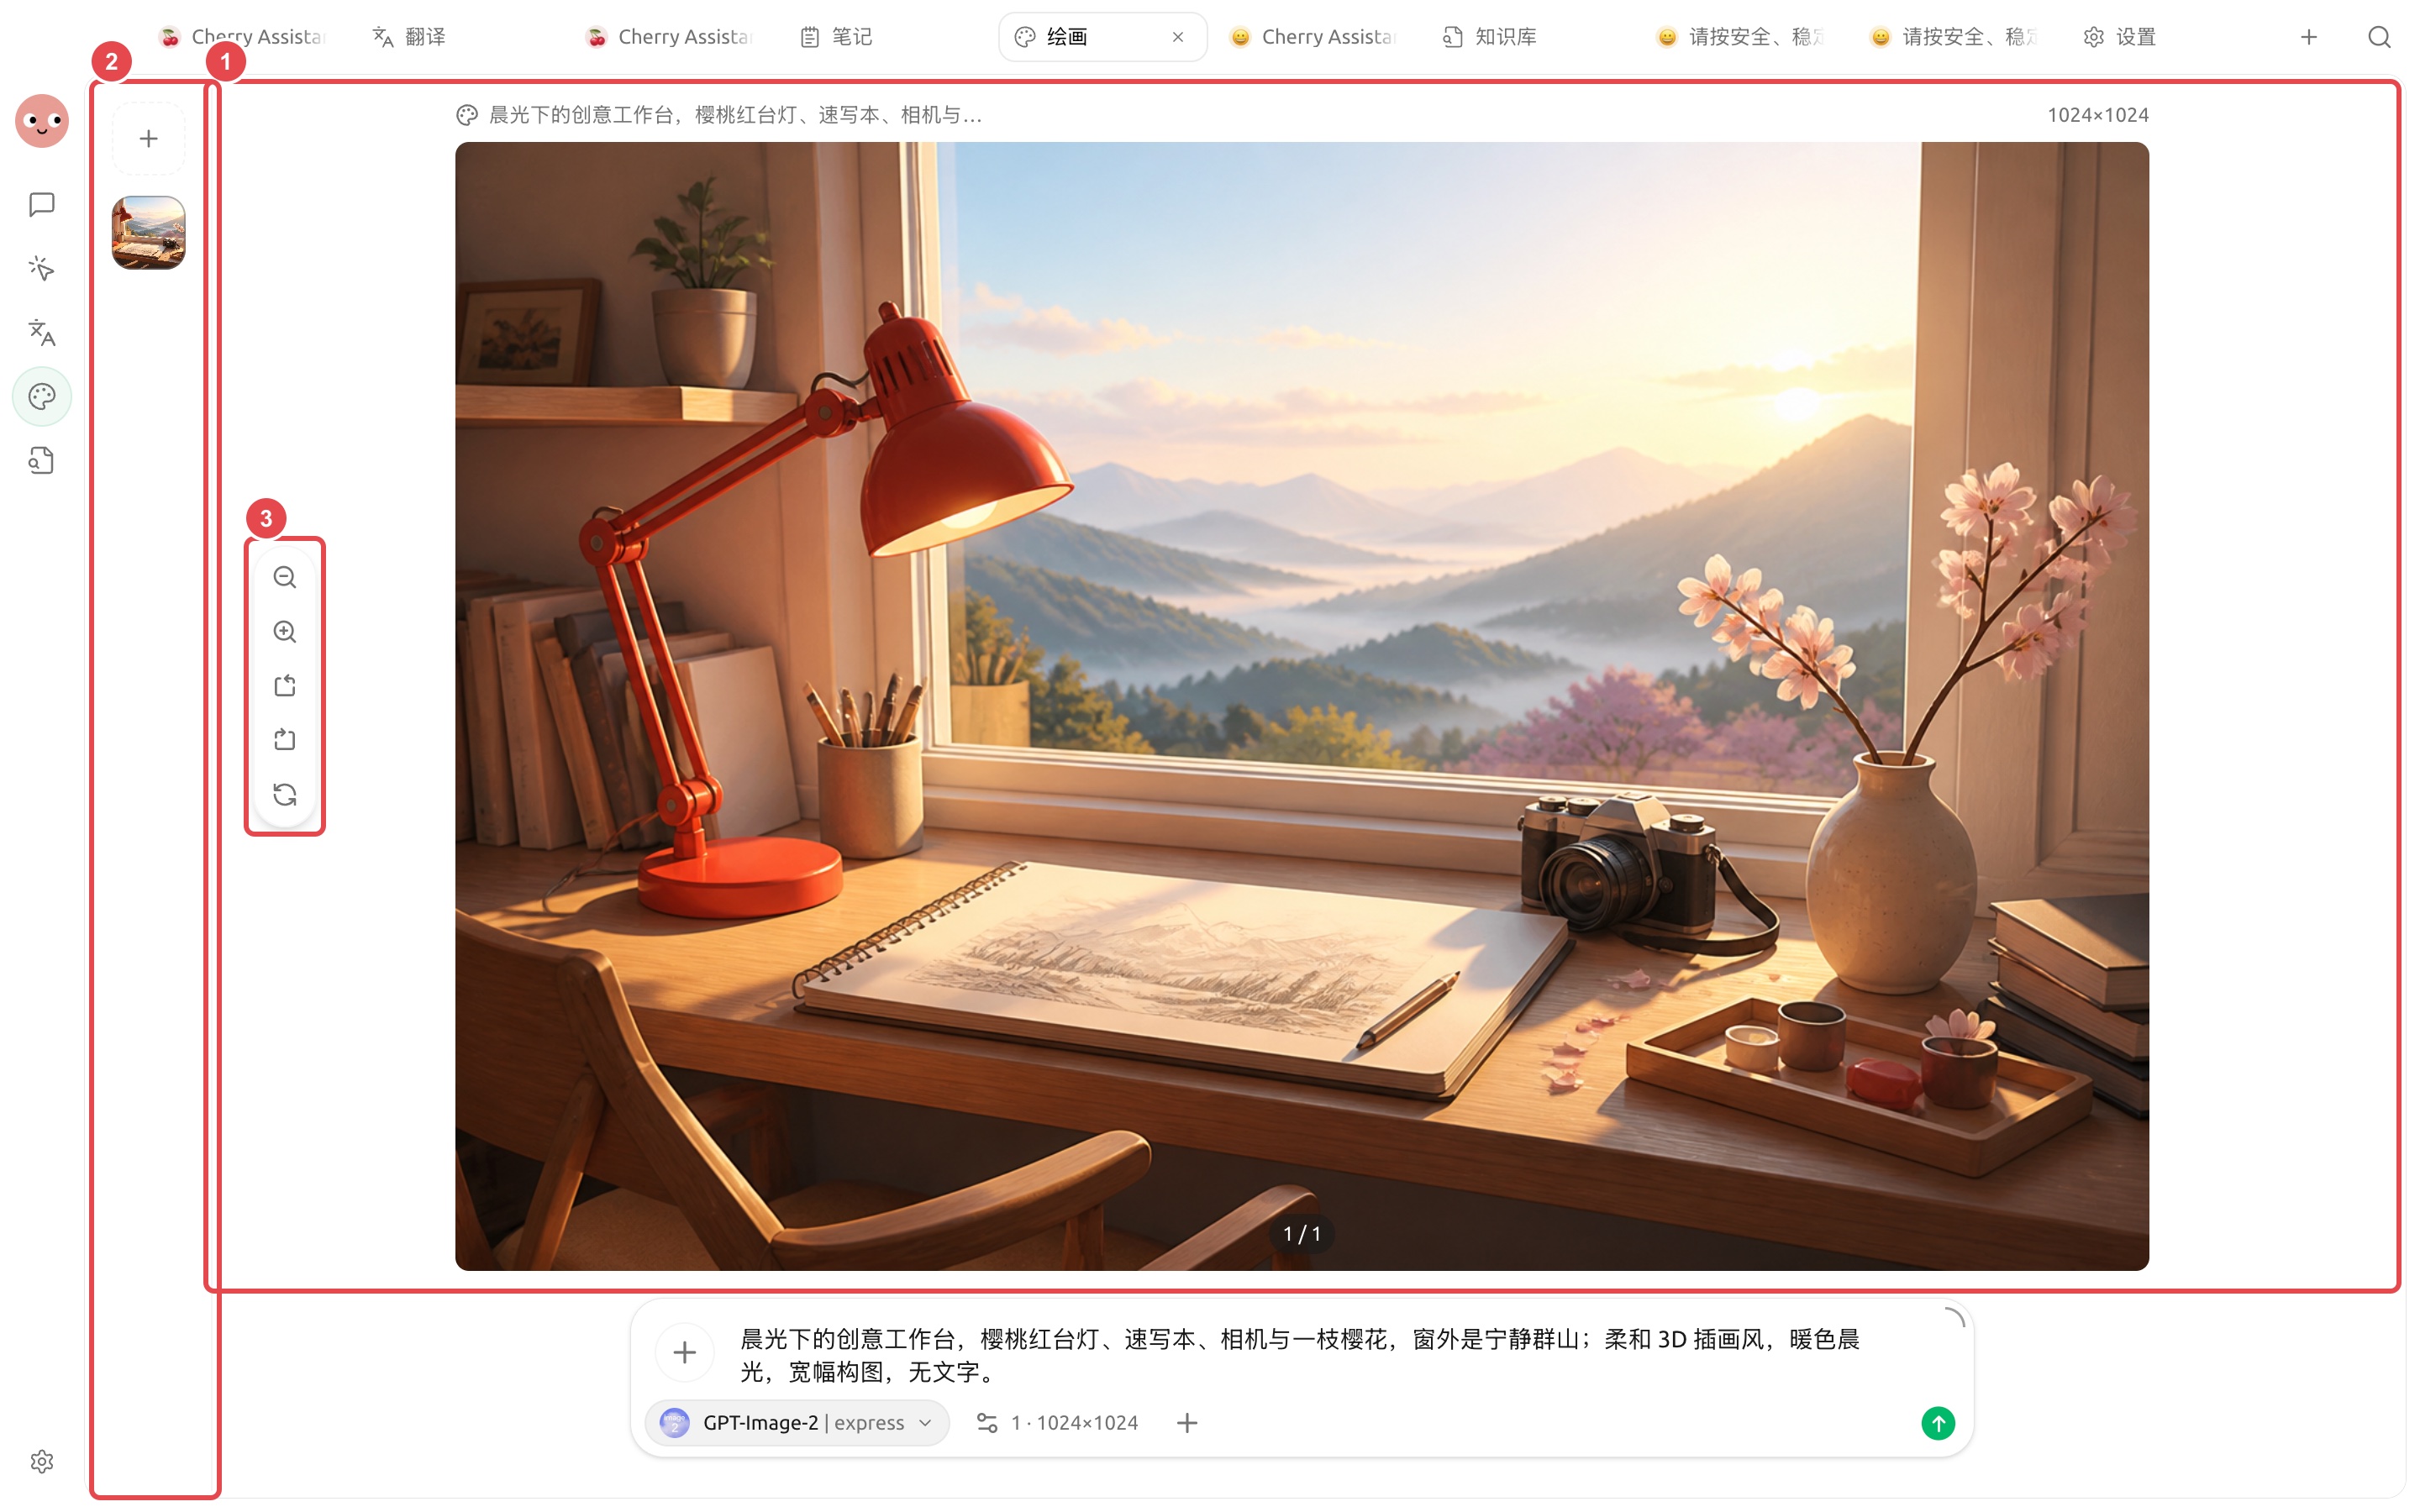
<figure><img src="https://3562065924-files.gitbook.io/~/files/v0/b/gitbook-x-prod.appspot.com/o/spaces%2F0Ut5BptC3t8CtSU1UWpM%2Fuploads%2Fgit-blob-418a088986e17a73a4808871fc4c1f5c1684fa05%2Fcherry-v2-guide-painting-result.jpg?alt=media" alt="绘画页面使用 GPT-Image-2 express 根据创意工作台提示词生成的实际图片"><figcaption><p>First use this actual generated image as the main visual draft, confirm the subject, lighting, and color tone, then expand it into square and portrait sizes.</p></figcaption></figure>

## Prepare materials

* Content topic and platform used;
* Allowed brand colors and reference images;
* Text, logos, and elements that must not appear;
* Three image ratios and whitespace requirements.

## Workflow

{% stepper %}
{% step %}

### 1. Let the Agent extract the visual direction

Put the article or event description into the working directory, and let the Agent output only suggestions for the subject, scene, color tone, shot, and whitespace first; do not generate an image yet.
{% endstep %}

{% step %}

### 2. Validate the main visual in \[Painting]

Choose the appropriate template and model, and first generate a landscape draft. Check the product appearance, character details, and brand risks.
{% endstep %}

{% step %}

### 3. Expand sizes using a reference image

After selecting the main visual, use it as a reference to generate the square and portrait versions separately. Each prompt should specify the subject that must be kept and the composition that can be adjusted.
{% endstep %}

{% step %}

### 4. Make local corrections and enhance

Use editing or masking only on the problematic areas, and then enhance the final version. Include the use case and ratio in the file name to avoid confusion.
{% endstep %}
{% endstepper %}

## Result check

* The three images have consistent color tones and subjects;
* No incorrect text generated by the model;
* No brand logos, people, or sensitive information appear unexpectedly;
* The size meets the publishing platform requirements;
* The use of the reference image is authorized.

## Recommended combination and completion criteria

| Item                | Recommended approach                                                                                                       |
| ------------------- | -------------------------------------------------------------------------------------------------------------------------- |
| Painting model      | First use the Agent to generate a sample image to verify the connection, then save the painting template                   |
| Input materials     | Put brand colors, fonts, dimensions, reference images, and prohibited elements in the same project directory               |
| Batch mode          | Confirm one image first, then generate images in the same series                                                           |
| Completion criteria | Correct size, readable text, consistent brand elements, no extra marks, and the original reference image is still retained |

Suitable for article covers, social media illustrations, and event materials; for final posters that require precise layout, it is recommended to do the final proofreading in a design tool.

{% hint style="info" %}
If you want to generate images directly in the Agent chat, first configure the global \[Painting Model] and enable the Agent’s \[Generate Image] tool. When detailed editing is needed, it is still recommended to return to the \[Painting] page.
{% endhint %}


---

# Agent Instructions
This documentation is published with GitBook. GitBook is the documentation platform designed so that both humans and AI agents can read, navigate, and reason over technical content effectively. Learn more at gitbook.com.

## Querying This Documentation
If you need additional information that is not directly available in this page, you can query the documentation dynamically by asking a question.

Perform an HTTP GET request on the current page URL with the `ask` query parameter, and the optional `goal` query parameter:

```
GET https://docs.cherryai.com.cn/docs/en-us/advanced-basic/cases/brand-image-kit.md?ask=<question>&goal=<endgoal>
```

`ask` is the immediate question: it should be specific, self-contained, and written in natural language.
`goal` is optional and describes the broader end goal you are ultimately trying to accomplish on behalf of the user. GitBook uses it to tailor the answer towards what is most useful for that goal.

The response will contain a direct answer to the question and relevant excerpts and sources from the documentation.

Use this mechanism when the answer is not explicitly present in the current page, you need clarification or additional context, or you want to retrieve related documentation sections.